Le Diable Blanc - Appearance Database <


X-23, Vol. 3 #2 - Wolverine Goes To Hell - The Killing Dream, Part 2
Importance Rating: 3.0 out of 10
poster
Penciler(s): Will Conrad
Writer(s): Marjorie Liu
Release Date: October 2010
Variant Covers: None.
Trade Prints: X-23: Marvel Must Have #1, X-23: Volume 1: Killing Dream and X-23 Hardcover #1
Fun Facts: None.
-
Comic Summary: X-23 has never been a normal teenager, but with a demonic Wolverine on the loose, her dreams of becoming that normal teen seem less possible than ever. When the images this imposter Wolverine has been filling her head with become real, who can she turn to? And where is the real Wolverine in all of this? Find out as the series you've been waiting for continues!

X-23, Vol. 3 #3 - Wolverine Goes To Hell - The Killing Dream, Part 3
Importance Rating: 6.0 out of 10
poster
Penciler(s): Will Conrad, Sana Takeda
Writer(s): Marjorie Liu
Release Date: November 2010
Variant Covers: None.
Trade Prints: X-23: Marvel Must Have #1, X-23: Volume 1: Killing Dream and X-23 Hardcover #1
Fun Facts: None.
-
Comic Summary: Laura fights her way through the hellish landscape of her nightmares until a glowing being appears to her and rmakes her see her past. It reminds Laura that she isn’t soulless; she wasn’t born hollow but was made that way and foguht the scientists every step of the way. The glowing figure finally identifies itself as Laura’s higher self and tells her she is in her own mind not in true hell and merges with her. Laura confonts Hellverine and manages to beat him. She wakes up on Utopia now having a starshaped scar on her hand. Hellion is all right again. Later, Cyclops, Emma and Storm discuss what to do with X-23 until Gambit correctly points out that Laura is going to leave Utopia. Storm asks her to stay but Laura has to find hersef first. On the streets of San Francisco, she is unaware that she has caught the interest of Miss Sinister.
(Brief description courtesy of uncannyxmen.net)

X-23, Vol. 3 #4 - Songs of the Orphan Child, Part 1
Importance Rating: 6.5 out of 10
poster
Penciler(s): Will Conrad, Marco Checchetto
Writer(s): Marjorie M. Liu
Release Date: January 2011
Variant Covers: A. Marko Djurdjevic Variant Cover.
Trade Prints: X-23: Volume 1: Killing Dream and X-23 Hardcover #1
Fun Facts: None.
-
Comic Summary: X-23 hitchhikes and ends up in a diner where she meets a girl named Alice who has been beaten. When Laura accuses her of trying to lure her to her pimp, Alice denies it and leaves. Later, Laura walks on and soon finds that the “pimp” has murdered Alice, so Laura kills him as well. When she buries Alice, she is joined by Gambit, who has come to help and support her. After a talk about what she wants, they decide to drive on his motor bike but they are found by the police and Alice, who is alive again but seems different. She lures Laura with telling her she knows things about her mother. X-23and Gambit follow her and the police, only to be led to Miss Sinister.
(Brief description courtesy of uncannyxmen.net)

X-23, Vol. 3 #5 - Songs of the Orphan Child, Part 2
Importance Rating: 7.0 out of 10
poster
Penciler(s): David Lopez, Will Conrad
Writer(s): Marjorie Liu
Release Date: February 2011
Variant Covers: None.
Trade Prints: X-23: Volume 1: Killing Dream and X-23 Hardcover #1
Fun Facts: None.
-
Comic Summary: X-23 and Gambit are brought to Miss Sinister, who explains she has taken over one of Mr. Sinister’s old labs and is taking care of the children he kept for experimental purposes. Nevertheless, Laura (and especially Gambit) are having a hard time believing Miss Sinister is as harmless as she claiMs. to be. When she tries to manipulate Gambit by taking Laura’s shape, the real Laura attacks her, only to witness Miss Sinister transforming into the real Mr. Sinister.
(Brief description courtesy of uncannyxmen.net)

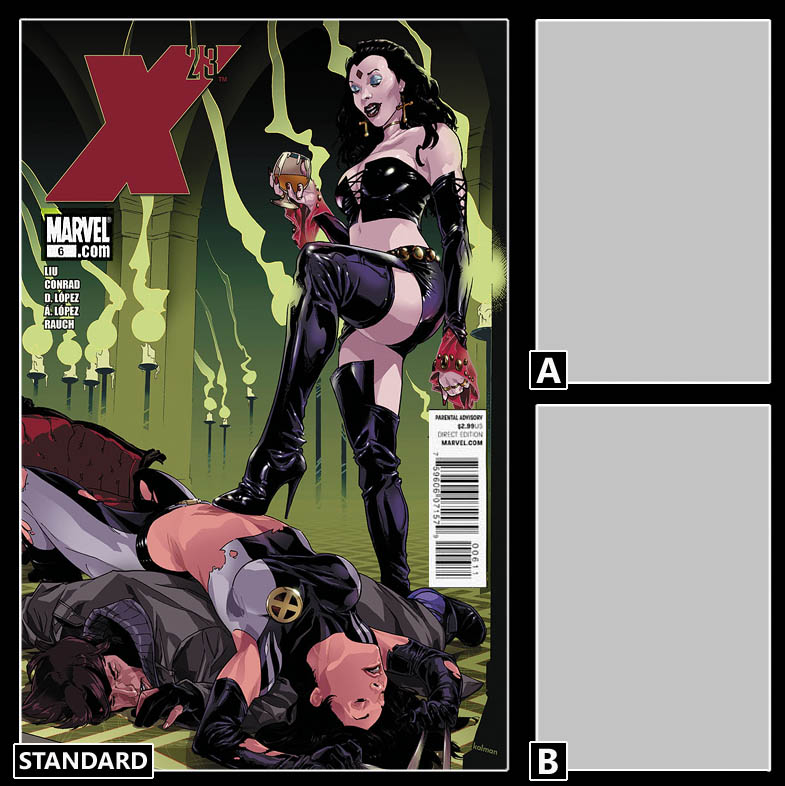
X-23, Vol. 3 #6 - Songs of the Orphan Child, Part 3
Importance Rating: 8.0 out of 10
poster
Penciler(s): David Lopez, Will Conrad
Writer(s): Marjorie Liu
Release Date: February 2011
Variant Covers: None.
Trade Prints: X-23: Volume 1: Killing Dream and X-23 Hardcover #1
Fun Facts: None.
-
Comic Summary: Laura and Gambit are surprised as Miss Sinister has transformed into the real Mr. Sinister. Immediately, Gambit attacks him and is quickly beaten, as is X-23. Miss Sinister then transforms to her true self once again, after which she has Gambit locked away and Laura tied to a certain chair. When Laura regains consciousness Miss Sinister explains that, ever since she used that chair, the real Mr. Sinister has managed to take more and more control over her, therefore she wants to transfer her consciousness into Laura’s body. The process begins but, much to her surprise, she only manages to transfer Mr. Sinister’s consciousness into Laura. More surprisingly, Laura manages to cast him out, eliminating Sinister’s consciousness. Alice, in the meantime, has freed Gambit, who in turn activates the lab’s self-destruct. Now freed, Laura offers Miss Sinister a chance at redemption, which is promptly rejected. Feeling the necessary offer made, Laura guts Miss Sinister, who nonetheless manages to escape. With an injured and unconscious Alice in his arms, Gambit tricks Laura to escape, even though she wants to look for the last Alice clone, and the trio make it out of the facility before in implodes. Together they take Alice to a hospital, where Laura decides to look for Malcolm Colcord and stop his new Weapon Plus program. Meanwhile, unknown to them, the last Alice clone has survived the lab’s implosion and is now possessed by the real Mr. Sinister, who has Miss Sinister as his prisoner.
(Brief description courtesy of uncannyxmen.net)

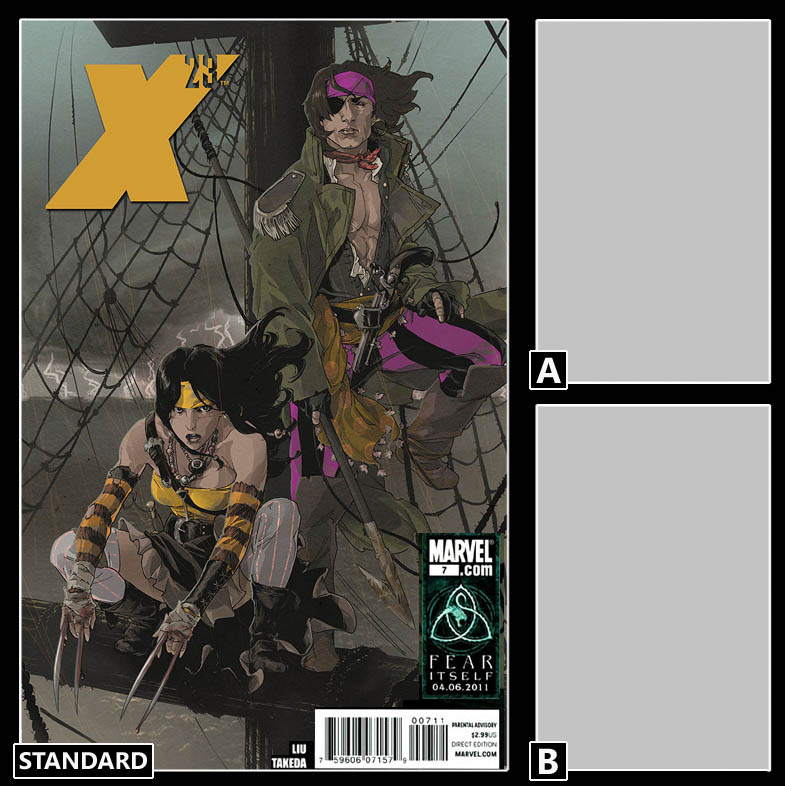
X-23, Vol. 3 #7 - Songs of the Orphan Child, Part 4
Importance Rating: 8.0 out of 10
poster
Penciler(s): Sana Takeda
Writer(s): Marjorie Liu
Release Date: March 2011
Variant Covers: None.
Trade Prints: Daken and X-23 Collision Hardcover
Fun Facts: None.
-
Comic Summary: In order to get into Madripoor in their quest to track down Malcolm Colcord, X-23 and Gambit need to do a favor for an old friend of Gambit’s in Singapore. Amar, who works for the police special division, is worried that an informant of his among the pirates has disappeared. Laura and Gambit sneak upon the pirates’ island and witness the man being tortured. When X-23 instinctively attacks, Gambit is forced to follow. She manages to take out the pirate leader but Gambit is tossed into the shark infested waters. X-23 follows, killing the sharks that threaten them and saving Gambit’s life. When they get out, the fight has left the pirates. Nevertheless, they are too late, as their informant has died of his injuries.
(Brief description courtesy of uncannyxmen.net)

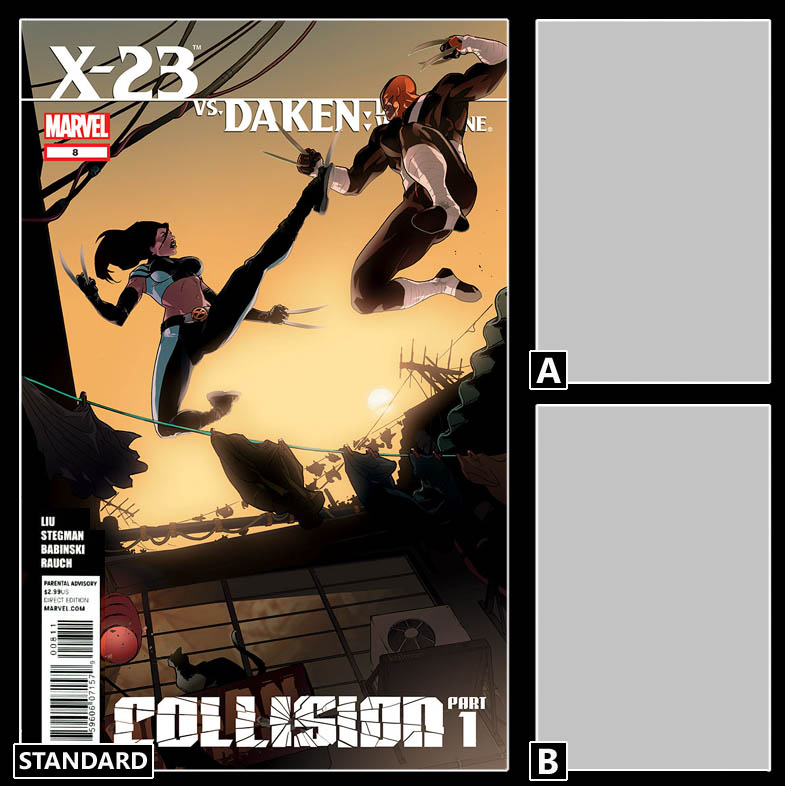
X-23, Vol. 3 #8 - Collision: Part 1
Importance Rating: 6.0 out of 10
poster
Penciler(s): Ryan Stegman
Writer(s): Marjorie Liu
Release Date: April 2011
Variant Covers: None.
Trade Prints: Daken and X-23 Collision Hardcover
Fun Facts: None.
-
Comic Summary: X-23 and Gambit are looking for Daken to help them find Malcolm Colcord. They spy Daken in the chaotic streets of Madripor but, before X-23 can reach him, she has to interfere with a kidnapping case. She kills the would-be kidnappers, but not before learning that they are abducting children for Colcord. They bring the boy to Gambit’s friend Tyger Tiger, who, thanks to Daken, has lost control over Madripoor. She tells them to come to her office the next day and prepares them. The next day they playact a scene for Daken’s benefit. Tyger seemingly blows them off, but X-23’s claim to be Wolverine’s clone has garnered her Daken’s attention. However, the conversation between them soon turns into a full blown battle.
(Brief description courtesy of uncannyxmen.net)

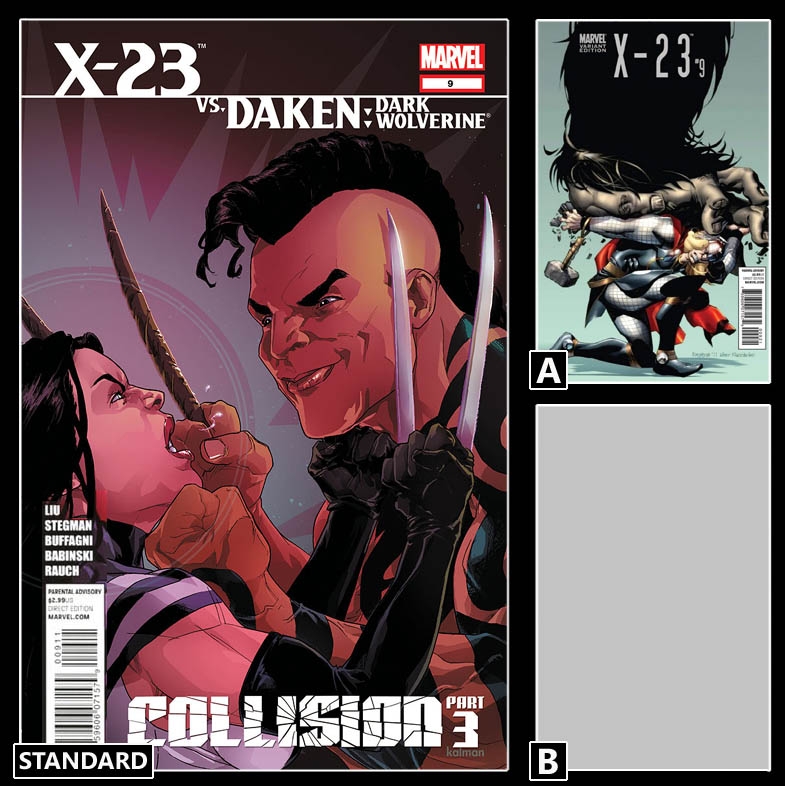
X-23, Vol. 3 #9 - Collision: Part 3
Importance Rating: 7.0 out of 10
poster
Penciler(s): Ryan Stegman, Matteo Buffagni
Writer(s): Marjorie Liu
Release Date: May 2011
Variant Covers: A. Thor Goes Hollywood Variant
Trade Prints: Daken and X-23 Collision Hardcover
Fun Facts: None.
-
Comic Summary: After Daken’s betrayal, X-23 is now a prisoner of Malcolm Colcord, being held in isolation until Colcord’s scientists plan to dissect her. Daken uses an opportunity to help X-23 free herself and she massacres quickly the scientists. Afterwards, they both search the project and find children who have been experimented upon and turned into monsters. Meanwhile, Gambit awakes with Tyger Tiger at his side. Elsewhere a mystery woman gets a dangerous substance from one of Colcord’s guards.
(Brief description courtesy of uncannyxmen.net)

X-23, Vol. 3 #10 - Touching Darkness, Part 1
Importance Rating: 7.0 out of 10
poster
Penciler(s): Sana Takeda
Writer(s): Marjorie M. Liu
Release Date: June 2011
Variant Covers: None.
Trade Prints: X-23: Chaos Theory and X-23: Chaos Theory Hardcover
Fun Facts: None.
-
Comic Summary: X-23 and Gambit are in Paris, where Laura’s behavior has gotten more self-destructive again to the point where she cuts herself once more. When Gambit discovers this, she runs away and later inadvertently hurts him. Afterwards, she plans to leave, but Gambit has called Wolverine to help and he arrives that moment with Jubilee, who was recently turned into a vampire. Wolverine tells Laura she has to fill her life with better memories. When she and Jubilee are out on a walk, Gambit calls him on the different ways he treats Laura and Jubilee. Outside, Jubilee drives away some men who are interested in them. When X-23 cuts her own throat, Jubilee succumbs to bloodlust and attacks her.
(Brief description courtesy of uncannyxmen.net)

X-23, Vol. 3 #11 - Touching Darkness, Part 2
Importance Rating: 6.0 out of 10
poster
Penciler(s): Sana Takeda
Writer(s): Marjorie M. Liu
Release Date: July 2011
Variant Covers: None.
Trade Prints: X-23: Chaos Theory and X-23: Chaos Theory Hardcover
Fun Facts: None.
-
Comic Summary: Out of control, Jubilee drinks X-23’s blood, which prompts her to experience a memory of Laura’s where she was forced to kill and didn’t. The memory snaps Jubilee out and she is angry at X for testing her. Nevertheless, the two find that their “killer” status is something they have in common and they bond. The next day, there is trouble as Gambit learns that a trigger scent was transported out of Madripoor and is being tested. The four heroes attack the lab where the altered trigger scent is being tried out. Separated from the others, Laura is subjected to the scent and then released into the Paris Metro. Jubilee tries to stop her and, in their fight, they both end up in front of an oncoming train.
(Brief description courtesy of uncannyxmen.net)

X-23, Vol. 3 #12 - Touching Darkness, Part 3
Importance Rating: 7.0 out of 10
poster
Penciler(s): Sana Takeda
Writer(s): Marjorie M. Liu
Release Date: August 2011
Variant Covers: None.
Trade Prints: X-23: Chaos Theory and X-23: Chaos Theory Hardcover
Fun Facts: None.
-
Comic Summary: Jubilee battles a crazed Laura and, together with Gambit and Wolverine, manages to talk her out of her killer rage. However, the altered trigger scent is released into the Metro, affecting all the bystanders. The heroes try to contain the resulting mob, trying not to hurt them. Laura follows some affected people to the street where she confronts the mystery woman who makes cryptic comments about Laura’s future and leaves her an envelope. With the crisis contained, Laura finds in the envelope the name of a boy whom she didn’t kill despite begin brainwashed to do so. Later, Laura and Jubilee talk and Jubilee promises to be there if Laura needs her.

X-23, Vol. 3 #13 - Chaos Theory, Part 1
Importance Rating: 5.0 out of 10
poster
Penciler(s): Sana Takeda
Writer(s): Marjorie M. Liu
Release Date: October 2011
Variant Covers: None.
Trade Prints: X-23: Chaos Theory and X-23: Chaos Theory Hardcover
Fun Facts: None.
-
Comic Summary: Laura dreams of a strange symbol. She and Gambit are in New York to look for Alex Cimini. Gambit stays with Cecilia Reyes as his wounds need stitching up while Laura makes her way to the university where Alex is in the physics department. As she sees him she decides not to speak to him and leaves. Something strange happens in the lab and Laura suddenly sees the symbol from her dream in the sky. An earthquake damages a city block and Laura sees a smiling man with the symbol on his forehead. Laura does her best to save people, assisted by Spider-Man. The rest of the Future Foundation join them, worried that it’s not over yet.
(Brief description courtesy of uncannyxmen.net)

X-23, Vol. 3 #14 - Chaos Theory, Part 2
Importance Rating: 5.0 out of 10
poster
Penciler(s): Sana Takeda
Writer(s): Marjorie M. Liu
Release Date: November 2011
Variant Covers: None.
Trade Prints: X-23: Chaos Theory and X-23: Chaos Theory Hardcover
Fun Facts: None.
-
Comic Summary: X-23 has accompanied Spider-Man to the Future Foundation, where Mr. Fantastic is trying to figure out the reason for the recent earthquake and if X-23 has any connection to it. Laura feels uncomfortable and Sue and Spidey try to put her at ease. Reed scans strange energy in her and Val figures out that Sue and Spidey also have inactive traces of the same energy. Even as Spider-Man figures out that the common link is the Uni-power, Valeria activates the old traces and Laura, Spider-Man and the Invisible Woman find themselves transported to another world. Elsewhere in New York, Gambit and Cecilia Reyes visit Alex Mancini to find Laura.
(Brief description courtesy of uncannyxmen.net)

X-23, Vol. 3 #16 - Chaos Theory, Part 4
Importance Rating: 5.0 out of 10
poster
Penciler(s): Phil Noto
Writer(s): Marjorie M. Liu
Release Date: January 2012
Variant Covers: None.
Trade Prints: X-23: Chaos Theory and X-23: Chaos Theory Hardcover
Fun Facts: None.
-
Comic Summary: X-23 tricks the demon king into taking her as a host. Not relinquishing control of her body, she returns home to the king’s dimension. Now removed from her body, the demon king means to take it out on her in pain but X-23 suddenly regains the Enigma Force and turns back to Captain Universe. With ease, she dispatches the king’s demons and effortlessly returns home alone. Later, she tells Alex Cincini nothing of her role in his past to spare him the pain, an act of kindness that makes Gambit proud.
(Brief description courtesy of uncannyxmen.net)

X-23, Vol. 3 #17 - Misadventures in Babysitting, Part 1
Importance Rating: 4.0 out of 10
poster
Penciler(s): Sana Takeda
Writer(s): Marjorie M. Liu
Release Date: January 2012
Variant Covers: None.
Trade Prints: X-23: Misadventures in Babysitting Hardcover
Fun Facts: None.
-
Comic Summary: X-23 has an awkward reunion with Hellion, who is depressed and angry over his lost hands. The meeting goes badly and Gambit threatens Hellion if he should hurt Laura. Sue Richards asks Laura to babysit Franklin and Valeria. While Laura is on the phone with Hellion, Val activates a time machine she invented and a dragon comes through. (Brief description courtesy of uncannyxmen.net)

X-23, Vol. 3 #19 - Misadventures in Babysitting, Part 3
Importance Rating: 4.0 out of 10
poster
Penciler(s): Sana Takeda
Writer(s): Marjorie M. Liu
Release Date: March 2012
Variant Covers: None.
Trade Prints: X-23: Misadventures in Babysitting Hardcover
Fun Facts: None.
-
Comic Summary: The Collector gives X-23 a spacesuit to gather Franklin and Valeria, who are floating outside the spaceship in protective bubbles. However, his help is a trick and, after some seconds, the suit disappears, leaving Laura stranded in the vacuum of space. Desperate, Laura claws at the ship, a lucky slice of which opens the ship and spaces both Hellion and the Collector. Outside the ship, Hellion’s power works again and he manages to telekinetically get everyone back inside the ship. Laura threatens the Collector until he returns them home. Together, the kids quickly clean up the mess they left before the Richards come home to find their kids asleep and Laura claiming nothing extraordinary happened. Later, she meets Hellion, who believes they have a real relationship now, though Laura has instead realized that nothing connects them anymore and dumps him. She later explains her reasons to Gambit, who lends her the keys to one of his city apartments. Inside the apartment, she is expected by Jubilee. (Brief description courtesy of uncannyxmen.net)

X-23, Vol. 3 #20 - Girls Night Out, Part 1
Importance Rating: 4.0 out of 10
poster
Penciler(s): Phil Noto
Writer(s): Marjorie M. Liu
Release Date: April 2012
Variant Covers: None.
Trade Prints: X-23: Misadventures in Babysitting Hardcover
Fun Facts: None.
-
Comic Summary: After a football game at the Jean Grey Institute, X-23 is reminded again that both groups of X-Men want to know where she stands after the schism that split the group. Laura has no wish to decide. Instead, she heads for a night on the town with Jubilee, unaware of being followed by the Black Widow. In a club, she notices a prostitute being manhandled by her pimp. She confronts the man and learns he is the successor of her old pimp, Zebra Daddy, whom she killed. Laura and Jubilee fight the pimp and his men and free the girl, then learn of the whereabouts of the other girls. They attack the brothel to free them. Outside they are already expected by SHIELD agents who help the young women. They were notified by the Black Widow, who has grown interested in Laura but criticizes her lack of strategy that night. She suggests Laura attend Avengers Academy where she can teach her to be the best hero she can be. Finally, Laura decides to take her up on the offer and leaves the Jean Grey School after telling Wolverine and Gambit goodbye. (Brief description courtesy of uncannyxmen.net)

X-Factor, Vol. 1 #60 - X-Tinction Agenda - Part 3: Brotherhood
Importance Rating: 2.0 out of 10
poster
Penciler(s): Jon Bogdanove
Writer(s): Louise Simonson
Release Date: November 1990
Variant Covers: A. 2nd Print Variant. Brown background instead of blue.
Trade Prints: X-Men: X-Tinction Agenda
Fun Facts: None.
-
Comic Summary: The Genegineer and Cameron Hodge don’t go along well, but Genosha’s President Madame Reneau reminds Moreau that they need their insane ally for a while longer. While the US government officially does not get inviolved, they inofficially support a rescue mission of X-Factor and the reamining members of New Mutants and X-Men. Once on the island they get attacked by a Magistrate strikeforce under Havok’s command, but despite the surprise of seeing their former member Havok with them, they can fight them off. Boom-Boom and Rictor escape the citadel, while Storm plans to take someone hostage.
(Brief description courtesy of uncannyxmen.net)

X-Factor, Vol. 1 #61 - X-Tinction Agenda - Part 6: Betrayal!
Importance Rating: 3.0 out of 10
poster
Penciler(s): Jon Bogdanove
Writer(s): Louise Simonson
Release Date: December 1990
Variant Covers: None.
Trade Prints: X-Men: X-Tinction Agenda
Fun Facts: None.
-
Comic Summary: Cameron Hodge examines his recent captives (Marvel Girl, Cable, Gambit, Sunspot and Forge) and is angry that the inventor Forge is in an unexplanable coma for he wanted to utilize his cybernetic knowledge. Jean is brought into a prison cell, where she meets the dying Wolverine and shares a moment of passion with him. Cyclops, Iceman and Beast infiltrate the citadel disguised as mutates while Banshee, Cannonball and Archangel cause a distraction at the citadel’s penthouse. Soon the flight team is defeated by Hodge and the others are exposed too. Hank and Bobby get trapped between sliding walls, while Cyclops is forced to fight Havok. Right as Alex remembers his past life as an X-Man Cameron Hodge arrives and captures Cyclops. Havok decides to pretend to be the still loyal Magistrate, and plans to attack when least expected.
(Brief description courtesy of uncannyxmen.net)

X-Factor, Vol. 1 #62 - X-Tinction Agenda - Part 9: Captial Punishment
Importance Rating: 2.0 out of 10
poster
Penciler(s): Jon Bogdanove
Writer(s): Louise Simonson
Release Date: January 1991
Variant Covers: None.
Trade Prints: X-Men: X-Tinction Agenda
Fun Facts: None.
-
Comic Summary: The members of the X-teams that are still in fighting shape split up in various teams to search Hodge in the citadel, while the injured members try to get out of the building. Beast has the idea to use some obient mutates to carry his unconscious friends out. Chief Magistrate Anderson arrests President Reneau for crimes against the state. Storm, Archangel, Wolverine and others are able to damage various weapon systems but are majorly injured in the fight. In the end only Cyclops and Havok remain and use their energy blasts simultanouslly. While the building is cleared, the fight goes on and after many energy blasts only Cameron Hodge’s head remains. All three combatants fall off the building, but Marvel Girl gives the Summers brothers a telekinetic lift, while Hodge’s head fall down and lands near Wolfsbane who angrily rips it apart. Rictor shakes down the citadel. Days later Tam Anderson announces that the military has overtaken the country until new elections can be held. Havok and Wolfsbane decide to stay on the island to stand up for mutant rights, while the X-teams travel back home to Westchester to hold a funeral for Warlock.
(Brief description courtesy of uncannyxmen.net)

X-Factor, Vol. 1 #69 - The Muir Island Saga - Part 3: Clash Reunion
Importance Rating: 3.0 out of 10
poster
Penciler(s): Whilce Portacio
Writer(s): Fabian Nicieza
Release Date: August 1991
Variant Covers: None.
Trade Prints: X-Men by Chris Claremont & Jim Lee Omnibus Volume 2
Fun Facts: This is part three of the “Muir Island Saga”, it follows Uncanny X-Men #279, and continues in Uncanny X-Men #280.
-
Comic Summary: In Washington, at the request of Dr. Valerie Cooper, X-Factor - Cyclops, Marvel Girl, Iceman, Beast, Archangel - have come to the White House, where a massive crowd has gathered, all spouting hateful things. Valerie explains that it is happening all over the world, before there is a gunshot. X-Factor race into action, separating the crowd, they find the shooter and the victim, before Valerie reunites them with their long-lost mentor - Professor X (and Colossus). Xavier reveals that he has come for their help and that the Shadow King is behind all the current chaos. On Muir Island, Forge reveals to the now-free Wolverine and Rogue how he freed them, and they discuss the current situation, before the possessed Banshee arrives, though he is quickly taken down and freed of his possession too. Banshee reveals that Polaris is being used as the Shadow King’s nexus between the astral plane and the physical plane, and that if they sever the nexus, they will stop the Shadow King - though they know they may have to kill Polaris in the process. Aboard a SHIELD submarine, X-Factor, Xavier, Valerie Cooper, FBI Agent Reisz and Colonel Vashkin make their way to Muir Island. They discuss their plan of attack, and Reisz expresses his doubt that the plan will work, and soon Valerie is revealed to be under the Shadow King’s control also. X-Factor leave the submarine and arrive at Muir Island, where they are soon confronted by the possessed Moira MacTaggert, Madrox, Siryn, Psylocke, Gambit and Jubilee. A battle ensues, before Legion appears and traps X-Factor, while the Shadow King reveals himself to Xavier, through Agent Reisz, who is about to destroy Xavier, when Valerie Cooper is revealed to actually be Mystique in disguise. Mystique then shoots Reisz. Legion loses control over X-Factor, who find Polaris. Wolverine, Forge and Rogue appear, and discuss how to free Polaris, before the Shadow King reveals that he has taken over Legion’s body, and uses Legion’s power to blow up Muir Island!
(Brief description courtesy of uncannyxmen.net)

X-Factor, Vol. 1 #70 - The Muir Island Saga - Epilogue: Leeegggiiioonn
Importance Rating: 3.0 out of 10
poster
Penciler(s): Kirk Jarvinen
Writer(s): Peter David
Release Date: September 1991
Variant Covers: None.
Trade Prints: X-Men by Chris Claremont & Jim Lee Omnibus Volume 2
Fun Facts: None.
-
Comic Summary: Xavier searches inside Legion’s mind, trying to put his son back together, while Cyclops, Jean Grey, Storm and Moira MacTaggert comment on recent events and monitor the Professor. A brief discussion with Wolverine hints that there is still a rivalry between Wolverine and Cyclops. Archangel scouts over what is left of Muir Island, while Beast, Colossus and Forge discuss the clean up process. Rogue is visited by Mystique, Valerie Cooper and Nick Fury, during which Valerie reveals how she came to be possessed by the Shadow King and almost killed Mystique, only to nearly kill herself, and how Mystique took over in her place to get to the Shadow King from within. Rogue and Mystique argue for a while, before appearing to settle their differences. Jubilee gets mad at Wolverine, while Polaris tests out her returned magnetic powers, and Guido admires her return to regular appearance, before Valerie reveals that she is looking at re-starting a Freedom Force type group, and wants Polaris as a part of it. After an encounter with his original X-Men in mind space, Xavier is revealed to be fine, aside from his broken legs. Eventually, Xavier lets his son go, before wondering what he is going to do with fourteen X-Men.
(Brief description courtesy of uncannyxmen.net)

X-Factor, Vol. 1 #84 - X-Cutioner's Song - Part 2: Tough Love
Importance Rating: 2.0 out of 10
poster
Penciler(s): Jae Lee
Writer(s): Peter David
Release Date: November 1992
Variant Covers: None.
Trade Prints: X-Men: X-Cutioner's Song and X-Factor Visionaries: Peter David Vol. 4
Fun Facts: Part 2 of the X-Cutioner's Song crossover, follows Uncanny X-Men #294 and continues in X-Men (2nd series) #14.
-
Comic Summary: X-Force are divided over the news that Cable has made an assassination attempt on Professor X. In a hospital, Dr Valerie Cooper, Havok and Wolfsbane follow Xavier as he is lead to an operating room on a gurney. The doctor isn’t interested in talking to them however, and they are sent to the waiting room, where Storm and Bishop have arrived. Upstairs, Polaris, Multiple Man and Quicksilver are with most of the X-Patriots, watching over the injured Taylor. Strong Guy and Pirouette arrive, and it is implied they have been intimate. Havok sends Wolfsbane and Strong Guy to Central Park to see if they can pick up any clues as to Cable’s whereabouts. Archangel is angry that Cable escaped, and boasts that he will be going after Apocalypse soon enough. Wolfsbane and Strong Guy have just arrived in Central Park when several members of X-Force arrive - Cannonball, Rictor, Boom-Boom, Shatterstar and Feral. Havok communicates with Strong Guy and tells him not to engage X-Force - but it’s too late, as Wolfsbane bounds over to her former teammates, reunited with Cannonball, Boom-Boom and Rictor - whom she kisses passionately, but bites him. Strong Guy appears and tells X-Force that they are wanted. Cannonball replies that they cannot surrender, but asks Wolfsbane to join them. Feral and Shatterstar engage Strong Guy in battle, before Wolfsbane and Feral attack each other. Quicksilver arrives to aid Strong Guy, before Havok, Polaris and Multiple Man appear, though Rictor causes their jet to crash. Quicksilver mocks Shatterstar as they battle. In the operating theatre, the doctor discovers something on Xavier. The X-Factor / X-Force battle continues, until Cannonball orders a retreat - they get away in the IPAC, but Havok manages to cause damage to it. Wolverine, Rogue, Psylocke, Beast and Gambit arrive to help bring in X-Force, while Havok wonders where his brother is. At that moment, Cyclops and Jean Grey are brought before Apocalypse, who sends his Horsemen away - only to be revealed that it is Sinister, posing as Apocalypse. Back at the hospital, the doctor shows Valerie, Storm, Bishop and Multiple Man the strange growth on Xavier’s chest. It is revealed to be a technovirus, and that there is no way to stop it!
(Brief description courtesy of uncannyxmen.net)

X-Factor, Vol. 1 #85 - X-Cutioner's Song - Part 6: Snikts and Bones
Importance Rating: 3.0 out of 10
poster
Penciler(s): Jae Lee
Writer(s): Peter David
Release Date: December 1992
Variant Covers: None.
Trade Prints: X-Men: X-Cutioner's Song and X-Factor Visionaries: Peter David Vol. 4
Fun Facts: Part 6 of the X-Cutioner's Song crossover, issue follows Uncanny X-Men #295 and continues in X-Men (2nd series) #15


-
Comic Summary: At Department K, Wolverine and Bishop battle Cable. Eventually Wolverine ends the battle against Cable, as he admits that he doesn’t believe Cable shot Xavier, and they agree to team up to get this mess sorted out. In Arkansas, Havok, Storm, Cannonball, Polaris, Iceman, Archangel, Rogue, Gambit, Boom-Boom, Psylocke and Quicksilver have tracked the Mutant Liberation Front to a small town - they are confronted by strange townsfolk, before locating a hatch to an underground base. Apocalypse arrives at Cable’s safe-house, and puts more pieces of the puzzle together. The battle against the Mutant Liberation Front begins, with Cannonball and Dragoness picking things up from when they last battled. Quicksilver struggles against Tempo, who is taken down by Psylocke. Cyclops finds himself battling children - apparently - while Stryfe is as cryptic as ever. Archangel struggles against Forearm - and accidentally decapitates Kamikaze, freaking out Boom-Boom. Gambit is taken down by Wildside, before Reaper slashes Quicksilver’s leg - and is about to cut his head off with his scythe. Meanwhile, at the hospital where Taylor has been recuperating, the X-Patriots render Multiple Man unconscious, and make their escape.
(Brief description courtesy of uncannyxmen.net)

X-Factor, Vol. 1 Annual #7 - The Historians of Tales to Come
Importance Rating: 3.0 out of 10
poster
Penciler(s): Joe Madureira, Joe Quesada, Darick Robertson
Writer(s): Peter David, Fabian Nicieza
Release Date: May 1992
Variant Covers: None.
Trade Prints: X-Factor Visionaries: Peter David Vol. 3
Fun Facts: None.
-
Comic Summary: Mojo learns of the rival network overtaking his ratings and decides to air a special in which Spiral hunts down and kills Arize. On Earth, Val Cooper learns of Spiral’s recent rampages and asks X-Factor to help take down her former employee. Their paths converge at Arize’s cabin in the outskirts of South Dakota. X-Factor manages to subdue Spiral before she can kill Arize, at which point they ask why she is so angry. Spiral reveals to them the chain of events that transformed her from the vibrant Ricochet Rita into the monster she is today. She notes Arize’s future role in that transformation, and informs them of Mojo’s twisted, engineered time-loop that has trapped her in an eternal circle of self-destruction. After Arize laments the pain his actions have caused, Spiral informs him the eventual leader of the Mojoverse will be someone named Shatterstar. Arize and Spiral, deciding to join forces to break Mojo’s endless cycle of oppression, time-dance their way back to the Wildways. 2nd story:
Val Cooper has to forgo a much-awaited Motown tribute concert in order to finish a mound of paperwork late one night. To her horror, after two hours of paper-pushing, the papers come to life and try to kill her. Fortunately for Val, however, this turns out to be a nightmare. 3rd story: A bullied school-kid named Cal hires Guido to be his bodyguard. Guido accepts and warns the bullies to leave Cal alone. Upon returning to Cal’s school a few weeks later, however, Guido finds that Cal has become the school bully, thanks to having the threat of Guido’s return! Guido quickly deposes Cal from power and warns him to never try that stunt again.

X-Factor, Vol. 3 #27 - Messiah Complex - Chapter Eleven
Importance Rating: 5.5 out of 10
poster
Penciler(s): Scot Eaton
Writer(s): Peter David
Release Date: March 2008
Variant Covers: None.
Trade Prints: X-Men: Messiah Complex
Fun Facts: This is chapter 11 of Messiah Complex. It is continued from Uncanny X-Men #494 and is continued in New X-Men #46.
-
Comic Summary: Eighty years in the future, the search of Layla and the Madrox dupe has led them to Lucas Bishop, an internee of a concentration camp and not yet even a teenager. During his reluctant conversation with them, Lucas explains his knowledge of the history that led to the camps, which included the birth of a so-called mutant messiah some eighty years before. Rather than being a savior, the messiah instead was responsible for the death of over a million humans, an action which eventually led to the existence of internment camps for mutants. Having received their needed intelligence, Layla then reluctantly kills the Madrox duplicate with a grenade she has purloined from a guard, an action which sends the dupe’s consciousness back to the past. In the past, Jamie Madrox awakens not only with the information of his future duplicate, but also with the “M” tattoo he had received in the camp. He immediately attempts to warn Cyclops and the X-Men of Bishop, but it is too late. Cyclops has already provided Bishop and his team with the intelligence that the Marauders have taken the mutant baby to Muir Island – and all communications have since been severed. Elsewhere, Cable awakens in his aircraft, completely at the mercy of Xavier, who is attending to his wounds. Once this is done, Xavier demands an explanation from Cable of his actions. Though not giving specifics, Cable explains that the baby is a pivotal mutant who will save everyone in the future – both mutant and human. After consideration, Xavier agrees to join with Cable and explains that he has not only already located the baby at Muir Island, but that they are already en route. On Muir Island, Gambit is greeted by Mister Sinister, who takes Gambit and the baby inside, while instructing the rest of the Marauders to prepare for the arrival of the X-Men. Once inside, however, Sinister shape-shifts to her true form of Mystique. Over the body of the true Sinister, Mystique tells Gambit that it’s time for the next step. Shortly thereafter, Wolverine team of X-Force arrives to a seemingly deserted facility. However, Wolverine correctly guesses that they are being deceived by Lady Mastermind, whom he takes out with his claws. With the rest of the Marauders revealed, X-Force attacks. Meanwhile, back at the Xavier Institute, three students gape in horror as they come upon Predator X, which has dug up and gorged itself on the corpses of their slain classmates.
(Brief description courtesy of uncannyxmen.net)

X-Force, Vol. 1 #16 - X-Cutioner's Song - Part 4: Jacklighting
Importance Rating: 3.0 out of 10
poster
Penciler(s): Greg Capullo
Writer(s): Fabian Nicieza
Release Date: November 1992
Variant Covers: None.
Trade Prints: X-Men: X-Cutioner's Song
Fun Facts: Issue originally comes poly-bagged with trading card.
-
Comic Summary: X-Force battles the X-Men Blue team (sans Beast) and X-Factor (sans Quicksilver). The X-Men’s hope is to find Cable through X-Force. At the same time the X-Men Gold team, together with Beast and Quicksilver, is trying to find Apocalypse. However, they only find his Horsemen, who are easily defeated. An automated holo-message starts. It’s from Sinister, who tells the X-Men that they are on the wrong trail. In the mansion Bishop tries to defend Xavier from Sinister, who instead of fighting gives them the name of the mastermind behind their current problems. In his secret hideout Cable readies himself for combat, as he thinks he knows who the assassin is. Meanwhile, the captive Jean and Scott are brought before Stryfe. Eventually, the X-Men and X-Factor defeat the X-Force team and wonder what to do next.
(Brief description courtesy of uncannyxmen.net)

X-Force, Vol. 1 #17 - X-Cutioner's Song - Part 8: Sleeping With The Enemy
Importance Rating: 2.0 out of 10
poster
Penciler(s): Greg Capullo
Writer(s): Fabian Nicieza
Release Date: December 1992
Variant Covers: None.
Trade Prints: X-Men: X-Cutioner's Song
Fun Facts: Issue originally comes poly-bagged with trading card.
-
Comic Summary: Cryptic as ever, Stryfe battles Apocalypse, blaming him for everything that has gone wrong in his life. Apocalypse is weak as his regeneration was not complete, though he does his best to defend himself against Stryfe - whom he seems to recognize once Stryfe removes his helmet. Stryfe then stabs Apocalypse through the chest with the same weapon that Apocalypse once used to kill him. Apocalypse falls on to a teleportation pad, and vanishes. The Dark Riders confront Stryfe, and bow before him as their new master. Inside Graymalkin, Cable, Wolverine and Bishop watch a reconstruction of events in Cable and Stryfe’s past/future, and learn that either Cable or Stryfe is a duplicate of the other, but Cable does not know why. At the Mansion, Stevie Hunter does her best to tend to the wounded Quicksilver, Gambit, Rogue, and Boom-Boom, whose jaw is now wired shut. Havok joins Storm and Valerie Cooper as they observe the Beast working to remove the virus from Xavier, while in the Danger Room, the imprisoned X-Force members talk to Wolfsbane, her former New Mutants teammates asking her whose side she is on. Siryn learns from Multiple Man that what they shared together was actually Siryn and a dupe. Inside Stryfe’s base, Cyclops and Jean Grey make a run for it from their cell, while back at the Mansion, Iceman, Archangel, Polaris and Colossus are alerted to an intruder - whom they soon discover is none other than Apocalypse. They attack him, until he reveals that he has come to help them battle Stryfe!
(Brief description courtesy of uncannyxmen.net)

X-Force, Vol. 1 #51 - Reflections in the Night
Importance Rating: 4.5 out of 10
poster
Penciler(s): Luciano Lima
Writer(s): Jeph Loeb
Release Date: February 1996
Variant Covers: None.
Trade Prints: None.
Fun Facts: None.
-
Comic Summary: Night time, Cable and Bishop investigate Sabretooth’s escape from the Danger Room, and Bishop makes allegations that Boomer was lying in her statement as to what really happened, but Cable backs his team member up, causing friction between the two, which Storm is forced to end. Shatterstar is being examined by the Beast, who tries to find some information on Shatterstar’s parents, except that Shatterstar has no memories of them. When questioned by Cable as to why he is doing this instead of checking for any residue left over by Shaw’s mental manipulations, the Beast reveals that Shatterstar’s DNA matches that of Longshot, which should be impossible. Gambit is startled when Siryn screams the wall of her quarters down. Gambit checks on her, and discovers that she did it in her sleep. Confused, Siryn remembers that she was having a dream where she was held against her will - and Deadpool was there. Sunspot and Caliban have a discussion about what makes a person who they are, while in her quarters, Boomer begins destroying all her belongings with plasma time-bombs. Cannonball tries to get her to let him in, but she refuses, and begins to cut her hair. Elsewhere, Warpath has been testing out his new powers en route to the meeting place where he was asked to meet via the National Council of Indian Affairs. He is soon attacked by a mysterious woman. When he confronts her, he discovers that she has powers, and is confused when she kisses him, telling him to remember “Risque”, before vanishing. The next morning, Cannonball, Cable and Warpath try to talk to Boomer together, and are startled when she exits her room, sporting short hair, a remodelled costume, and calling herself “Meltdown”.
(Brief description courtesy of uncannyxmen.net)

X-Force, Vol. 1 Annual #1 - Shattershot - Part 4: The Mirror Liars
Importance Rating: 2.5 out of 10
poster
Penciler(s): Gavin Curtis, Sandu Florea, Greg Capullo
Writer(s): Gavin Curtis, Dan Slott, Fabian Nicieza
Release Date: 1992
Variant Covers: None.
Trade Prints: None.
Fun Facts: None.
-
Comic Summary: 1st story: Several years in the future, Arize returns to the Xavier Institute in search of the X-Men’s help, only to find the militant, Cannonball-led X-Force instead. After a brief fight, Arize explains to X-Force – whose members also include Cyberlock, Darkchild, Powerpax, Siryn and Sunspot – that he needs their help in deposing the corrupt Shatterstar as ruler of the Wildways in order to instill peace and freedom. Together, they return to the Wildways at a point one hundred years in the future, and find it just as bad under Shatterstar’s Biped rule as it was under the rule of the Spineless Ones. Through a two-pronged assault, X-Force and Arize successfully convince Shatterstar to denounce the enslavement and usher in an era of freedom, liberty, and equality for all. Nearby, an aged Longshot stands by himself in the shadows and smiles. 2nd story: At the St. Simons Academy, Taki the Wiz Kid develops a crush on his teacher, Mrs. Huntington. He gets jealous when she goes on a date with a man named Conrad and spies on him. He learns that Conrad is actually a mutant-hating secret agent. With the help of his friends Artie and Leech, Wiz Kid exposes Conrad’s secret ring of mutant-haters to both the police and Mrs. Huntington. 3rd story: Cable tests the allegiances of the members of X-Force by presenting them with a list of the team’s ten most dangerous foes and evaluating their reactions.
(Brief description courtesy of uncannyxmen.net)

X-Force, Vol. 4 #5 - Untitled
Importance Rating: 2.0 out of 10
poster
Penciler(s): Jorge Molina
Writer(s): Simon Spurrier
Release Date: July 2014
Variant Covers: None.
Trade Prints: X-Force, Vol. 4 #1
Fun Facts: None.
-
Comic Summary: From the brain of dead Antonio Aggasiz, X-Force has learned that he stole technology from other dimensions for Volga, most importantly a process that can give people superhuman powers before eventually killing them. In addition, they learned Volga’s location, a floating yacht in the desert. X-Force attack from several directions. Marrow dimly recalls being there before but actually has no bad memories, though she wonders who her imaginary friend “baby” is. Aboard the yacht, they are expected by super-powered guards and Volga himself, who makes a cryptic comment about Marrow losing weight. Hearing this, she finally recalls she was pregnant and lost her baby. However when Volga tells her the whole truth, that she knew about the risk to her pregnancy and went ahead with the process anyway, Marrow turns catatonic. Her teammates are easily beaten, MeMe is trapped in the computer system and Volga is surprised about Cable still being alive, as he was infected with a version of the process in Alexandria that should have killed him after one day. Still, he doesn’t care and uses a preprogrammed sequence of notes to detonate Cable.

X-Force, Vol. 6 #9 - Untitled
Importance Rating: 1.5 out of 10
poster
Penciler(s): Joshua Cassara
Writer(s): Benjamin Percy
Release Date: March 2020
Variant Covers: None.
Trade Prints: X-Force Volume 2 (2020)
Fun Facts: None.
-
Comic Summary: In the heart of South America, X-Force finds a problem growing that threatens to destroy everything they've built... and one of their own might be responsible.

X-Force, Vol. 6 #28 - Cerebrax
Importance Rating: 2.0 out of 10
poster
Penciler(s): Robert Gill
Writer(s): Benjamin Percy
Release Date: May 2022
Variant Covers: A. Peach Momoko Stormbreakers Variant
B. Skan Variant
Trade Prints:
Fun Facts: None.
-
Comic Summary: IT'S QUENTIN QUIRE, #&%$! CEREBRAX stalks the island of Krakoa, and no one is safe! Its hunger for minds is insatiable...but what happens when it absorbs the minds - and powers - of the most powerful mutants?! X-FORCE will have to STEP. IT. UP. - and QUENTIN QUIRE leads the way!

X-Man #60 - Out Of The Loop
Importance Rating: 1.5 out of 10
poster
Penciler(s): Ben Herrera
Writer(s): Terry Kavanagh
Release Date: February 2000
Variant Covers: None.
Trade Prints: None.
Fun Facts: None.
-
Comic Summary: Nate finds himself in New York City, surrounded by Coldsnap-9 gas. All around him are dead bodies, some super heroes. He has no idea what’s happened. He flies around and sees a reflection of himself. He looks like Caliban. He runs into Spider-Man, only he’s been turned into a vampire. He eventually escapes Spidey’s group of vampires only to run into a battle between the X-Men and Gene Nation. It seems to Nate that everything bad that’s happened is actually something that he prevented from happening in earlier adventures. Nate tries to fight Gene Nation, but he can’t physically hit anyone. Nobody can even see him. During the fight most of the X-Men are killed. Nate realizes that he can still use his telekinesis and single handedly takes out the remaining Gene Nation members. Soon after, he wakes from his dream and finds himself inside an underground lair with Caliban in front of him. At the end he finds out that his captor is Apocalypse and what he wants with him.
(Brief description courtesy of uncannyxmen.net)

X-Men '92, Vol. 1 #1 - Secret Wars - Chapter One: Hope You Survive the Experience / Chapter Two: Here Comes Tomorrow
Importance Rating: 7.0 out of 10
poster
Penciler(s): Scott Koblish
Writer(s): Chad Bowers, Chris Sims
Release Date: August 2015
Variant Covers: A. Standard Variant
B. Skottie Young Variant
C. Antman Variant
D. Blank Variant
E. X-Gwen Variant
F. Previews Exclusive SDCC 2015 Variant
G. Books-a-Million Exclusive Variant
H. Newbury Comics Variant
I. Hastings Variant
Trade Prints: X-Men '92 Vol. 0: Warzones!
Fun Facts: This title was released as a digital infinity title shortly before print. Released as two different titles online, volumes 1 and 2.
-
Comic Summary: The Westchester Wars have been over for some time, and the X-Men – Cyclops, Wolverine, Jean Grey, Storm, Gambit, Rogue and Jubilee – have gone to the mall to use the laser tag facilities for a training exercise. Jubilee emerges as the winner of this game, but Wolverine gets into an argument with Cyclops, and leaves the others, just as several Sentinels arrive in the mall. One of the Sentinels goes after Wolverine who is in a clothing store. Jean tries to calm the crowds and asks them to leave in an orderly manner while the other X-Men battle the Sentinels. Wolverine soon joins them, and the Sentinels are taken out. Baron of Westchester, Robert Kelly, arrives on a carriage drawn by Warwolves. Baron Kelly apologies about the Sentinels and explains they were free-range, and not detectable as part of the Sentinel dismantling project. Wolverine argues with Baron Kelly, who warns Wolverine that he will be looking at a trip to Clear Mountain. The X-Men hadn't heard of Clear Mountain. Baron Kelly reminds the X-Men about the war between the X-Men and Magneto and his Brotherhood, and how Magneto's death left Westchester with an abundance of mutants who knew nothing but violence as a way of life, so the Bureau of Super-Powers set up Clear Mountain, a haven for wayward mutants with a desire for a new path in life. Back at the X-Mansion, the X-Men fill the Beast and Professor X in about Clear Mountain, and after much discussion, Professor X agrees that a visit is in order. Cyclops is tense because he is worried that with Clear Mountain, the X-Men might not be needed anymore, and then the X-Men won't need Cyclops. He informs the Professor that after this mission he is leaving the X-Men. The next morning, the X-Men set off for Clear Mountain and en route Cyclops asks Jean to go on vacation with him when the mission is over. Wolverine is not happy about this. Arriving at Clear Mountain, the X-Men are greeted by its Director, Cassandra Nova, some pioneer in mutant psychology. Cassandra takes the X-Men on a tour of the facility where they find over a dozen mutants who once waged war with each other now living together peacefully as part of their rehabilitation. Jean suffers from a sudden psychic black out, but the other X-Men's powers are okay. Wolverine suddenly smells Sabretooth and attacks his nemesis, until, bizarrely, Sabretooth seems reasonable, and talks to Wolverine, asking to be friends. Back at the X-Mansion, the Professor uses Cerebro to take a look at what is going at Clear Mountain, but on the Astral Plane, he encounters Cassandra Nova, who is not happy to see him, and warns him to watch his step as her mouth opens wide. Xavier's psychic armor materializes and they battle each other, with Xavier witnessing a flashback where a gang called the Shadow Kings entered the ruins of Apocalypse's temple and discovered some sort of clones of Charles himself, while the Shadow King emerged from one of the gang members, and seemingly merged with one of the clones, who woke, and killed the gang. The Shadow Queen, as Cassandra dubs herself, then invades the Professor's mind and at the X-Mansion, his motionless body collapses. As Cassandra continues on the tour with the X-Men, she explains the stages of Clear Mountain's treatment program, with phase four being the Mind Field. She offers to give the X-Men a taste of the Mind Field. Wolverine thinks that something is off around this place, and Cyclops agrees. The X-Men agree to undergo the Mine Field treatment, but Jubilee is not allowed due to her age. Cassandra's associates Miles and Rachel take Jubilee away. The X-Men are placed in pods and suddenly find themselves trapped, as Cassandra prepares to begin the Mine Field process on them!

X-Men '92, Vol. 1 #2 - Secret Wars - Chapter Three: Those Who Help Themselves / Chapter Four: Love is a Battlefield
Importance Rating: 8.0 out of 10
poster
Penciler(s): Scott Koblish
Writer(s): Chad Bowers, Chris Sims
Release Date: September 2015
Variant Covers: A. Standard Variant
B. David Nakayama Variant
Trade Prints: X-Men '92 Vol. 0: Warzones!
Fun Facts: This title was released as a digital infinity title shortly before print. Released as two different titles online, volumes 3 and 4.
-
Comic Summary: As prisoners of Cassandra Nova at the Clear Mountain facility, the X-Men are forced to undergo time in the Mind Fields observed psychically by Cassandra Nova. Wolverine is forced to contend with various enemies, which soon transform into himself at various stages of his life. Wolverine knows that something strange is going on, but Cassandra wins him over, and Wolverine embraces all of his various selves, becoming approved by the Bureau of Super-Powers. Cassandra next visits Storm, who also sees various versions of herself, before Cassandra tells her that she is going to lead the New X-Men. Storm is concerned for her friends, before Cassandra places her in a container where Storm sees various pieces of her life replayed. Storm then learns about the Shadow King being inside Cassandra Nova. Storm learns about the Shadow King's return via the gang called the Shadow Kings and is tormented by Cassandra's plans for the future. Storm uses her powers to break free of the container she was placed in and challenges Cassandra Nova. But Nova takes Storm out, and rejects her for the BSP. Rogue and Gambit share a Mind Field. Gambit wants to kiss Rogue, who relives her first kissing experience with Cody, which ended so badly. She recalls how the Brotherhood manipulated her into taking Ms Marvel's powers and how she went to the X-Men for help. Gambit remembers his wedding and how he abandoned his wife. Gambit and Rogue are about to kiss again when Cassandra appears and tells them that the X-Men are heroes, they must send a positive message. Several X-Babies are watching Gambit and Rogue, who attack Cassandra, until she turns them into puppets and shows them they life they could have together, full of traditional family values – if they want it bad enough. Rogue them promises that one day they will be engaged to be married, and Cassandra gives them BSP approval. Next up is the Beast, who only has a brief conversation with Cassandra before she rejects him for the BSP. Meanwhile, Jubilee is playing a video game as she was not allowed to undergo the Mine Field process. She sees a projection of a small pink-skinned body who seems to be trying to get her to follow him. Jubilee loses her guards and chases after him. The projection flies through a locked door and Jubilee breaks into the room, where she finds an assortment of odd mutants in the shadows, including one called Chamber. Jubilee is slightly nervous around some of them, such as Feral, before the Beast is thrown into the room. Jubilee is pleased to see him, and Chamber takes the two of them into another part of the area they are locked in, where the Rej-X, as they are known, as forced to strip Sentinels for parts. Finally, at the X-Mansion, X-Force arrives! Cable, Domino, Archangel, Bishop, Deadpool and Psylocke explore the grounds after receiving a psychic distress call from Xavier – but when they find Xavier they are horrified to discover he is dead!

X-Men '92, Vol. 1 #3 - Secret Wars - Chapter Five: Head Games / Chapter Six: Ten out of Ten
Importance Rating: 7.5 out of 10
poster
Penciler(s): Scott Koblish
Writer(s): Chad Bowers, Chris Sims
Release Date: October 2015
Variant Covers: A. Manga Variant
Trade Prints: X-Men '92 Vol. 0: Warzones!
Fun Facts: This title was released as a digital infinity title shortly before print. Released as two different titles online, volumes 5 and 6.
-
Comic Summary: At the X-Mansion, X-Force discover that Professor X is still alive, and that the X-Men went to Clear Mountain Institute, but haven't checked in since. X-Force teleport to Clear Mountain, except for Psylocke, who remains to look after Xavier's body and mind. To do so, she enters the Astral Plane. In the Mind Field, Cassandra Nova is trying to convince Jean Grey to unleash the Phoenix within her, so she can devour the excess energy. Jean resists Cassandra's advances, until the villainess is close enough for Cyclops to attack her. The Mind Field changes, as Cassandra appears as the Watcher and the Imperial Guard, and battles Cyclops after imprisoning Jean Grey. As Cassandra continues to try and get Jean to give up her power, the Mind Field changes again and again, as Cassandra appears to them as Sinister, Stryfe and Apocalypse. Jean eventually changes into the White Phoenix. Psylocke reaches the Mind Field and finds remnants of the X-Men, before locating Cyclops and Jean Grey. Psylocke seems to have some feelings for Cyclops, but nevertheless she frees Jean from Cassandra's grasp, and shoves a psi-knife into Cassandra. X-Force reach Clear Mountain Institute, and are confronted by Trevor Fitzroy who reminds them that the war is over. But Cable isn't convinced, and a battle begins. Cassandra, shoved from the Mind Field by Psylocke, turns her attention to the battle, as X-Force have engaged her guards. Jubilee, the Beast and the Rej-X have started to reconfigure the defensive systems of the Sentinels that Cassandra has stockpiled, when Deadpool locates them all. Psylocke and Xavier return to their bodies, and Charles informs Psylocke that they have to get to Baron Kelly, as he knows Cassandra is planning to assassinate him. At the X-Museum, dedicated to the X-Men after the Westchester Wars, Baron Kelly gives a speech, before being taken aside by his guard, who is soon revealed to by Psylocke in disguise. Xavier is with her, but when they warn Baron Kelly that he is in danger, who instructs his actual guards to take them into custody after he learned that Clear Mountain has been attacked by mutant terrorists. X-Force have taken out most of the guards, and Jubilee, Beast and the Rej-X have joined up with them. Cassandra confronts them all, and introduces her New X-Men – Logan, Remy and Anna Marie. She instructs X-Force and the others to run. Back in the Mind Field, Jean and Cyclops find Storm, who is able to use her control over lightning to reach out through the Mind Field and strike the stasis chambers that the three of them are being held captive in. The three New X-Men are acting very strangely thanks to Cassandra's brainwashing of them. She warns X-Force that in ten minutes Cable will be the man who killed Baron Kelly, and suggests to the Rej-X that they could become Thors if they handed Cable in to Doom. The mutants battle each other, until Storm, Jean and Cyclops arrive, and Storm gives a speech that unites the mutants. At the X-Museum, Xavier and Psylocke are handcuffed and led past people who have come to visit the museum, when the multi-headed, multi-limbed Sentinel arrives to terminate Baron Kelly!

X-Men '92, Vol. 1 #4 - Secret Wars - Chapter Seven: Kelly's Heroes / Chapter Eight: Evolution
Importance Rating: 7.5 out of 10
poster
Penciler(s): Scott Koblish
Writer(s): Chad Bowers, Chris Sims
Release Date: October 2015
Variant Covers: A. Standard Variant
Trade Prints: X-Men '92 Vol. 0: Warzones!
Fun Facts: This title was released as a digital infinity title shortly before print. Released as two different titles online, volumes 7 and 8.
-
Comic Summary: The New X-Men and Cassandra have arrived at the X-Museum along with the X-Sentinel which has set its sight on Baron Kelly. The New X-Men are assisting to save civilians, while Baron Kelly is confused as to why Psylocke is trying to help him. X-Force and several other mutants from Clear Mountain, all under Storm's command, are also on hand to engage the X-Sentinel. Wolverine panics when he is unable to reach a woman who is trapped upside down in her car. She asks him to use his claws, but he can't. However when she asks him to get Cyclops, this snaps Wolverine out of his brainwashing, and he rescues her. Rogue and Gambit discuss their wedding plans in the middle of the battle, while Storm and her forces struggle against the X-Sentinel. Cable and Psylocke get Baron Kelly safely to the Blackbird, where Jean and Cyclops are waiting for them – along with Cassandra. The Shadow King within Cassandra then cofnronts Jean, while the X-Sentinel takes out Gambit. Rogue realizes she can't help him as she can't touch him, but Caliban is nearby and he is able to help. When Gambit wakes, he realizes that maybe he and Rogue are not meant to be. Jean manages to weaken Cassandra / the Shadow King, enabling Xavier to confront his foe on the Astral Plane, but the Shadow King seems to throw Xavier out of it. The Shadow King thinks he has won, but Xavier returns, armed with the additional powers of Jean, Psylocke and Cable. As the other mutants continue to battle the X-Sentinel, Cyclops is annoyed that Baron Kelly had the override codes this whole time. He explains that they need to be shot with a laser into the Sentinel. During this discussion, Cassandra, free of the Shadow King's hold, disappears. Jubilee grabs a laser, and starts firing it at the Sentinel, while Xavier finally defeats the Shadow King by trapping him in a psi-gun and firing him away, though the Shadow King warns Xavier that he will haunt him. Jubilee struggles against the X-Sentinel, as its many hands block her laser attacks – until Gambit drives a kinetically-charged motorcycle into the X-Sentinel, blowing up its hands. Gambit then kisses a surprised Rogue, while Jubilee strikes the Sentinel with the laser, and the shut-down codes are received. Jubilee wakes in the X-Mansion, where she announces that she finally feels like a full-fledged X-Man. Jean Grey says farewell to Wolverine, as she and Cyclops are going on vacation. Rogue shows Jubilee that there are now students at the school, including Chamber, who appears to be interested in Jubilee. Psylocke and Bishop decide to remain with the X-Men, but Cable and the rest of X-Force, who now count Shatterstar and Feral amongst their number, depart. Cyclops says goodbye to Storm and congratulates her on opening the school. He tells her the X-Men have never been in better hands. Meanwhile, Cassandra is fine, and has taken an interest in a mutant called Joseph, while Baron Kelly meets with Apocalypse and his Horsemen – Mystique, Bastion and Exodus. Apocalypse boasts that a future is coming to Westchester where mutant and human alike while tremble at the sound of his name!

X-Men '92, Vol. 2 #1 - Let the Games Begin
Importance Rating: 5.5 out of 10
poster
Penciler(s): Alti Firmansyah
Writer(s): Chad Bowers, Chris Sims
Release Date: May 2016
Variant Covers: A. Afua Richardson Hip-Hop Variant
B. Incentive Variant Cover
C. John Tyler Action Figure Variant
D. Stan Lee Collectibles Variant
E. Stan Lee Collectibles B/W Variant
Trade Prints: X-Men '92 Vol. 1: The World is a Vampire
Fun Facts: None.
-
Comic Summary: Charles has reopened the Xavier School, and Hank is preparing to teach a class, when the window shatters inward. A mercenary named Maverick has come to the X-Men with dire threats, and the People's Protectorate is in hot pursuit. They demand the X-Men return Maverick, who they say has stolen information from Russia. Maverick agrees to return with them, and says he has news of a far worse threat, if they will give him 24 hours. Their controller, Airstrike, agrees. Maverick then tells the X-Men there's a threat aimed at them. It seems the Russians, back in World War II, tried to create an answer to Captain America, combining a Russian monster with their science. This went badly, the result placed in battle massacred troops from both sides. The Russians declared it a failure and locked it away. Fast forward fifty years, and the von Strucker children have purchased the creature's prison, and pointed it at the X-Men. Maverick must go, he's got to keep a step ahead of the Russians, but he warns the X-Men: this thing, called Alpha Red, isn't coming... it's already here, somewhere!

X-Men '92, Vol. 2 #2 - Young Blood
Importance Rating: 5.5 out of 10
poster
Penciler(s): Alti Firmansyah
Writer(s): Chad Bowers, Chris Sims
Release Date: June 2016
Variant Covers: A. Incentive Variant Cover
Trade Prints: X-Men '92 Vol. 1: The World is a Vampire
Fun Facts: None.
-
Comic Summary: The machinations of the Fenris Twins! - FEAR: The terror of Alpha Red! - RELISH: The X-Men of the '90s, back in action!

X-Men '92, Vol. 2 #3 - The World is a Vampire
Importance Rating: 5.5 out of 10
poster
Penciler(s): Alti Firmansyah
Writer(s): Chad Bowers, Chris Sims
Release Date: July 2016
Variant Covers: A. David Nakayama Variant
Trade Prints: X-Men '92 Vol. 1: The World is a Vampire
Fun Facts: Title Logic: "The World is a Vampire" is the beginning lyric to the Smashing Pumpkins hit song, 'Bullet with Butterfly Wings'.
-
Comic Summary: If you only buy one X-book this month... - ...DRACULA COMMANDS IT BE THIS ISSUE!

X-Men '92, Vol. 2 #4 - Pages From the Book of Sins
Importance Rating: 5.5 out of 10
poster
Penciler(s): Alti Firmansyah
Writer(s): Chad Bowers, Chris Sims
Release Date: August 2016
Variant Covers: None.
Trade Prints: X-Men '92 Vol. 1: The World is a Vampire
Fun Facts: Title Logic: 'Pages Form the Book of Sins" was the running title of the original Darkhold series in 1993-1994.
-
Comic Summary: The X-Men face the danger of THE DARKHOLD... - ...in a new 'virtual' realm called 'CYBERSPACE'! - Plus: they're still surrounded by VAMPIRES!

X-Men '92, Vol. 2 #6 - Lilpalooza
Importance Rating: 5.5 out of 10
poster
Penciler(s): Alti Firmansyah
Writer(s): Chad Bowers, Chris Sims
Release Date: September 2016
Variant Covers: A. Aaron Kuder Variant
Trade Prints: X-Men '92 Vol. 2: Lilapalooza
Fun Facts: None.
-
Comic Summary: The X-Men are working security at LILAPALOOZA - Westchester's biggest festival! - But just because they're security, doesn't mean they stop being TARGETS! - Guest-starring: THE FLAMING LIPS, TOADIES AND LILA CHENEY!

X-Men '92, Vol. 2 #7 - Homesick Alien Blues
Importance Rating: 5.5 out of 10
poster
Penciler(s): Alti Firmansyah
Writer(s): Chad Bowers, Chris Sims
Release Date: October 2016
Variant Covers: None.
Trade Prints: X-Men '92 Vol. 2: Lilapalooza
Fun Facts: None.
-
Comic Summary: Lilapalooza has gone off the rails as the X-Men have been teleported into space! Now, they face some old enemies made new as THE BROOD attack! Meanwhile, on Earth, The Toadies keep rocking as X-Factor comes knocking!

X-Men '92, Vol. 2 #8 - The Twelve
Importance Rating: 5.5 out of 10
poster
Penciler(s): Alti Firmansyah
Writer(s): Chad Bowers, Chris Sims
Release Date: November 2016
Variant Covers: None.
Trade Prints: X-Men '92 Vol. 2: Lilapalooza
Fun Facts: None.
-
Comic Summary: The X-Men are lost in space! Thankfully, Gladiator is here to help them out - NO, WAIT - HE'S HERE TO BRAWL!!

X-Men '92, Vol. 2 #9 - A Force to Be Reckoned With
Importance Rating: 5.5 out of 10
poster
Penciler(s): Alti Firmansyah
Writer(s): Chad Bowers, Chris Sims
Release Date: December 2016
Variant Covers: None.
Trade Prints: X-Men '92 Vol. 2: Lilapalooza
Fun Facts: None.
-
Comic Summary: Apocalypse is back - and he's got big plans! How will the X-Men survive their biggest enemy yet? And more so, how will they get back to Lilapalooza?!

X-Men '92, Vol. 2 #10 - Earth X
Importance Rating: 5.5 out of 10
poster
Penciler(s): Alti Firmansyah
Writer(s): Chad Bowers, Chris Sims
Release Date: January 2017
Variant Covers: None.
Trade Prints: X-Men '92 Vol. 2: Lilapalooza
Fun Facts: None.
-
Comic Summary: It's an X-traordinary final issue! How will our favorite X-Men survive their biggest threat yet - Apocalypse?! And will Scott Summers and Jean Grey make it back from the year 2099? This is one giant-size finale you don't want to miss out on!

X-Men '92: House of XCII #1 - None.
Importance Rating: 6.0 out of 10
poster
Penciler(s): Salva Espin
Writer(s): Steve Foxe
Release Date: April 2022
Variant Covers: A. Scott Williams Variant
B. David Nakayama Variant
C. David Nakayama Virgin Variant
D. David Talaski Variant
E. Second Print Variant
Trade Prints: X-Men '92: House of XCII
Fun Facts: None.
-
Comic Summary: Cyclops, Wolverine, Storm, Jean Grey, Gambit and Rogue are on the Master Mold Satellite orbiting Earth on a mission to end the Sentinel threat, while the Beast flies the X-Men's Blackbird around the satellite. Bolivar Trask is aboard the satellite and watches on in frustration as the X-Men destroy his Sentinels – until things take a turn for the worse when Gambit detonates a full deck of kinetically-charged playing cards against one Sentinel which causes a massive explosion, killing both he and Rogue. The Beast, distracted, flies into the Master Mold Satellite, but the Master Mold swats him, killing him, too. Cyclops is killed by another Sentinel while pushing Jean Grey to safety. Wolverine finds Bolivar Trask, wanting revenge for what happened to Jubilee. Jean telepathically contacts Wolverine, warning him to stop Trask before he transmits the data from the Master Mold to another location, but it's too late, as Trask presses a button. Magneto appears, hovering nearby in space and uses his powers to destroy the Master Mold Satellite, killing Wolverine, Storm and Jean Grey in the process. At the Krakoan Embassy in New York City, Psylocke is providing several ambassadors with a tour of the Embassy while asking them to recognize Krakoa as an independent nation. President Kelly has some hesitation about doing so, especially after what happened on Genosha and on Asteroid M. Psylocke explains that the X-Men are making sure that will never happen again, and Henry Gyrich notices the Friends of Humanity gathering outside the Embassy. Canada's Vindicator offers to handle them, but Psylocke calls X-Force leader Cable for assistance. One of the strange plants in the Embassy soon transforms into a gateway, and X-Force members Cannonball, Darkstar and Pyro arrive to deal with the Friends of Humanity. Vindicator announces that Canada will stand with Krakoa. President Kelly is about make a decision about the United States, before everyone is alerted to a blinding flash of light in the sky. Professor X asks Psylocke to return to Krakoa, while Trask receives a communication from the mysterious Orchis organization. Later on Krakoa, the X-Men and Magneto, who was killed the destruction of the Master Mold Satellite, are returned to life by the combined powers of a group of mutants called the Five, who hold the key to mutant resurrection. Professor X, Magneto and the X-Men look out over Krakoa and see mutants living in peace. Former enemies now stand together, and more mutants are welcomed to Krakoa through the portals. The X-Men think about friends they cannot bring back to life, in particular Jubilee who was killed before the X-Men learned how to back up mutant minds using Cerebro. As a celebration is underway on Krakoa, Professor X and Magneto visit a secret bunker, unaware that Wolverine is following them. Inside the bunker, Jubilee is alive and well. She remembers how she survived the Sentinel attack and reminds Xavier and Magneto that their one job is to make sure the Orchis Protocol does not come online because she has learned that in all of her lives, that is when the trouble begins. Outside the bunker, Wolverine thinks he can smell Jubilee, while on another satellite, Trask's consciousness now exists inside a Sentinel, and with Gyrich, Donald Pierce and Lady Deathstrike, Orchis have gathered and prepare to destroy the mutants once and for all.

X-Men '92: House of XCII #2 - None.
Importance Rating: 6.0 out of 10
poster
Penciler(s): Salva Espin
Writer(s): Steve Foxe
Release Date: May 2022
Variant Covers: A. Standard Release Variant
Trade Prints: X-Men '92: House of XCII
Fun Facts: None.
-
Comic Summary: While the past lives of Jubilee are recounted, in the present day on Krakoa, Rogue is preparing the Marauder ship with her team the Marauders – Iceman, Northstar, Rictor, Shatterstar and Grizzly. Gambit is concerned about Rogue being on a team of men, but Rogue tells him he doesn't have anything to worry about with this crew. Sinister and Beast work side by side in a laboratory, where Sinister begins his Chimera Project. Wolverine visits an arena where mutants are in combat, and finds Sabretooth, who makes a comment to him about mutants all being friends now. This annoys Wolverine, who storms off and finds Jean sitting on a large flower. Jean explains that she is somewhat overwhelmed with everything taking place on Krakoa, so much in train to get their new society functioning. X-Factor are reviewing the Resurrection Protocols, while Apocalypse and the Scarlet Witch prepare safeguards around the Krakoan portals, and Cable is training additional mutants to be part of X-Force. Jean has to leave, as a meeting of the Inner Circle has been called. Wolverine is concerned that something is wrong on Krakoa and vows to find out what. Jean arrives atb the meeting of the Inner Circle. When Cyclops asks her why, she avoids his question. Professor X leads the meeting by announcing that plans for an advanced Sentinel model were destroyed when Magneto imploded the Master Mold Satellite. But on another satellite, Orchis is also meeting – Henry Gyrich, Donald Pierce, Graydon Creed, Cameron Hodge, GW Bridge, Bolivar Trask and Lady Deathstrike. This satellite is stationed near their new enormous Tri-Sentinel, which is sent to Earth and lands on Krakoa. The Tri-Sentinel starts causing destruction on Krakoa so the X-Men and other mutants capable of fighting unite to battle the behemoth, with a powerful optic blast from Cyclops delivering the final blow that takes the Tri-Sentinel out. Magneto and Professor X search for a black box within the Sentinel, but are unable to locate one, and Magneto assumes that if there was a black box within the Sentinel it has been transferred back to Orchis. Indeed it has, and GW Bridge and Henry Gyrich look through the data contained within the black box – the names of mutants and their powers. Wolverine missed the battle, as he continues to look around the mysterious rockface where he saw Magneto and Professor X vanish into earlier, unaware that Sabretooth is watching him and Jubilee is on the other side of the rockface, not wanting to be discovered.

X-Men '92: House of XCII #3 - None.
Importance Rating: 3.0 out of 10
poster
Penciler(s): Salva Espin
Writer(s): Steve Foxe
Release Date: June 2022
Variant Covers: A. Standard Release Variant
Trade Prints: X-Men '92: House of XCII
Fun Facts: None.
-
Comic Summary: While the past lives of Jubilee are recounted, in the present day on Krakoa, Rogue is preparing the Marauder ship with her team the Marauders – Iceman, Northstar, Rictor, Shatterstar and Grizzly. Gambit is concerned about Rogue being on a team of men, but Rogue tells him he doesn't have anything to worry about with this crew. Sinister and Beast work side by side in a laboratory, where Sinister begins his Chimera Project. Wolverine visits an arena where mutants are in combat, and finds Sabretooth, who makes a comment to him about mutants all being friends now. This annoys Wolverine, who storms off and finds Jean sitting on a large flower. Jean explains that she is somewhat overwhelmed with everything taking place on Krakoa, so much in train to get their new society functioning. X-Factor are reviewing the Resurrection Protocols, while Apocalypse and the Scarlet Witch prepare safeguards around the Krakoan portals, and Cable is training additional mutants to be part of X-Force. Jean has to leave, as a meeting of the Inner Circle has been called. Wolverine is concerned that something is wrong on Krakoa and vows to find out what. Jean arrives atb the meeting of the Inner Circle. When Cyclops asks her why, she avoids his question. Professor X leads the meeting by announcing that plans for an advanced Sentinel model were destroyed when Magneto imploded the Master Mold Satellite. But on another satellite, Orchis is also meeting – Henry Gyrich, Donald Pierce, Graydon Creed, Cameron Hodge, GW Bridge, Bolivar Trask and Lady Deathstrike. This satellite is stationed near their new enormous Tri-Sentinel, which is sent to Earth and lands on Krakoa. The Tri-Sentinel starts causing destruction on Krakoa so the X-Men and other mutants capable of fighting unite to battle the behemoth, with a powerful optic blast from Cyclops delivering the final blow that takes the Tri-Sentinel out. Magneto and Professor X search for a black box within the Sentinel, but are unable to locate one, and Magneto assumes that if there was a black box within the Sentinel it has been transferred back to Orchis. Indeed it has, and GW Bridge and Henry Gyrich look through the data contained within the black box – the names of mutants and their powers. Wolverine missed the battle, as he continues to look around the mysterious rockface where he saw Magneto and Professor X vanish into earlier, unaware that Sabretooth is watching him and Jubilee is on the other side of the rockface, not wanting to be discovered.

X-Men '92: House of XCII #4 - None.
Importance Rating: 3.0 out of 10
poster
Penciler(s): Salva Espin
Writer(s): Steve Foxe
Release Date: July 2022
Variant Covers: A. Standard Release Variant
Trade Prints: X-Men '92: House of XCII
Fun Facts: None.
-
Comic Summary: While the past lives of Jubilee are recounted, in the present day on Krakoa, Rogue is preparing the Marauder ship with her team the Marauders – Iceman, Northstar, Rictor, Shatterstar and Grizzly. Gambit is concerned about Rogue being on a team of men, but Rogue tells him he doesn't have anything to worry about with this crew. Sinister and Beast work side by side in a laboratory, where Sinister begins his Chimera Project. Wolverine visits an arena where mutants are in combat, and finds Sabretooth, who makes a comment to him about mutants all being friends now. This annoys Wolverine, who storms off and finds Jean sitting on a large flower. Jean explains that she is somewhat overwhelmed with everything taking place on Krakoa, so much in train to get their new society functioning. X-Factor are reviewing the Resurrection Protocols, while Apocalypse and the Scarlet Witch prepare safeguards around the Krakoan portals, and Cable is training additional mutants to be part of X-Force. Jean has to leave, as a meeting of the Inner Circle has been called. Wolverine is concerned that something is wrong on Krakoa and vows to find out what. Jean arrives atb the meeting of the Inner Circle. When Cyclops asks her why, she avoids his question. Professor X leads the meeting by announcing that plans for an advanced Sentinel model were destroyed when Magneto imploded the Master Mold Satellite. But on another satellite, Orchis is also meeting – Henry Gyrich, Donald Pierce, Graydon Creed, Cameron Hodge, GW Bridge, Bolivar Trask and Lady Deathstrike. This satellite is stationed near their new enormous Tri-Sentinel, which is sent to Earth and lands on Krakoa. The Tri-Sentinel starts causing destruction on Krakoa so the X-Men and other mutants capable of fighting unite to battle the behemoth, with a powerful optic blast from Cyclops delivering the final blow that takes the Tri-Sentinel out. Magneto and Professor X search for a black box within the Sentinel, but are unable to locate one, and Magneto assumes that if there was a black box within the Sentinel it has been transferred back to Orchis. Indeed it has, and GW Bridge and Henry Gyrich look through the data contained within the black box – the names of mutants and their powers. Wolverine missed the battle, as he continues to look around the mysterious rockface where he saw Magneto and Professor X vanish into earlier, unaware that Sabretooth is watching him and Jubilee is on the other side of the rockface, not wanting to be discovered.

X-Men '92: House of XCII #5 - None.
Importance Rating: 3.0 out of 10
poster
Penciler(s): Salva Espin
Writer(s): Steve Foxe
Release Date: August 2022
Variant Covers: A. Standard Release Variant
Trade Prints: X-Men '92: House of XCII
Fun Facts: None.
-
Comic Summary: While the past lives of Jubilee are recounted, in the present day on Krakoa, Rogue is preparing the Marauder ship with her team the Marauders – Iceman, Northstar, Rictor, Shatterstar and Grizzly. Gambit is concerned about Rogue being on a team of men, but Rogue tells him he doesn't have anything to worry about with this crew. Sinister and Beast work side by side in a laboratory, where Sinister begins his Chimera Project. Wolverine visits an arena where mutants are in combat, and finds Sabretooth, who makes a comment to him about mutants all being friends now. This annoys Wolverine, who storms off and finds Jean sitting on a large flower. Jean explains that she is somewhat overwhelmed with everything taking place on Krakoa, so much in train to get their new society functioning. X-Factor are reviewing the Resurrection Protocols, while Apocalypse and the Scarlet Witch prepare safeguards around the Krakoan portals, and Cable is training additional mutants to be part of X-Force. Jean has to leave, as a meeting of the Inner Circle has been called. Wolverine is concerned that something is wrong on Krakoa and vows to find out what. Jean arrives atb the meeting of the Inner Circle. When Cyclops asks her why, she avoids his question. Professor X leads the meeting by announcing that plans for an advanced Sentinel model were destroyed when Magneto imploded the Master Mold Satellite. But on another satellite, Orchis is also meeting – Henry Gyrich, Donald Pierce, Graydon Creed, Cameron Hodge, GW Bridge, Bolivar Trask and Lady Deathstrike. This satellite is stationed near their new enormous Tri-Sentinel, which is sent to Earth and lands on Krakoa. The Tri-Sentinel starts causing destruction on Krakoa so the X-Men and other mutants capable of fighting unite to battle the behemoth, with a powerful optic blast from Cyclops delivering the final blow that takes the Tri-Sentinel out. Magneto and Professor X search for a black box within the Sentinel, but are unable to locate one, and Magneto assumes that if there was a black box within the Sentinel it has been transferred back to Orchis. Indeed it has, and GW Bridge and Henry Gyrich look through the data contained within the black box – the names of mutants and their powers. Wolverine missed the battle, as he continues to look around the mysterious rockface where he saw Magneto and Professor X vanish into earlier, unaware that Sabretooth is watching him and Jubilee is on the other side of the rockface, not wanting to be discovered.

X-Men Adventures #1 - Night of the Sentinals
Importance Rating: 4.5 out of 10
poster
Penciler(s): Andrew Wildman
Writer(s): Ralph Macchio
Release Date: November 1992
Variant Covers: None.
Trade Prints: X-Men Adventures Volume 1
Fun Facts: Based on the Fox cartoon, Season 1 Episode 1, 'Night of the Sentenals, Part 1'.
-
Comic Summary: The X-Men connect a mutant registration program, with ties to the government, to a group of mutant-capturing robots called Sentinels, after they rescue a teenage mutant girl named Jubilee from the mall.

X-Men Adventures #2 - A Death in the Family
Importance Rating: 7.0 out of 10
poster
Penciler(s): Andrew Wildman
Writer(s): Ralph Macchio
Release Date: December 1992
Variant Covers: None.
Trade Prints: X-Men Adventures Volume 1
Fun Facts: Based on the Fox cartoon, Season 1 Episode 2, 'Night of the Sentinals, Part 2'.
-
Comic Summary: Breaking into the Mutant Control Agency's headquarters to destroy the registration files on mutants, the X-Men lose one of their members against the Sentinels, but eventually gain another in young Jubilee.

X-Men Adventures #3 - Enter: Magneto
Importance Rating: 2.0 out of 10
poster
Penciler(s): Andrew Wildman
Writer(s): Ralph Macchio
Release Date: January 1993
Variant Covers: None.
Trade Prints: X-Men Adventures Volume 1
Fun Facts: Based on the Fox cartoon, Season 1 Episode 3, 'Enter Magneto'.

Though Gambit never appears in the actual cartoon episode he appears briefly in the comic adaptation in one panel.
-
Comic Summary: Magneto has come to rescue Beast, but Beast refuses to escape. He wants to prove his innocence at a public trial. Magneto and Beast debate the Mutant/Human conflict as the prison guards mount an attack against Magneto. Magneto destroys the small attackforce including their tanks and other armored vehicles. In the X-Mansion, Professor Xavier watches the video tape from the prison, and informs Jubilee of his past relationship with Magneto. He describes Magneto as an old friend that he met in an hospital, and how in the face of a brutal army, Magneto becomes convinced that peace between mutants and normal humans is not possible. Xavier was forced to stop Magneto then, and it appears that Xavier must stop Magneto again.

X-Men Adventures #5 - Captive Hearts
Importance Rating: 5.0 out of 10
poster
Penciler(s): Andrew Wildman
Writer(s): Ralph Macchio
Release Date: March 1993
Variant Covers: None.
Trade Prints: X-Men Adventures Volume 2
Fun Facts: Based on the Fox cartoon, Season 1 Episode 5, 'Captive Hearts'.
-
Comic Summary: Wolverine must overcome his feelings for Jean, and Storm must overcome her crippling claustrophobia, when the team journeys into the sewer to rescue Jean Grey & Cyclops from a race of hideously deformed mutants known as Morlocks, and their leader Callisto, who wants to make Scott her king.

X-Men Adventures #6 - Northern Exposure
Importance Rating: 3.0 out of 10
poster
Penciler(s): Andrew Wildman
Writer(s): Ralph Macchio
Release Date: April 1993
Variant Covers: None.
Trade Prints: X-Men Adventures Volume 2
Fun Facts: Based on the Fox cartoon, Season 1 Episode 6, 'Cold Vengeance'.
-
Comic Summary: Wolverine flees to Canada to seek solitude in the Canadian wilderness. He finds peace among a group of Baffin Island Eskimos, only to discover Sabretooth has been stalking him and has taken the people of the village captive, and plans to kill them all. Wolverine is able to defeat Sabretooth and rescue the villagers. Back at the X-Mansion, Gambit tells the X-Men he heard the people at Genosha welcome mutants and he wants the team to vacation there. Professor Xavier sends Storm, Gambit, and Jubilee to Genosha as tourists. While in Genosha, Storm, Gambit and Jubilee are attacked and captured by a Sentinel.

X-Men Adventures #7 - Yearning to Be Free
Importance Rating: 8.5 out of 10
poster
Penciler(s): Chris Batista
Writer(s): Ralph Macchio
Release Date: May 1993
Variant Covers: None.
Trade Prints: X-Men Adventures Volume 2
Fun Facts: Based on the Fox cartoon, Season 1 Episode 7, 'Slave Island'.
-
Comic Summary: Gambit, Storm, and Jubilee become slave labor on the island resort of Genosha, along with other mutants, forced to help build the new power source for a Sentinel factory. Gambit turns on the others to escape from Genosha, running into Cable in the process.

X-Men Adventures #8 - Cable Connection
Importance Rating: 8.5 out of 10
poster
Penciler(s): Chris Batisia
Writer(s): Ralph Macchio
Release Date: June 1993
Variant Covers: None.
Trade Prints: X-Men Adventures Volume 2
Fun Facts: Based on the Fox cartoon, Season 1 Episode 7, 'Slave Island'.
-
Comic Summary: Storm, and Jubilee are still inslaved at the labor camps on the island resort of Genosha, along with other mutants, forced to help build the new power source for a Sentinel factory. Gambit and Cable work together after a brief fight to rescue them and destory the Sentinals. Returning home they find the mansion has been attacked.

X-Men Adventures #9 - The Irresistible Force
Importance Rating: 4.0 out of 10
poster
Penciler(s): Andrew Wildman
Writer(s): Ralph Macchio
Release Date: July 1993
Variant Covers: None.
Trade Prints: X-Men Adventures Volume 3
Fun Facts: Based on the Fox cartoon, Season 1 Episode 8, 'The Unstoppable Juggernaut'.

Title Logic: The Irresistible force paradox, also the unstoppable force paradox, is a classic paradox formulated as "What happens when an irresistible force meets an immovable object?" This paradox is a form of the omnipotence paradox, but that paradox is most often discussed in the context of God's omnipotence.
-
Comic Summary: As the X-Men return home from their adventure at Genosha, they find the mansion destroyed and Professor Xavier gone. They are led to believe the wrecking crew is a Russian immigrant known as Colossus. But the real demolition man maybe someone far beyond their expectations, and a lot closer to home.

X-Men Adventures #10 - Sometimes a Great Notion
Importance Rating: 4.0 out of 10
poster
Penciler(s): Andrew Wildman
Writer(s): Ralph Macchio
Release Date: July 1993
Variant Covers: None.
Trade Prints: X-Men Adventures Volume 3
Fun Facts: Based on the Fox cartoon, Season 1 Episode 9, 'The Cure'.

Title Logic: 'Sometimes a Great Notion' is Ken Kesey's second novel, published in 1964. The story involves an Oregon family of loggers who cut and procure trees for a local mill in opposition of striking, unionized workers.
-
Comic Summary: The same scientist who created the ability suppression collars for Genosha claims to have developed a cure for mutation. Rogue goes to the doctor for help. Professor Xavier has shown up at Muir Island to investigate the same "cure". They quickly find out that the doctor and his cure are not what she was lead to believe.

X-Men Adventures #11 - Deadly Cure
Importance Rating: 3.5 out of 10
poster
Penciler(s): Andrew Wildman
Writer(s): Ralph Macchio
Release Date: August 1993
Variant Covers: None.
Trade Prints: X-Men Adventures Volume 3
Fun Facts: Based on the Fox cartoon, Season 1 Episode 9, 'The Cure'.
-
Comic Summary: The same scientist who created the ability suppression collars for Genosha claims to have developed a cure for mutation. Rogue goes to the doctor for help. Professor Xavier has shown up at Muir Island to investigate the same "cure". They quickly find out that the doctor and his cure are not what she was lead to believe.

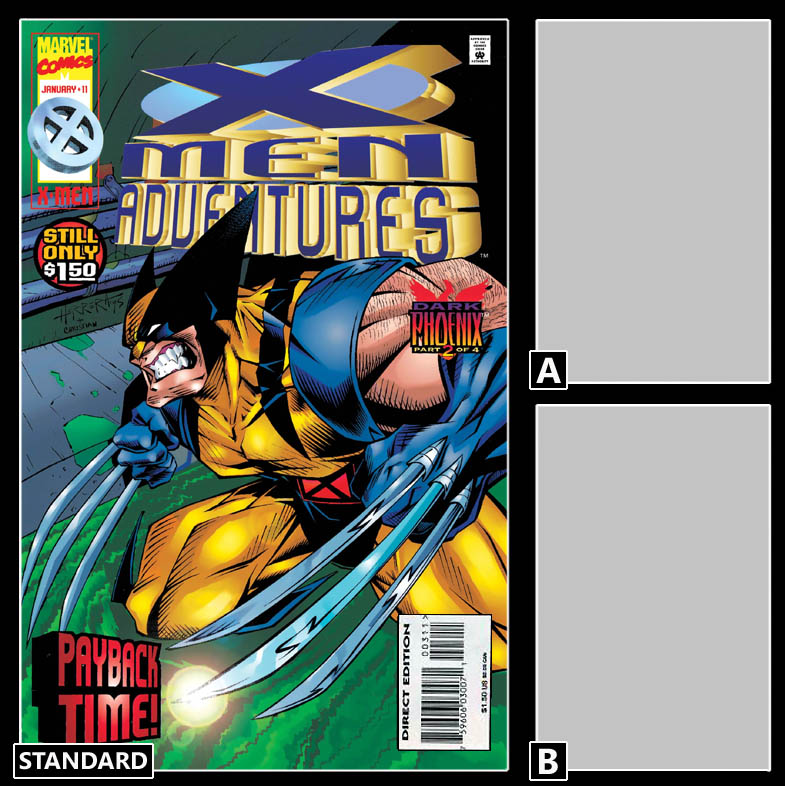
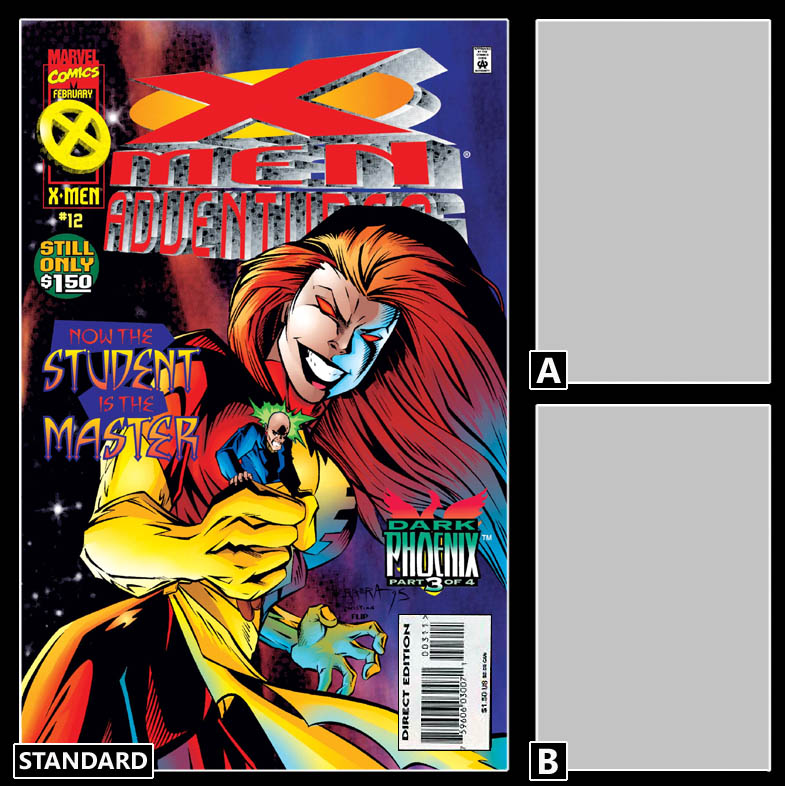
X-Men Adventures #12 - To End in Fire
Importance Rating: 4.0 out of 10
poster
Penciler(s): Andrew Wildman
Writer(s): Ralph Macchio
Release Date: September 1993
Variant Covers: None.
Trade Prints: X-Men Adventures Volume 3
Fun Facts: Based on the Fox cartoon, Season 1 Episode 10, 'Come the Apocalypse'.
-
Comic Summary: Still posing as Dr. Adler, Mystique is still promising a cure for mutation, but little do they know that she's really recruiting mutants to become the Four Horsemen of Apocalypse. And Apocalypse's plans for "survival of the fittest" comes to light.

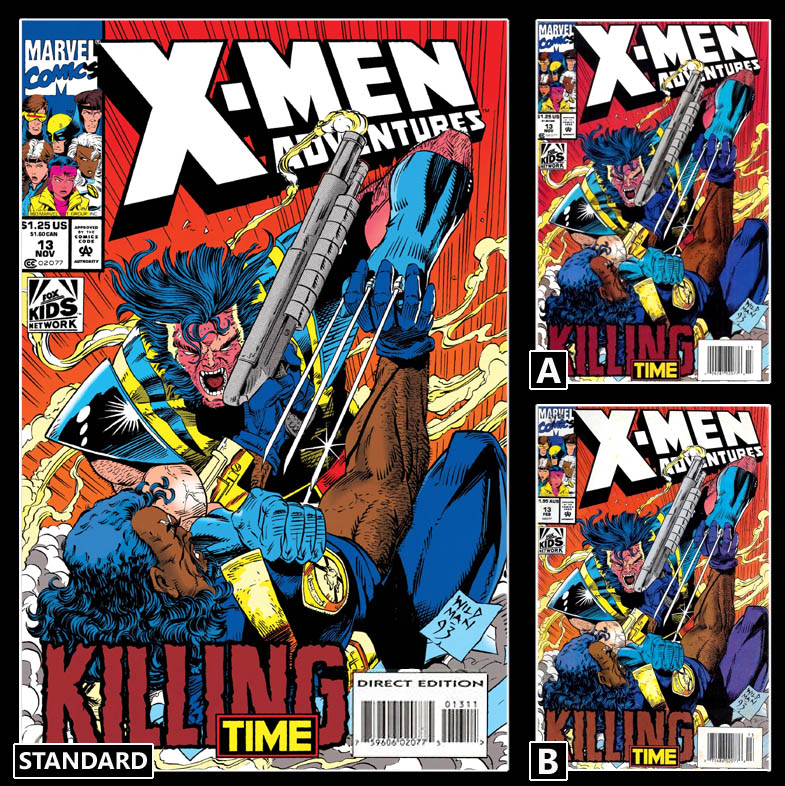
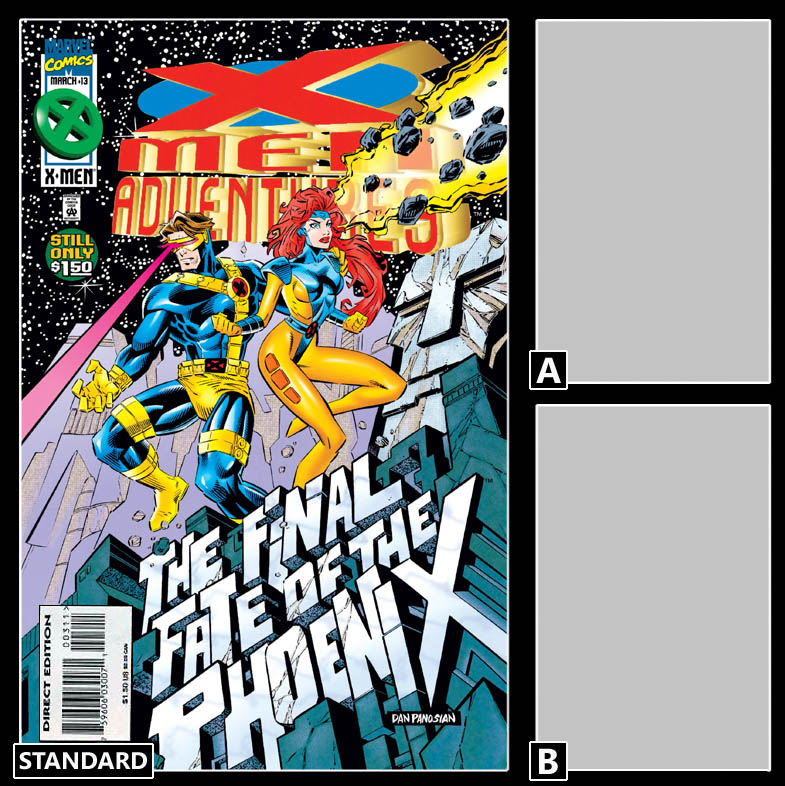
X-Men Adventures #13 - And All Our Yesterdays
Importance Rating: 3.0 out of 10
poster
Penciler(s): Andrew Wildman
Writer(s): Ralph Macchio
Release Date: October 1993
Variant Covers: None.
Trade Prints: X-Men Adventures Volume 4
Fun Facts: Based on the Fox cartoon, Season 1 Episode 11, 'Days of Future Past, Part 1'.
-
Comic Summary: A mutant security enforcement officer from a bleak future, named Bishop, comes back to present time to thwart an assassination in an attempt to change history for a better future. The time transportation made his mind a little fuzzy and with little to work on as to who did the assassination and not having full details of how it happens, Bishop may have more work than he can handle alone.

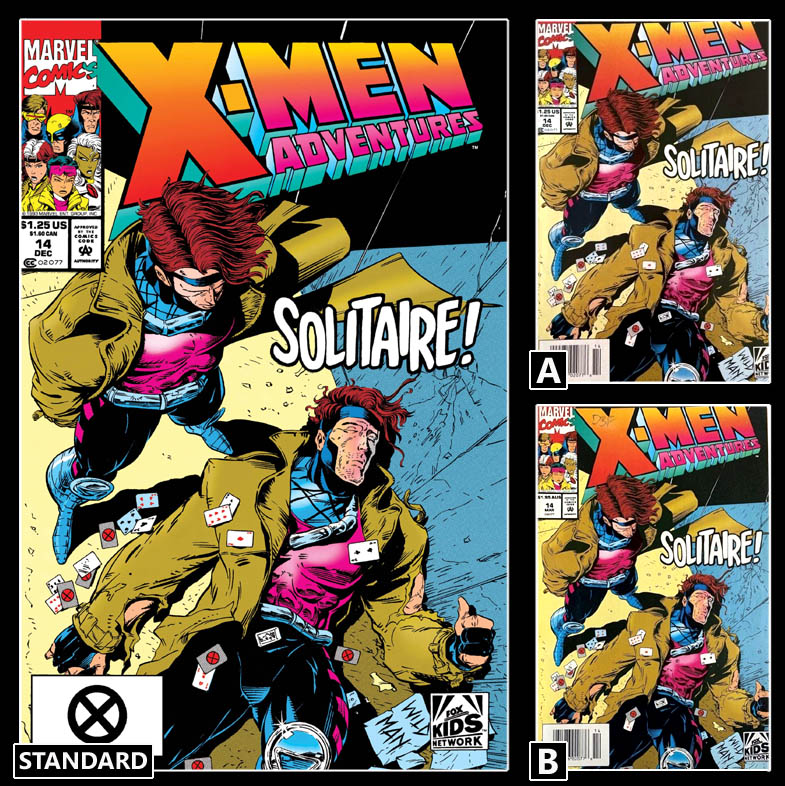
X-Men Adventures #14 - Even a Savior
Importance Rating: 9.0 out of 10
poster
Penciler(s): Nick Napalitano
Writer(s): Ralph Macchio
Release Date: November 1993
Variant Covers: None.
Trade Prints: X-Men Adventures Volume 4
Fun Facts: Based on the Fox cartoon, Season 1 Episode 12, 'Days of Future Past, Part 2'.
-
Comic Summary: Bishop believes that the assassin he's come back in time to stop is Gambit. The X-men go to Washington D.C. to try and stop the assassination themselves leaving Gambit and Bishop back at the mansion and Wolverine to keep an eye on them. Gambit takes off to Washington D.C. to prove he's not the assassin only to be confronted by... himself?

X-Men Adventures #15 - The Sleep of Reason
Importance Rating: 5.5 out of 10
poster
Penciler(s): Andrew Wildman
Writer(s): Ralph Macchio
Release Date: December 1993
Variant Covers: None.
Trade Prints: X-Men Adventures Volume 4
Fun Facts: Based on the Fox cartoon, Season 1 Episode 13, 'Final Decision'.

Comic has a biography for Gambit in the back of the comic.

Gambit also appears in a Hanes underwear ad at the beginning of the comic.

Title Logic: 'The Sleep of Reason Produces Monsters' (Spanish: El sueño de la razón produce monstruos) is an etching made by the Spanish painter and printmaker Francisco José de Goya y Lucientes. Etched between 1797–1799.
-
Comic Summary: Senator Kelly has been abducted by Magneto and given the facts about Magneto's goals of superiority of mutants over humans, the X-men's beliefs of peaceful co-existence between both races, and the Sentinel's plans of global domination. And must make a decision of his future plans in politics based on this information.

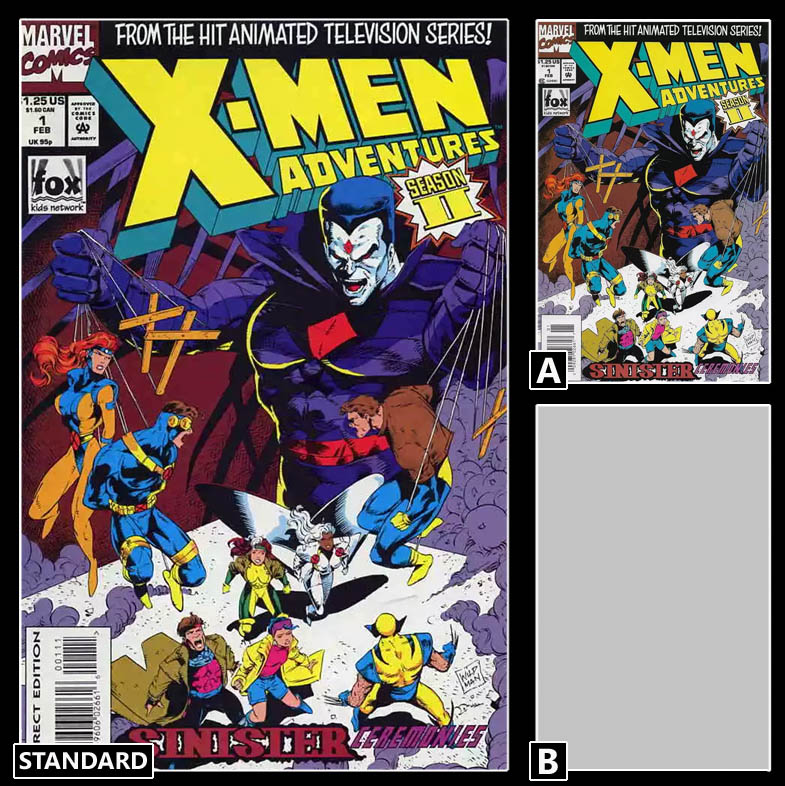
X-Men Adventures, Season II #1 - Sometimes They Come Back
Importance Rating: 6.0 out of 10
poster
Penciler(s): Andrew Wildman
Writer(s): Ralph Macchio
Release Date: February 1994
Variant Covers: None.
Trade Prints: None.
Fun Facts: Based on the Fox cartoon, Season 2 Episode 1, 'Til' Death Do Us Part, Part 1'.

Gambit appears in a Gameboy advertisement in the back of the comic.

Title Logic: "Sometimes They Come Back" is a short story by Stephen King, first published in the March 1974 issue of Cavalier and later collected in King's 1978 collection Night Shift.
-
Comic Summary: Jean and Scott get married. Newly elected President Kelly has freed Beast who has been incarcerated since the attack on government facility at the beginning of Season 1 and added him as part of his Presidential cabinet. Another friend who was thought to be dead at the same incident has resurfaced, but this time he's not so friendly. With the President's newly found pro-mutant point of view, the public feels betrayed are reacting with violence.

X-Men Adventures, Season II #2 - Somethin' Sinister
Importance Rating: 3.0 out of 10
poster
Penciler(s): Andrew Wildman
Writer(s): Ralph Macchio
Release Date: March 1994
Variant Covers: None.
Trade Prints: None.
Fun Facts: Based on the Fox cartoon, Season 2 Episode 1, 'Til' Death Do Us Part, Part 2'.
-
Comic Summary: Scott and Jean are on their way to a secluded island for their honeymoon, but gets cut short by Mister Sinister. As Morph continues with his plans of revenge against the X-Men, he starts losing his motivation. But Mister Sinister makes sure he finishes what he started. The Friends of Humanity have began to rally.

X-Men Adventures, Season II #3 - Cast A Giant Shadow
Importance Rating: 3.0 out of 10
poster
Penciler(s): John Hebert
Writer(s): Ralph Macchio
Release Date: April 1994
Variant Covers: None.
Trade Prints: None.
Fun Facts: Based on the Fox cartoon, Season 2 Episode 3, 'Whatever it Takes''.
-
Comic Summary: Jean Grey uses Cerebro to detect a tearing in the astral plane in a part of Africa. Rogue and Storm decide to investigate the astral plane disturbance. Shani tells Storm that MjNari caused the destruction. Storm agrees to let the Shadow King host her body instead of the boy. Wolverine confronts Morph, who says he has get through this by himself. Storm forces the Shadow King to leave her body. MjNari lures the Shadow King into the astral plane opening. Xavier and Magneto find they are in the Savage Land and discover they cannot use their powers. Two villain try to abduct Magneto, who falls into a river and Xavier tries to save him.

X-Men Adventures, Season II #4 - Red Dawn
Importance Rating: 3.0 out of 10
poster
Penciler(s): Andrew Wildman
Writer(s): Ralph Macchio
Release Date: May 1994
Variant Covers: None.
Trade Prints: None.
Fun Facts: Based on the Fox cartoon, Season 2 Episode 4, 'Red Dawn'.
-
Comic Summary: Colossus returns home to Russia with Jubilee by his side. They are confronted by a newly revived Russian, life force absorbing, super soldier from the cold war, named Omega Red, who has a bad history with Wolverine. Xavier and Magneto continue their treacherous journey through the Savage Land.

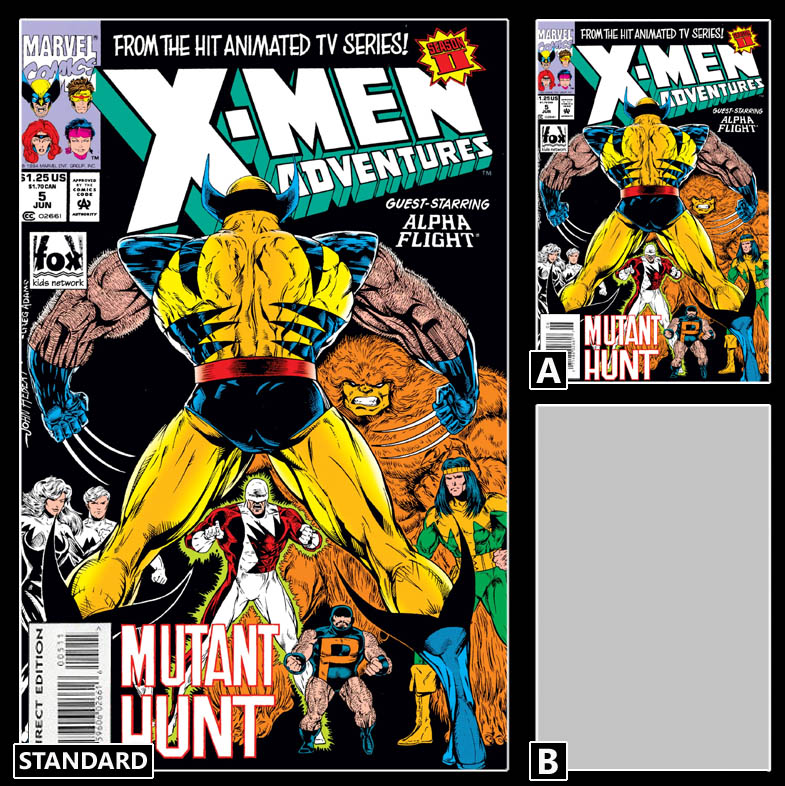
X-Men Adventures, Season II #5 - Mutant Hunt
Importance Rating: 3.0 out of 10
poster
Penciler(s): Andrew Wildman
Writer(s): Ralph Macchio
Release Date: June 1994
Variant Covers: None.
Trade Prints: None.
Fun Facts: Based on the Fox cartoon, Season 2 Episode 5, 'Repo Man'.
-
Comic Summary: Wolverine fights Alpha Flight and is taken for expiraments. Wolverine escapes into the woods, disoriented. He is rescued only to be taken back to Department H. Elsewhere the team searches for Professor X and Magneto.

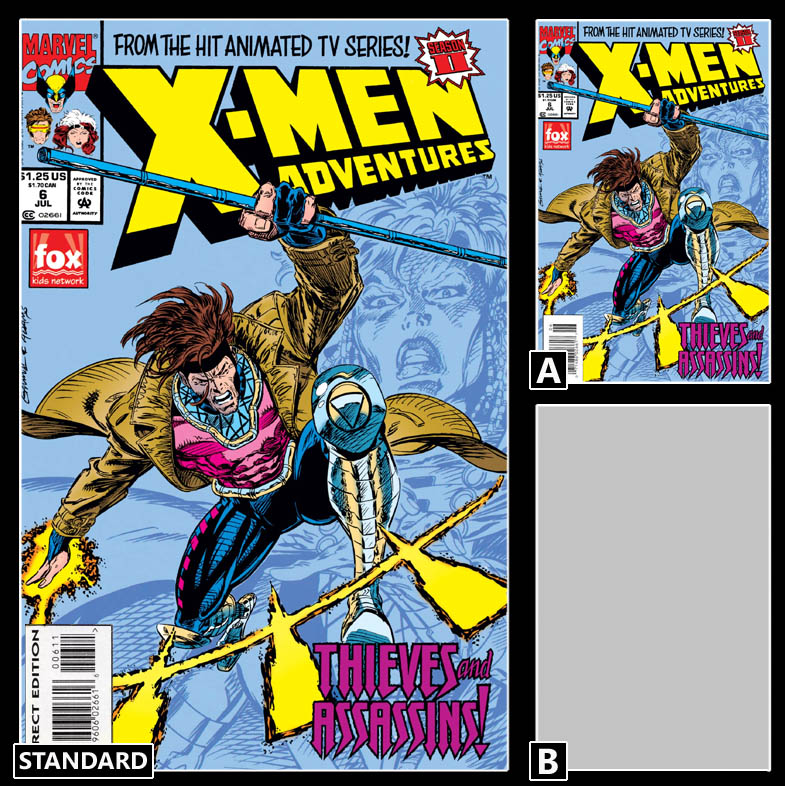
X-Men Adventures, Season II #6 - Thieves and Assassins!
Importance Rating: 9.5 out of 10
poster
Penciler(s): Andrew Wildman
Writer(s): Ralph Macchio
Release Date: July 1994
Variant Covers: None.
Trade Prints: None.
Fun Facts: Based on the Fox cartoon, Season 2 Episode 6, 'X-ternally Yours'.

In the cartoon reality, Remy, has a younger brother named Bobby (Robert LeBeau) and Remy does not say anything about being adopted. This is different from the comic reality where he is adopted into the LeBeau family and has an older brother named Henri.
-
Comic Summary: Every ten years, The Assassins Guild and The Thieves Guild must each give an offering to a supernatural being called The X-Ternal, in exchange for power. When it comes to be Gambit's brother, Bobby, who has to offer the tithing this time, he comes up missing. The Assassins Guild want to exchange him for Gambit, so he can finally come face to face with the woman he left at the altar 10 years before.

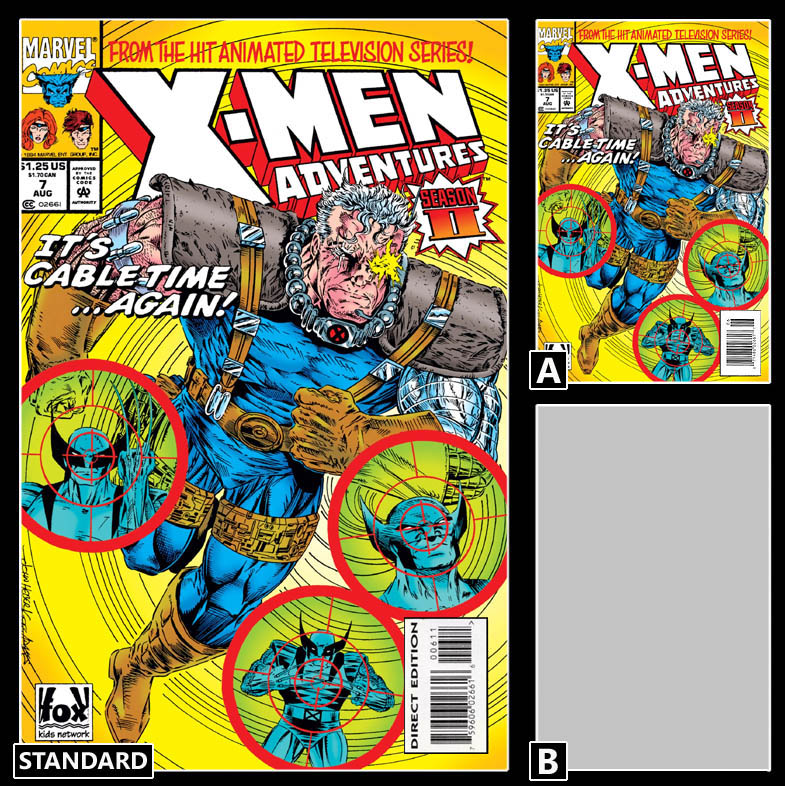
X-Men Adventures, Season II #7 - Time Fugitives, Part 1
Importance Rating: 3.0 out of 10
poster
Penciler(s): Scott Rosema
Writer(s): Ralph Macchio
Release Date: August 1994
Variant Covers: None.
Trade Prints: None.
Fun Facts: Based on the Fox cartoon, Season 2 Episode 7, 'Time Fugitives, Part 1'.
-
Comic Summary: New York City, 3999 AD. Here Time is changing itself. Cable uses his time device and sees that Bishop traveled from 2055 AD to the present to stop a plague, which Apocalypse started. Because he stopped the virus from being created, the antibodies that protected mutants from further plagues were never created.

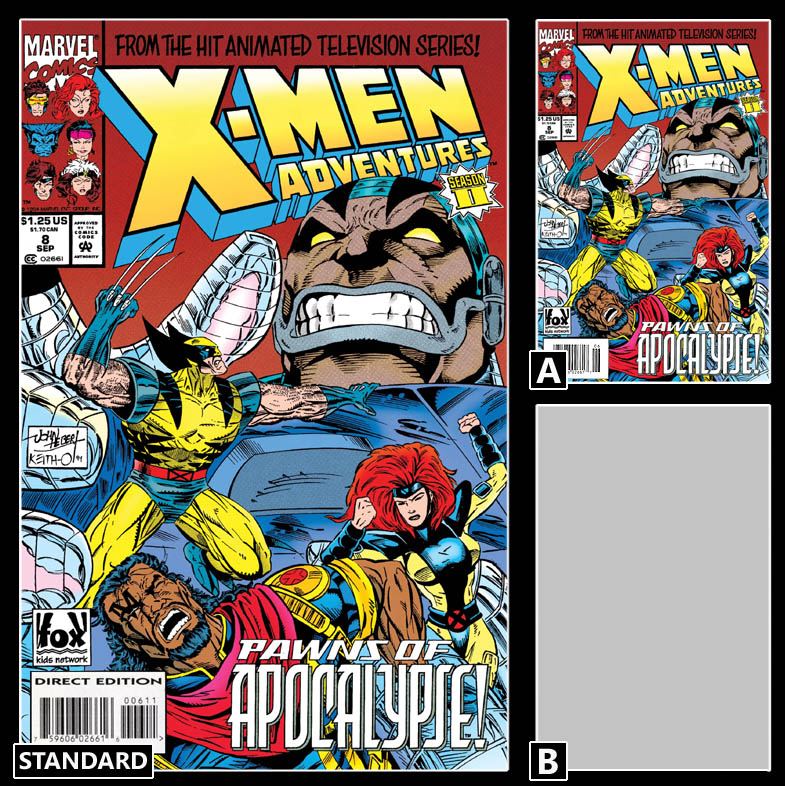
X-Men Adventures, Season II #8 - Pawns of the Apocalypse
Importance Rating: 3.0 out of 10
poster
Penciler(s): Andrew Wildman
Writer(s): Ralph Macchio
Release Date: September 1994
Variant Covers: None.
Trade Prints: None.
Fun Facts: Based on the Fox cartoon, Season 2 Episode 6, 'Time Fugitives: Part 2'.
-
Comic Summary: Part two of Bishop and Cable's battle in the future. Both are trying to prevent the world they know. The X-men join in hoping to end the fight and send the time travellers home. Apocalypse interferes, setting forth the techno virus.

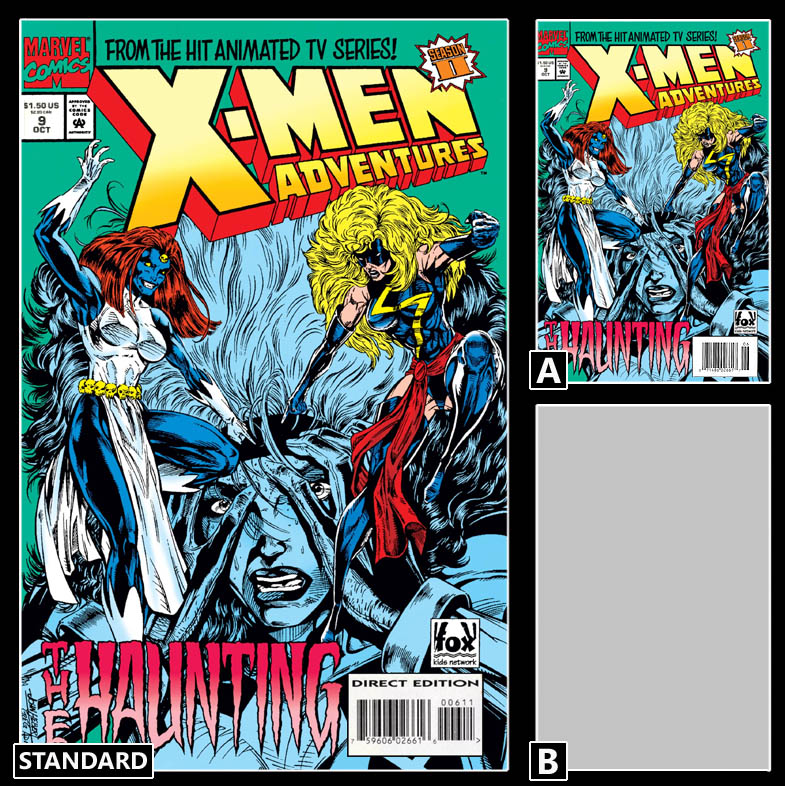
X-Men Adventures, Season II #9 - Rogue's Tale
Importance Rating: 4.0 out of 10
poster
Penciler(s): Andrew Wildman
Writer(s): Ralph Macchio
Release Date: October 1994
Variant Covers: None.
Trade Prints: None.
Fun Facts: Based on the Fox cartoon, Season 2 Episode 9, 'A Rogue's Tale'.
-
Comic Summary: Mr. Sinister send Mystique to destroy the X-Men while Professor X is lost in the Savage Land. Rogue starts having painful visions of a mysterious woman and they're literally driving her crazy when the mysterious woman possesses Rogue's body. Unknown to the X-Men, this mystery woman holds some dark secrets to Rogue's past before she joined the X-Men.

X-Men Adventures, Season II #10 - Beauty And The Beast
Importance Rating: 4.0 out of 10
poster
Penciler(s): Andrew Wildman
Writer(s): Ralph Macchio
Release Date: November 1994
Variant Covers: None.
Trade Prints: None.
Fun Facts: Based on the Fox cartoon, Season 2 Episode 10 'Beauty and the Beast'.
-
Comic Summary: The Friends Of Humanity attack a hospital for the blind that Beast is working at. And Wolverine plans on tearing them apart from the inside. Beast and one of his blind patients, Carly, fall in love together. But Carly's father is a mutant hater and won't stand to see them associating with each other. When the Friends Of Humanity kidnap Carly for associating with a mutant, Wolverine, Beast, and the FOH come full circle. Meanwhile, in the Savage Land, Xavier and Magneto are struggling to survive.

X-Men Adventures, Season II #11 - Mojovision
Importance Rating: 4.0 out of 10
poster
Penciler(s): Andrew Wildman
Writer(s): Ralph Macchio
Release Date: December 1994
Variant Covers: None.
Trade Prints: None.
Fun Facts: Based on the Fox cartoon, Season 2 Episode 11, 'Mojovision'.
-
Comic Summary: On a world ruled by Television, an alien named Mojo is master. When he abducts the X-Men and forces them to be action heroes in his shows, he may have to deal with more than he bargained for when Mojo's original action hero sabotages him. Xavier and Magneto are still slowly making their way through the Savage Land.

X-Men Adventures, Season II #12 - Reunion, Part 1
Importance Rating: 4.0 out of 10
poster
Penciler(s): John Hebert
Writer(s): Ralph Macchio
Release Date: November 1994
Variant Covers: None.
Trade Prints: None.
Fun Facts: Based on the Fox cartoon, Season 2 Episode 12, 'Reunion, Part 1'.
-
Comic Summary: Professor Xavier, Magneto and Jean are captured by Mister Sinister, the Nasty Boys and the mutates in Savage Land. It is revealed that Mister Sinister is the shadowy master who has been leading the mutates. Mister Sinister summons Sauron to use his mind control powers on Professor X, forcing him to send a message to lure the rest of the X-Men to Savage Land. The remaining X-Men are aware that they are walking into a trap but travel to Savage Land anyway to rescue Jean and the Professor.

X-Men Adventures, Season II #13 - The Savage is Loose
Importance Rating: 3.5 out of 10
poster
Penciler(s): Andrew Wildman
Writer(s): Ralph Macchio
Release Date: February 1995
Variant Covers: None.
Trade Prints: None.
Fun Facts: Based on the Fox cartoon, Season 2 Episode 13, 'Reunion, Part 2'.
-
Comic Summary: The X-Men are now in the Savage Land and are powerless like Xavier and Magneto, which leaves the X-Men open to being experimented on by Mr. Sinister. The only ones left to rescue them are Ka-Zar and Wolverine. Once everyone regains their powers, the Savage Land is restored. But what does the future hold for the Savage Land now?

X-Men Adventures, Season III #1 - The Lady Takes a Chance
Importance Rating: 3.0 out of 10
poster
Penciler(s): Manny Clark
Writer(s): Ralph Macchio
Release Date: March 1995
Variant Covers: None.
Trade Prints: None.
Fun Facts: Based on the Fox cartoon, Season 3 Episode 1, 'Out of the Past, Part 1'.

Title Logic: 'A Lady Takes a Chance' is a 1943 romantic comedy film starring Jean Arthur and John Wayne.
-
Comic Summary: Wolverine is lured into the Morlock tunnels by a former lover who is accompanied by a group of cybernetic mercenaries called Reavers. Wolverine discovers this woman he used to love isn't the woman he once knew, as she's gone through the same cybernetic alterations that the Reavers have, and a new moniker, calling herself Lady Deathstrike. She has discovered a long buried alien craft and needs Wolverine's adamantium claws to cut it open.

X-Men Adventures, Season III #2 - In Spirits Joined
Importance Rating: 5.0 out of 10
poster
Penciler(s): John Hubert
Writer(s): Ralph Macchio
Release Date: April 1995
Variant Covers: None.
Trade Prints: None.
Fun Facts: Based on the Fox cartoon, Season 3 Episode 2, 'Out of the Past, Part 2'.
-
Comic Summary: After being released from an alien spacecraft, a being called the Spirit Drinker starts draining the life force of the people around it, including The Reavers, Lady Deathstrike and Jubilee. The X-Men need to figure out the secret of destroying it before the drained life forces are gone forever.

X-Men Adventures, Season III #3 - The Phoenix Saga Part 1: Sacrifice
Importance Rating: 3.0 out of 10
poster
Penciler(s): John Hubert
Writer(s): Ralph Macchio
Release Date: May 1995
Variant Covers: None.
Trade Prints: None.
Fun Facts: Based on the Fox cartoon, Season 3 Episode 3, 'Phoenix Saga Part 1: Sacrifice'.
-
Comic Summary: Following visions from recent dreams, Professor Xavier sends his X-Men on a mission to the Eagle One Space-Station, putting them in the middle of an interstellar conflict. With their shuttle under attack, Jean makes a last ditch effort to use her powers to save the other X-Men.

X-Men Adventures, Season III #4 - The Phoenix Saga Part 2: The Dark Shroud
Importance Rating: 3.5 out of 10
poster
Penciler(s): John Hubert
Writer(s): Ralph Macchio
Release Date: June 1995
Variant Covers: None.
Trade Prints: None.
Fun Facts: Based on the Fox cartoon, Season 3 Episode 3, 'Phoenix Saga Part 2: The Dark Shroud'.
-
Comic Summary: The X-Men barely survive their return trip from space, Jean Grey discovering herself changed by the experience. Professor Xavier's dark half is given form, and proceeds to attack his students.

X-Men Adventures, Season III #5 - The Phoenix Saga Part 3: Phoenix and the Princess
Importance Rating: 4.0 out of 10
poster
Penciler(s): Ernie Stiner
Writer(s): Ralph Macchio
Release Date: July 1995
Variant Covers: None.
Trade Prints: None.
Fun Facts: Based on the Fox cartoon, Season 3 Episode 5, 'Phoenix Saga Part 3: Cry of the Banshee'.
-
Comic Summary: Professor Xavier's claims of the capture of his alien soulmate Lilandra by Juggernaut and Black Tom Cassidy are met with skepticism. The X-men finally believe and go into battle, going against not only Juggernaut and Black Cassidy, but Gladiator as well. The Phoenix awakens inside Jean to defeat Gladiator.

X-Men Adventures, Season III #6 - The Phoenix Saga Part 4: Now Come the Starjammers
Importance Rating: 3.0 out of 10
poster
Penciler(s): John Hubert and Jerry Bingham
Writer(s): Ralph Macchio
Release Date: August 1995
Variant Covers: None.
Trade Prints: None.
Fun Facts: Based on the Fox cartoon, Season 3 Episode 6, 'Phoenix Saga Part 4: Starjammers'.
-
Comic Summary: Lilandra seeks to protect the M'Kraan Crystal from her wicked brother, the Emperor D'Ken. But the interstellar pirates known as the Starjammers capture it, and Cyclops, in an effort to enact their own revenge scheme on the emperor.

X-Men Adventures, Season III #7 - The Phoenix Saga Part 5: The Power Corrupted
Importance Rating: 3.0 out of 10
poster
Penciler(s): Stefano Raffaelle
Writer(s): Ralph Macchio
Release Date: September 1995
Variant Covers: None.
Trade Prints: None.
Fun Facts: Based on the Fox cartoon, Season 3 Episode 7, 'Phoenix Saga Part 5: Child of Light'.
-
Comic Summary: Shi'ar Emperor D'Ken's rise to power via the M'Kraan Crystal is causing a universal implosion. The X-Men, Imperial Guard, and Starjammers find themselves overpowered and unable to stop it. Jean Grey must unleash her destiny as the host of the Phoenix, even at a most personal cost.

X-Men Adventures, Season III #8 - Rebellion in the Savage Land
Importance Rating: 1.0 out of 10
poster
Penciler(s): Ben Herrerd
Writer(s): Ralph Macchio
Release Date: October 1995
Variant Covers: None.
Trade Prints: None.
Fun Facts: Based on the Fox cartoon, Season 3 Episode 8, 'Savage Land, Strange Heart, Part 1'.

Gambit is not part of the storyline, he only appears on the cover.
-
Comic Summary: Mutant-draining, pterodactyl-man Sauron is persuaded into capturing Storm by Zaladane, the high priestess of Savage Land Sun God Garokk, unaware of her ulterior motives for unleashing the mutant's full potential.

X-Men Adventures, Season III #10 - Dark Phoenix Part 1
Importance Rating: 3.0 out of 10
poster
Penciler(s): Ben Herrerd
Writer(s): Ralph Macchio
Release Date: December 1995
Variant Covers: None.
Trade Prints: None.
Fun Facts: Based on the Fox cartoon, Season 3 Episode 10, 'Dark Phoenix: Dazzled'.
-
Comic Summary: The flirtation between Cyclops and a mutant singer named Dazzler exacerbates the Phoenix-controlled side of Jean Grey, leaving her open for manipulation by a secret sect of mutants coveting her immense powers for their own evil designs.

X-Men Adventures, Season III #11 - Dark Phoenix Part 2
Importance Rating: 3.0 out of 10
poster
Penciler(s): Ben Herrerd
Writer(s): Ralph Macchio
Release Date: January 1996
Variant Covers: None.
Trade Prints: None.
Fun Facts: Based on the Fox cartoon, Season 3 Episode 11, 'Dark Phoenix: The Inner Circle'.
-
Comic Summary: The Circle Club (Hell-fire in the comics) makes the Phoenix-controlled Jean Grey their new Queen, but finds two factors opposing it: her mental bond with Cyclops, and the presumed-dead Wolverine stalking after them.

X-Men Adventures, Season III #12 - You Can Never Go Home
Importance Rating: 4.0 out of 10
poster
Penciler(s): Ben Herrerd
Writer(s): Ralph Macchio
Release Date: February 1996
Variant Covers: None.
Trade Prints: None.
Fun Facts: Based on the Fox cartoon, Season 3 Episode 12, 'Dark Phoenix: The Dark Phoenix'.
-
Comic Summary: As the Dark Phoenix grows increasingly hostile, even destroying an entire star system, the X-Men struggle to figure out a way to stop her without harming their teammate Jean Grey.

X-Men Adventures, Season III #13 - Crime and Punishment
Importance Rating: 3.5 out of 10
poster
Penciler(s): Ben Herrera and Mike Miller
Writer(s): Ralph Macchio
Release Date: March 1996
Variant Covers: None.
Trade Prints: None.
Fun Facts: Based on the Fox cartoon, Season 3 Episode 12, 'Dark Phoenix: Fate of the Phoenix.'

Though this is the last issue of this "season', there are 2 other episodes that never made it to comics. 'Cold Comfort', the introduction of Iceman and 'Orphan's End' a story of Scott and Cosair. The fourth and fifth season of the cartoon was never released in comic.
-
Comic Summary: The X-Men face the Shi'ar Imperial Guard in a trial by combat to spare the life of Jean Grey, though even they begin to question the safety of the universe as long as the Dark Phoenix remains alive inside her.

X-Men Blue, Volume 1 #1 - Strangest, Part One
Importance Rating: 1.0 out of 10
poster
Penciler(s): Jorge Molina, Matteo Buffagni
Writer(s): Cullen Bunn
Release Date: August 2017
Variant Covers:
Trade Prints: X-Men Blue, Volume 1
Fun Facts: Gambit does not appear in the comic. He is only on this one variant, the Unknown Comics Exclusive, that connects to their X-Men Gold #1 Variant. Only this variant is shown in the database.
-
Comic Summary: The time-displaced original X-Men arrive at a large yacht on the Mediterranean Sea, off the coast of Italy. They are very talkative with each other, as Cyclops talks about what he misses from their time. Jean telepathically locates frightened thoughts, and the group find some humans who are being held hostage by Black Tom Cassidy. A battle ensues as the young X-Men do their best to take down Black Tom and keep the civilians safe. Their mission is complicated by the arrival of the Juggernaut, who is particularly hostile towards Cyclops, blaming him for the death of his step-brother, Xavier. Jean telepathically takes Black Tom out, and they move the battle with the Juggernaut to the deck, where their teamwork eventually defeats him. The young X-Men return to Madripoor, where they are currently residing with Magneto, despite their doubts. They report in to Magneto and inform him that their mission is accomplished. Magneto points out that there are many other matters that need their attention – threats against mutantkind, wayward comrades and mutants who capaitalize on the fears of the populace. He tells the young X-Men that they have been chosen to ensure Charles Xavier's dream becomes a reality, and that he will guide them. Meanwhile, in a small town, the local sheriff, Kira Lee, organizes a hunting party to accompany her into the woods to track something that has been menacing their local community. They are attacked by a wendigo, but a mysterious young man with sharp claws that protrude from his knuckles appears and comes to the sheriff's aid. She escapes, but when she looks back into the forest, the wendigo and her rescuer are both gone.

X-Men Blue, Volume 1 #9 - Untitled
Importance Rating: 2.0 out of 10
poster
Penciler(s): Cory Smith
Writer(s): Cullen Bunn
Release Date: October 2017
Variant Covers: None.
Trade Prints: X-Men Blue Volume 2
Fun Facts: Part of the Secret Empire Event.
-
Comic Summary: Polaris battles Havok and tries to convince him that this isn't who he really is. She holds Havok back, enabling Marvel Girl and Jimmy Hudson to go rescue their teammates. They battle some Hellfire soldiers, before Marvel Girl locates the cell where Angel, Iceman and Beast are being held prisoner, and they set out to find Cyclops, who Marvel Girl learns is with Emma Frost. While Polaris defeats Havok and tells him that she will not give up on him, the young X-Men take out more Hellfire soldiers, before locating Briar Raleigh. Danger defeats Marrow, and Polaris comes to her give her assistance, taking out Wolfsbane. At the same time, Cyclops, under the control of Emma, attacks his friends. Emma prevents the Beast from breaking her control with one of his spells, while Angel tries to get through to Xorn, but he is being controlled by Emma. Jean enters Cyclops' mind and discovers that Emma is attempting to remake Cyclops in the image of this time period's Cyclops, Emma's former lover. Jean challenges Emma, and forces her to lose control within Cyclops' mind – during which, the portion of the Cosmic Cube that Emma possesses appears. Emma reiterates how much she loathes Jean, before back on the physical plane, Cyclops attcks Emma, taking her down with a powerful optic blast. Emma commands Xorn to go after the X-Men when they leave, but her control over Xorn has temporarily dropped. The X-Men defeat Mondo and Toad with ease, while Angel suggests to Firestar that she should look him up some time so they can go out. The young X-Men are reunited with Polaris and Danger, and with Briar, they all depart New Tian in the Danger-Blackbird. During the flight, Jean and Cyclops discover that they have a permanent telepathic connection, Jean assumes as a result of what Emma was using to enhance her own powers, which she saw “bleed” into their connection, and Polaris informs the young X-Men that she, Danger and Briar are their new teachers. In Vietnam, Magneto meets with a holographic projection of Steve Rogers, who is annoyed about what has been going on in New Tian. Magneto assures Captain America that he has nothing to do with the X-Men's attack, and warns him that if the X-Men were acting on his orders, then they would turn their attention from New Tian, to Hydra's America. Beneath New Tian, Emma Frost and Havok meet with Miss Sinister and Bastion, and the group apparently working together, know that New Tian will not last much longer, and plan to take something called “Mothervine” global.

X-Men Blue, Volume 1 #19 - Cross Time Capers: Part 4
Importance Rating: 2.0 out of 10
poster
Penciler(s): R.B. Silva
Writer(s): Cullen Bunn
Release Date: January 2018
Variant Covers: None.
Trade Prints: X-Men Blue Volume 3
Fun Facts: Part of the Marvel Legacy Event.
-
Comic Summary: The time-displaced X-Men watch as apparently versions of themselves battle Magneto after murdering the Brotherhood of Evil Mutants. The X-Men wonder what has happened to them since they apparently returned to their correct place in time, and how this is altering the future. The original X-Men are joined by Charles Xavier, who gives Magneto a warning, before he bodyslides away with the X-Men, and the time-displaced Beast learns of a looming missile attack – possibly too late as the missile explodes over the battleground. Charles Xavier and the original X-Men return to the X-Mansion. Xavier thinks they have company, as he detected an anomaly before they teleported away. He and Angel go to another room within the mansion, where another Charles Xavier is being held in some sort of stasis, connected to Cerebro. The Charles who is up and about walking tells Angel that if this Charles has communicated with the X-Men and managed to bring them back here, it is only so they can die. The time-displaced X-Men and Magneto survived the missile by being transported to some nether-realm, where they witness apparently the totality of time, several different alternate realities. Magneto thinks about how he could use this knowledge to conquer mankind, but Jean challenges him, despite her teammates' cautioning her against it, Jean convinces Magneto that his future self sent them to the past to save the future. The X-Men agree to do something to sort out what is happening here in the past, and figure out whether these versions of themselves are responsible for the trouble in the future. Magneto agrees to help the X-Men, and once they transport inside the X-Mansion, they are confronted by Xavier and the original X-Men – a battle ensues, but disguises are soon dropped as Xavier and the original X-Men are revealed to be the alternate-reality Brotherhood in disguise – and they are determined to make this time period their own!

X-Men Forever Alpha - Rubicon
Importance Rating: 6.0 out of 10
poster
Penciler(s): Jim Lee and Tom Grummett
Writer(s): Chris Claremont
Release Date: July 2009
Variant Covers: A. Jim Lee Book Market Variant. Shows the bottom half of the original image, top of image is shown on standard release.
Trade Prints: None.
Fun Facts: This series is a reboot of the X-Men series. This issue reprints X-Men 1-4 and then has a new spin on the time after that. The series will begin at that point with a new storyline.
-
Comic Summary: A group of mutants have stolen a shuttle and are being pursued by some agents. Magneto arrives and tears their ships apart before bringing them on board Asteroid M. At the mansion the X-Men are testing the building‘s defenses. They split into two teams, but only Wolverine, with Psylocke‘s help, is able to breach them. The two different crews fight on board the asteroid until Magneto stops them. One of them, Fabian Cortez, has a suggestion for Magneto. Back at the mansion the X-Men Blue team respond to a signal that Magneto is up to something. He has raised a nuclear submarine. The X-Men confront him, but after a brief battle he flies off with the nuclear weapons. Rogue tries to follow him to talk, but is shot down by a russian plane. Magneto is hurt and is healed by Cortez. Rogue is found in Genosha but is pursued by the newly formed Acolytes wanting her to join them. She disagree’s and fights them, and the X-Men arrive to help her. Magneto turns up and declares that Asteroid M will be a haven for all mutantkind. (Brief description courtesy of uncannyxmen.net)

X-Men Forever Giant Size #1 - But What About Vengeance?
Importance Rating: 4.0 out of 10
poster
Penciler(s): Fernando Blanco and Mike Grell
Writer(s): Chris Claremont
Release Date: August 2010
Variant Covers: None.
Trade Prints: None.
Fun Facts: None.
-
Comic Summary: 1st story. Cyclops has invited Xavier to a family reunion with his family and friends. Also invited is his brother Havok and his girlfriend Polaris, as well as his friends Archangel and Iceman and their respective girlfriends. However, they re soon attacked by the Shi’ar’s Imperial Guard, who want Xavier. The heroes immediately fight and the Starjammer’s Sikorsky teleports the other X-Men to join them. However, Xavier holds Jean Grey back from the battle, afraid if the Shi’ar sees that she is alive they will believe she is Dark Phoenix and destroy Earth. Xavier finally asks for the battle to stop and agrees to come with Lilandra and spend the rest of his life with the Shi’ar.
2nd story. The mysterious Consortium director plots with SHIELD deputy director G.W. Bridge to get rid of Fury and make it seem the X-Men are to blame for the deaths of Iron Man and Beast. That evidence is given to the Avengers, who decide to confront the X-Men.

X-Men Forever, Volume 2 #1 - Love and Loss
Importance Rating: 6.0 out of 10
poster
Penciler(s): Tom Grummett
Writer(s): Chris Claremont
Release Date: August 2009
Variant Covers: A. Tom Grummett 2nd Printing Variant Cover.
Trade Prints: X-Men Forever, Volume 1: Picking Up Where We Left Off
Fun Facts: None.
-
Comic Summary: In Westchester, Professor X, Beast and Colonel Nick Fury remotely monitor the X-Men—whose field roster consists of Cyclops, Gambit, Nightcrawler, Jean, Wolverine, Storm, Rogue and Shadowcat—during the team’s mission to apprehend Fabian Cortez for S.H.I.E.L.D. While en route, Jean Grey daydreams about having an affair with Wolverine. An explosion on the jet’s right wing cuts the flight short and forces the X-Men to abandon ship. On the ground, Cortez ambushes Cyclops, turns his amplified optic blasts against the rest of the X-Men and forces Rogue to make physical contact with Storm. In the nearby woods, Shadowcat tries to mind her own business while Jean lovingly consoles an injured Wolverine. Cortez ambushes them as well. During the fight, Kitty phases her hand through Wolverine’s right arm while Cortez enhances their power. A powered-up Jean scares Cortez away by manifesting a fiery raptor, but Nightcrawler and Gambit capture him as he flees and bring him into custody. Rogue grows suspicious of Storm. After the X-Men return home, Wolverine quits the team because of Nick Fury’s overbearing presence. Later, Jean Grey shares a psychic rapport with Wolverine while he investigates a lead and experiences his ambush and death firsthand. (Brief description courtesy of uncannyxmen.net)

X-Men Forever, Volume 2 #2 - Comes the Father
Importance Rating: 5.0 out of 10
poster
Penciler(s): Tom Grummett
Writer(s): Chris Claremont
Release Date: August 2009
Variant Covers: A. Tom Grummett 2nd Printing Variant Cover.
Trade Prints: X-Men Forever, Volume 1: Picking Up Where We Left Off
Fun Facts: None.
-
Comic Summary: Two NYPD officers see a flash of light in Central Park and follow it to its source, where they find the adamantium remains of Wolverine. Storm returns to Xavier’s School and finds the power out and everyone unconscious. After her teammates—except for Jean Grey and Rogue—wake up, Nick Fury learns from his S.H.I.E.L.D. agents in Central Park of Wolverine’s death. A mysterious little girl presses one of these S.H.I.E.L.D. agents for information before vanishing. Back in the mansion, Fury informs the X-Men of Wolverine’s death while Xavier struggles to discover what attacked them. Fury detects the presence of an intruder in the mansion. Storm heads underground to restart the power and is ambushed by Sabretooth. They fight, making their way into the Danger Room, where the rest of the X-Men arrive to stop the fight. Despite Cyclops’s orders to stand down, Storm tries to kill Sabretooth in front of everyone, but only succeeds in burning his face and destroying his eyes.
(Brief description courtesy of uncannyxmen.net)

X-Men Forever, Volume 2 #3 - The Cruelest Cut
Importance Rating: 5.0 out of 10
poster
Penciler(s): Tom Grummett
Writer(s): Chris Claremont
Release Date: September 2009
Variant Covers: A. Tom Grummett 2nd Printing Variant Cover.
Trade Prints: X-Men Forever, Volume 1: Picking Up Where We Left Off
Fun Facts: None.
-
Comic Summary: A trio of mysterious figures monitors its agent within Xavier’s School—the same agent who killed Wolverine earlier that night. Meanwhile, at Xavier’s, Sabretooth accuses Storm of murdering Wolverine. Professor X confirms this accusation when he probes the mind of the comatose Jean Grey—who was connected with Wolverine at his time of death—and sees Storm commit the treacherous act. The mere memory of the attack knocks Xavier out, but wakens Jean, who confronts Storm via astral projection before fainting again. Meanwhile, the rest of the X-Men confront Storm. She lashes out and tries to kill them. Storm flees and locks the team in the Danger Room, but Shadowcat easily phases through the door and confronts her in the hallway. Despite enduring the full extent of Storm’s powers, Shadowcat closes the distance between them and slashes Storm across the face using a single adamantium claw she absorbed from Wolverine!
(Brief description courtesy of uncannyxmen.net)

X-Men Forever, Volume 2 #4 - Strike-Back!
Importance Rating: 7.0 out of 10
poster
Penciler(s): Tom Grummett
Writer(s): Chris Claremont
Release Date: September 2009
Variant Covers: A. Tom Grummett 2nd Printing Variant Cover.
B. Niko Henrichon 1930s Decade Variant.
C. Second Print Variant
Trade Prints: X-Men Forever, Volume 1: Picking Up Where We Left Off
Fun Facts: None.
-
Comic Summary: The Consortium decides to abandon Storm, its agent within the ranks of the X-Men. Meanwhile, at Xavier’s School, Storm escapes from Shadowcat—who now bears one of Wolverine’s adamantium claws because of her encounter with Fabian Cortez—and heads into the sewers. Shadowcat frees the rest of the X-Men and Sabretooth from the Danger Room and they head after Storm. They split into two teams: Rogue, Gambit and Nightcrawler travel on the surface, while Jean Grey, Cyclops, Sabretooth and Shadowcat take to the sewers. Before they depart, Beast takes a sample of Storm’s blood from Shadowcat’s claw and takes it to the lab, where he, Professor X and Nick Fury enter it into the scanner grid to pinpoint Storm’s location. Surprisingly, the computer produces two different locations. They send Gambit, Rogue and Nightcrawler after one of the anomalous readings, while the other team closes in on Storm in the tunnels. Storm repels them and escapes to the surface, where several agents of the Consortium confront and threaten to kill her. Meanwhile, Rogue, Nightcrawler and Gambit arrive at their destination at the Brooklyn Bridge, where Gambit encounters their target: a de-aged Ororo Munroe.
(Brief description courtesy of uncannyxmen.net)

X-Men Forever, Volume 2 #5 - Bury My Heart
Importance Rating: 6.0 out of 10
poster
Penciler(s): Tom Grummett
Writer(s): Chris Claremont
Release Date: October 2009
Variant Covers: A. Dave Cockrum 70th Anniversary Frame Variant Cover.
Trade Prints: X-Men Forever, Volume 1: Picking Up Where We Left Off
Fun Facts: None.
-
Comic Summary: Consortium snipers fire at Gambit and little Ororo, but Nightcrawler dispatches them before they cause any harm. Cyclops, Jean, Sabretooth and Shadowcat arrive at the traitor Storm’s position in time to save her from execution by Consortium agents. Storm murders the remaining Consortium officer and flees, vowing revenge on the X-Men. Sabretooth discovers a hidden dock the Consortium agents use to get in and out of the city undetected. Elsewhere, Fabian Cortez’s transport ship goes missing and delivers him into the hands of Consortium agents in Africa. After the X-Men return home, Beast details the uncanny biological similarities between the Storm they knew and the younger version currently in their company. He then reveals his new theory that mutants die faster the more they use their powers, an ailment he believes Professor has known about since the beginning—and an accusation to which Xavier confesses is true. Nick Fury of all people comes to Xavier’s aid and challenges the X-Men to accept it and fulfill their roles as heroes. Later, after the X-Men have a memorial ceremony for their departed ally Wolverine, Jean breaks up with Cyclops, who then declares the time has come for the X-Men to set things right in the fight for mutant survival. Brooklyn Bridge, where Gambit encounters their target: a de-aged Ororo Munroe. (Brief description courtesy of uncannyxmen.net)

X-Men Forever, Volume 2 #6 - Play Day!
Importance Rating: 7.0 out of 10
poster
Penciler(s): Paul Smith
Writer(s): Chris Claremont
Release Date: October 2009
Variant Covers: None.
Trade Prints: X-Men Forever, Volume 2: The Secret History of the Sentinels
Fun Facts: None.
-
Comic Summary: Instead of cleaning up the Danger Room, Gambit, Nightcrawler and Shadowcat play an impromptu game of baseball, much to Cyclops’s chagrin. Lil’ ‘Ro observes this interaction from the control room with Lockheed but accidentally summons a tornado that propels her into the Danger Room. She joins the X-Men as they continue to clean, but an Danger Room robot whirrs to life and attacks the team. Gambit saves them by destroying the room’s power source. Elsewhere in the mansion, Professor X and Sabretooth discuss their individual reputations with the X-Men, while Beast and Jean Grey confirm what Xavier revealed to them earlier: mutants die young. Later, Cyclops asks ‘Ro and Gambit to stay with the X-Men even though they intend to leave. Shadowcat discusses Wolverine’s death and its impact on her with Nightcrawler. Professor X and Nick Fury examine some ominous images from South America.
(Brief description courtesy of uncannyxmen.net)

X-Men Forever, Volume 2 #7 - Past is Prologue
Importance Rating: 5.0 out of 10
poster
Penciler(s): Tom Grummett
Writer(s): Chris Claremont
Release Date: November 2009
Variant Covers: None.
Trade Prints: X-Men Forever, Volume 2: The Secret History of the Sentinels
Fun Facts: This is the first issue that Gambit wears his new uniform.

Title Logic: "Whereof what's past is prologue; what to come, In yours and my discharge." is a quote from Shakepeare's 'The Tempest'.
-
Comic Summary: Something kills three of Nick Fury’s S.H.I.E.L.D. agents near the site of a massive footprint in the Andes. The X-Men send a team consisting of Nightcrawler, Rogue, Beast, Jean Grey, Shadowcat and Nick Fury to investigate. While en route, Fury recalls the World War 2 mission on which he first met Wolverine, then serving the Canadian military. On that same mission, Fury’s Howlers destroyed a top-secret Nazi research base while Logan eviscerated a scientist named Dietrich Trask. Back in the present, the X-Men land and realize a moment too late the identity of the culprit of the massacre in the Andes: a Sentinel Master Mold.
(Brief description courtesy of uncannyxmen.net)

X-Men Forever, Volume 2 #8 - Fire on the Mountains
Importance Rating: 4.0 out of 10
poster
Penciler(s): Tom Grummett
Writer(s): Chris Claremont
Release Date: November 2009
Variant Covers: None.
Trade Prints: X-Men Forever, Volume 2: The Secret History of the Sentinels
Fun Facts: None.
-
Comic Summary: Nick Fury and the X-Men defeat the attacking Sentinel in the Andes with ease, much to the chagrin of the Consortium, who monitor the situation remotely. Deeper in the jungles of South America, the X-Men discover an abandoned industrial facility, inside of which they find the signature of the Consortium along with an unconscious, telepathically shielded female scientist named Zigfried. The X-Men depart to tackle an impending Sentinel threat in a nearby village, leaving Nick Fury with Zigfried, who pulls a gun on him and reveals her true identity as Dr. Zigfried Trask! Meanwhile, back in Westchester, Gambit and Lil’ ‘Ro make themselves comfortable in the X-Mansion while Cyclops and Professor X explain to Sabretooth the terms of his stay.
(Brief description courtesy of uncannyxmen.net)

X-Men Forever, Volume 2 #10 - Home, Come the Heroes
Importance Rating: 2.0 out of 10
poster
Penciler(s): Terry Austin
Writer(s): Chris Claremont
Release Date: December 2009
Variant Covers: A. Zombie Variant Cover. Same as standard only Wolverine is a zombie.
Trade Prints: X-Men Forever, Volume 2: The Secret History of the Sentinels
Fun Facts: None.
-
Comic Summary: The X-Men prevent the Sentinels from slaughtering a town full of civilians in the Andes. Shadowcat and Beast notice something unusual about these Sentinels, mainly their hollow cores and capacity for construction. Meanwhile, Dr. Sigrid Trask confronts Nick Fury, whom she blames for the murder of her grandfather, Dietrich. She shoots Fury in the leg but flees when S.H.I.E.L.D. agent Daisy Dugan intervenes. Before Dugan and Fury can evacuate, however, something destroys their jet—with three S.H.I.E.L.D. agents on board. Sigrid, meanwhile, escapes into the jungle and, after some introspection, stumbles upon a squad of wild Sentinels obedient to her command. Elsewhere, the Consortium monitors these proceedings and one of the agents reveals herself as Sigrid’s mother. (Brief description courtesy of uncannyxmen.net)

X-Men Forever, Volume 2 #11 - Snap Trap
Importance Rating: 6.0 out of 10
poster
Penciler(s): Tom Grummett
Writer(s): Chris Claremont
Release Date: January 2010
Variant Covers: None.
Trade Prints: X-Men Forever, Volume 3: Come to Mother...Russia!
Fun Facts: Title Logic: Snap Trap is the real name of the common Mouse Trap.
-
Comic Summary: Colossus and the Winter Guard are chasing the rogue Crimson Dynamo and receive surprising help by Shadowcat, who has come to see Colossus and her fellow X-Men, Gambit and ‘Ro. After the fight, they talk and, though hiding it, Kitty is devastated that Colossus is now in a relationship with his teammate, the Black Widow. Back at Xavier’s, Rogue and Sabretooth almost get into a fight over domestics and Fury tells a dejected Xavier to shape up, as the X-Men need him. Back in Russia, Colossus’ younger sister, Illyana, is kidnapped by the mysterious Cossack.
(Brief description courtesy of uncannyxmen.net)

X-Men Forever, Volume 2 #12 - Race the Wind
Importance Rating: 6.0 out of 10
poster
Penciler(s): Tom Grummett
Writer(s): Chris Claremont
Release Date: January 2010
Variant Covers: None.
Trade Prints: X-Men Forever, Volume 3: Come to Mother...Russia!
Fun Facts: None.
-
Comic Summary: In Russia, the Winter Guard and X-Men learn that Illyana Rasputin has been kidnapped. The abductor, Cossack, knows Belasco and intends to give back to Illyana her demonic magical powers. The heroes track them to an abandoned warehouse complex, only to find they are too late. Illyana is a teenager again, evil and under Cossack’s sway. In New York, Jean and Beast reminisce, Rogue vows to not let Burnout or Sabretooth beat her, and Sabretooth eavesdrops on Moira and Professor X discussing Burnout. (Brief description courtesy of uncannyxmen.net)

X-Men Forever, Volume 2 #13 - Black Magic
Importance Rating: 5.0 out of 10
poster
Penciler(s): Tom Grummett
Writer(s): Chris Claremont
Release Date: February 2010
Variant Covers: None.
Trade Prints: X-Men Forever, Volume 3: Come to Mother...Russia!
Fun Facts: None.
-
Comic Summary: In Russia, some members of the Winterguard and X-Men face Cossack, who has changed Illyana into her evil teenage self with dark magical powers. Cossack’s soldiers turn into werebeasts and keep the heroes busy while Illyana blocks the phasing ability of Kitty, who along with ‘Ro are separated from the others. Kitty and ‘Ro do their best to fight but eventually Magik catches up with them and, together with Cossack, unleashes Kitty’s dark side. In Westchester, Beast and Jean are growing closer. Xavier discusses the potential consequences of Burnout with fury and Moira. Meanwhile, Sabretooth catches a SHIELD agent who is a traitor, after which he and Daisy Dugan plan to get to the roots of the conspiracy.
(Brief description courtesy of uncannyxmen.net)

X-Men Forever, Volume 2 #14 - Darkness at Dawn
Importance Rating: 6.0 out of 10
poster
Penciler(s): Tom Grummett
Writer(s): Chris Claremont
Release Date: February 2010
Variant Covers: None.
Trade Prints: X-Men Forever, Volume 3: Come to Mother...Russia!
Fun Facts: None.
-
Comic Summary: Cossack and Magik have released Kitty’s inner darkness, turning her into Firecat. She resists briefly but then gives in, helping the villains to attack the Winter Guard members and Gambit, who have come to save them. Cossack attempts to turn ‘Ro as well, but she fights him with her unstable weather powers and resists. When Gambit taunts Firecat why she can’t resist as well, Kitty holds on to her true self and turns against Cossack, intent on killing him, even though that would condemn her forever. Luckily, the Black Widow prevents that by shooting Cossack. Though Kitty becomes herself again, Illyana stays Magik and boasts that this is her true self and vows revenge before teleporting away. Colossus promises he and the Winter Guard will take care of her. Back at Xavier’s, Daisy Dugan and Sabretooth have informed Fury about the traitors in SHIELD. He orders them to ferret out the rest of the conspiracy. Nightcrawler gets a call for help from Amanda Sefton from Jackson, Mississippi. Rogue offers to accompany him. On a date, Jean and the Beast kiss. In Alaska, Scott’s son Nate worries that the X-Men will take his father away from him again.
(Brief description courtesy of uncannyxmen.net)

X-Men Forever, Volume 2 #15 - Rising Storm
Importance Rating: 2.0 out of 10
poster
Penciler(s): Tom Grummett
Writer(s): Chris Claremont
Release Date: March 2010
Variant Covers: None.
Trade Prints: X-Men Forever, Volume 3: Come to Mother...Russia!
Fun Facts: None.
-
Comic Summary: Storm flees from both the Consortium and the X-Men and seeks refuge in Wakanda, which the Black Panther gives her, despite Nick Fury’s warnings. Storm proves herself as a heroine in Wakanda, even helping T’Challa catch his archenemy Killmonger and the two fall in love. The Panther proposes. On the day of the wedding, Killmogner breaks out and slays the royal family and parliament, then uses a power neutralizer on Storm. The Panther tries to save her but, in the ensuing battle, Killmonger wins and kills the Panther. He then frees his secret partner, Storm, from the neutralizer but she kills him, as she doesn’t plan to share power. Further, she uses her power to blow up the place to erase any evidence. When the rescue team finds her, she claims that she and T’Challa eloped and the people are only too happy to make her queen.
(Brief description courtesy of uncannyxmen.net)

X-Men Forever, Volume 2 #17 - Change is More Than Skin Deep
Importance Rating: 1.0 out of 10
poster
Penciler(s): Graham Nolan
Writer(s): Chris Claremont
Release Date: April 2010
Variant Covers: None.
Trade Prints: X-Men Forever, Volume 4: Devil in a White Dress
Fun Facts: Gambit is not in the comic, but his name is dropped in a conversation between Fury and Sabretooth.
-
Comic Summary: After Nightcrawler gave Rogue the kiss of life, they find their powers seem to have switched. Rogue berates Mystique for that but finds she has to help bystanders, as they have caused a conflagration. Mystique uses the opportunity to disappear. Kurt too has to save a young girl while not having any powers. Afterwards, both X-Men begin to fear that the exchange might be permanent. At Xavier’s, Fury, Daisy and Sabretooth debrief the traitorous SHIELD agents and find that all of them worked at the SHIELD UN bureau. Jean does her best no to discuss her relationships, or lack thereof, with Moira MacTaggert. Meanwhile, Beast is confident he will succeed where Xavier failed in curing Burnout.
(Brief description courtesy of uncannyxmen.net)

X-Men Forever, Volume 2 #19 - The Ties That Bind
Importance Rating: 6.0 out of 10
poster
Penciler(s): Graham Nolan
Writer(s): Chris Claremont
Release Date: March 2010
Variant Covers: None.

Trade Prints: X-Men Forever, Volume 4: Devil in a White Dress
Fun Facts: None.
-
Comic Summary: Fury, Daisy, Gambit and Sabretooth infiltrate the Consortium headquarters where, after some skirmishes, they find the imprisoned Fabian Cortez. Unfortunately, more Consortium troops arrive. Meanwhile at the mansion, Beast and Moira test Rogue to find that her new look seems to be permanent and she has lost her absorption power. Jean and Xavier find out that Nightcrawler now has this power. Jean and the returned Scott discuss the end of their relationship. Beast shares his concerns about Kitty with Scott. Kitty and ‘Ro use their computers to keep watch over Fury’s team. (Brief description courtesy of uncannyxmen.net)

X-Men Forever, Volume 2 #20 - Can Also Set Us Free
Importance Rating: 6.0 out of 10
poster
Penciler(s): Graham Nolan
Writer(s): Chris Claremont
Release Date: May 2010
Variant Covers: None.
Trade Prints: X-Men Forever, Volume 4: Devil in a White Dress
Fun Facts: None.
-
Comic Summary: Fury, Daisy, Sabretooth and Gambit are facing Consortium soldiers over the imprisoned Fabian Cortez. During the battle, Cortez is injured. When the other X-Men learn of their friends’ plight, they come to help. During the battle, Sabretooth loses a hand helping Daisy. The X-Men make their getaway. Beast announces Sabretooth might be suffering from Burnout and likely won’t get his hand or his sight back. Before his death, Cortez warns them the Consortium is worse than they can imagine and hints at a mysterious top man. A man who seems to be none other than Tony Stark aka Iron Man. (Brief description courtesy of uncannyxmen.net)

X-Men Forever, Volume 2 #21 - A Plague on Both Our Houses
Importance Rating: 1.0 out of 10
poster
Penciler(s): Rodney Buchemi
Writer(s): Chris Claremont
Release Date: August 2010
Variant Covers: None.
Trade Prints: X-Men Forever, Volume 5: Once More...Into the Breech
Fun Facts: Gambit only appears on the cover, he is not in the comic itself.

Title Logic: "a plague a' both your houses" is cried out by Mercutio in Shakespeare's 'Romeo and Juliet'.
-
Comic Summary: The X-Men are torn whether to believe Tony Stark is working with the Consortium. Kitty, ‘Ro and Nightcrawler research and find a link between Stark’s father and Bolivar Trask. Additionally, Fury has a source at Stark’s and announces there is a rumor about something called Plague X. They soon figure out the Consortium might be using a weapon on a satellite to kill all mutants. Amelia Trask meets her daughter Sigrid in the Andes and is introduced to her Neo-Sentinels, which they show in turn to Tony Stark on the Consortium satellite. (Brief description courtesy of uncannyxmen.net)

X-Men Forever, Volume 2 #22 - Rise to the Challenge
Importance Rating: 4.0 out of 10
poster
Penciler(s): Daniel HDR
Writer(s): Chris Claremont
Release Date: June 2010
Variant Covers: None.
Trade Prints: X-Men Forever, Volume 5: Once More...Into the Breech
Fun Facts: None.
-
Comic Summary: The X-Men are still shocked by the revelation that Tony Stark is working for the Consortium. They figure out that the Consortium’s ant-mutant weapon has to be in space and develop a plan to attack. Aboard the satellite, Beast and Jean are to find the weapon and destroy it while the other X-Men distract the villains, which is easier said than done as they face Ziggy Trask’s Neo-Sentinels. Stark shows his true colors by helping Jean and Beast reach the weapon but he is taken out by a Neo-Sentinel. As the weapon system is activated, Hank realizes he will have to stay to make sure the charges work; in other words sacrifice his life. (Brief description courtesy of uncannyxmen.net)

X-Men Forever, Volume 2 #23 - Do Not Go Gentle
Importance Rating: 5.0 out of 10
poster
Penciler(s): Rodney Buchemi
Writer(s): Chris Claremont
Release Date: June 2010
Variant Covers: None.
Trade Prints: X-Men Forever, Volume 5: Once More...Into the Breech
Fun Facts: Title Logic: "Do Not Go Gentle into That Good Night," a villanelle composed in 1951, is considered to be among the finest works by Welsh poet Dylan Thomas.
-
Comic Summary: Jean Grey and Beast share a tearful goodbye, as his presence is necessary to make sure the plague X-firing system stays disabled until their explosives detonate. Jean leaves to warn the other X-Men that they have to leave the orbital platform. They do so, only to find they have to battle Sigrid Trask and her Neo-Sentinels outside. On the bridge, Tony Stark kills Amelia Trask, then forces the rest of the workers to evacuate. He contacts Beast and helps him with his work. In space, the X-Men find Trask near invincible until they lure her close to the station as it blows up. The X-Men leave with the bitter knowledge that neither Beast nor Tony Stark survived. 2nd story: Several fringe worlds of the Shi’ar Empire suffer attacks from the Warskrulls. The Shi’ar find out the Skrulls could enter their security system due to the carelessness of one person, the empress’ consort, Charles Xavier. (Brief description courtesy of uncannyxmen.net)

X-Men Forever, Volume 2 #24 - Requiem
Importance Rating: 5.0 out of 10
poster
Penciler(s): Rodney Buchemi
Writer(s): Chris Claremont
Release Date: July 2010
Variant Covers: None.
Trade Prints: X-Men Forever, Volume 5: Once More...Into the Breech
Fun Facts: None.
-
Comic Summary: Jean has a nightmare about her lost loved ones. After she wakes, Xavier invites her for a stroll and they discuss her problems. Finally, he asks her to take over the school, but Jean is doubtful. Later, Fury gathers the X-Men and his most trusted SHIELD agents and explains that the rest of SHIELD has been infiltrated by the Consortium. They need to find a way to save both mutantkind and SHIELD. Later, he asks Sabretooth, Daisy Dugan and Gambit to keep on working together as a stealth unit. Moira MacTaggert informs Sabretooth that, while she can help his healing factor regrow his lost hand, his blindness cannot be cured. Later, the X-Men attend Hank McCoy’s funeral. They notice that most of the Avengers act coolly toward hem and expect a future confrontation. Gambit and ‘ro decide to stay with the X-Men and both worry about Kitty. Kitty confides to Xavier that whatever she inherited from Wolverine also influences her psyche and she offers to take over Beast’s science work. Jean decides to work together with Cyclops but stresses they will never be more than colleagues. (Brief description courtesy of uncannyxmen.net)

X-Men Forever 2 #1 - A Cry of-- Vengeance!
Importance Rating: 6.0 out of 10
poster
Penciler(s): Tom Grummett
Writer(s): Chris Claremont
Release Date: June 2010
Variant Covers: None.
Trade Prints: X-Men Forever 2: Back in Action
Fun Facts: None.
-
Comic Summary: The X-Men prepare for the worst, which soon comes in the form of the Avengers who believe them to be criminals and try to arrest them. A battle begins. When the X-Men find they cannot reason with the Avengers, they go to Plan B. Diverting them with the illusion that Thor has accidentally killed ‘Ro, the X-Men head for the mansion and switch on the devices they prepared before. Suddenly, the mansion explodes, leaving only a crater and the Avengers to fear that the X-Men are dead. Elsewhere, the mysterious Consortium leader waits for Sigrid Trask to awake from her coma and, in a certain orphanage, in Nebraska Mr. Sinister schemes.
(Brief description courtesy of uncannyxmen.net)

X-Men Forever 2 #2 - Six Weeks Later
Importance Rating: 1.5 out of 10
poster
Penciler(s): Tom Grummett
Writer(s): Chris Claremont
Release Date: August 2010
Variant Covers: None.
Trade Prints: X-Men Forever 2: Back in Action
Fun Facts: Gambit also appears in an advertisement for the X-Men: Curse of the Mutants saga in the center of the comic.
-
Comic Summary: Xavier’s school detonated for reasons unknown and Manoli Wetherell asks questions in a news report without coming out that the people who likely died there were the X-Men. The rest of the world too has questions. The Daily Bugle sends Peter Parker to Xavier’s estate, which is guarded by SHIELD agents to find some answers. What he does find are Sentinels guarding the place and finally a very changed Rogue. In the meantime, “perfect” Storm is furious that she will be unable to enact revenge against her former teammates, Mr. Sinister plans to abduct Cyclops’ son Nate, the Avengers wonder if they are to blame for the X-Men’s deaths and the other X-teams meet to discuss the future and Burnout. Things are about to get even harder for mutants as Sigrid Trask is appointed the new director of SHIELD.
(Brief description courtesy of uncannyxmen.net)

X-Men Forever 2 #3 - A Night on the Town!
Importance Rating: 4.0 out of 10
poster
Penciler(s): Tom Grummett
Writer(s): Chris Claremont
Release Date: July 2010
Variant Covers: None.
Trade Prints: X-Men Forever 2: Back in Action
Fun Facts: None.
-
Comic Summary: Spider-Man convinces Rogue to trust him and the two of them are having a great night fighting crime together, all the while a mysterious woman tries to find Rogue. In the meantime, Nick Fury is furious when he learns that Rogue has disappeared and may blow their cover. Meanwhile, Kitty, Jean and Nighcrawler are sent to find her and run into Sentinel duo instead. Rogues senses Kurt is in trouble and she and Spider-Man join the fight, as does the mystery woman who shortly distracts the Sentinels. After they have beaten the robots, Spider-Man promises to keep their secrets and the mystery woman is revealed to be Mystique. In Alaska, Summers Air gets a prospective new costumer: one Dr. Robyn Hanover.
(Brief description courtesy of uncannyxmen.net)

X-Men Forever 2 #4 - Stolen Lives!
Importance Rating: 4.0 out of 10
poster
Penciler(s): Rodney Buchemi
Writer(s): Chris Claremont
Release Date: July 2010
Variant Covers: None.
Trade Prints: X-Men Forever 2: Back in Action
Fun Facts: None.
-
Comic Summary: Moira MacTaggert and Sabretooth are abducted by Morlocks led by Masque. They want to force Moira to find a cure for Burnout and torture Sabretooth as an incentive. In the meantime, one X-Men team returns with their new guest Mystique, who is immediately held for questioning. Jean, Nightcrawler and Rogue stay behind to help, while another team led by Cyclops searches the Morlock tunnels. ‘Ro is ordered to stay behind. The X-Men find the Morlocks. However, when the X-Men are diverted by ‘Ro who tagged along, Masque uses that opportunity and horribly changes Cyclops and Gambit. In the meantime, Trask’s SHIELD agents have become aware of mutant activity in the Morlock tunnels and are getting ready to attack. Back at the mansion, Fury’s agents have no luck questioning Mystique. To make matters worse, she hints that she and Fury were old friends during World War II. Even Jean Grey cannot simply read her mind and therefore prepares for a more in-depth scan.
(Brief description courtesy of uncannyxmen.net)

X-Men Forever 2 #5 - Dead Reckoning!
Importance Rating: 6.0 out of 10
poster
Penciler(s): Rodney Buchemi
Writer(s): Chris Claremont
Release Date: August 2010
Variant Covers: None.
Trade Prints: X-Men Forever 2: Back in Action
Fun Facts: None.
-
Comic Summary: In the Morlock Tunnels, ‘Ro is hunted by her own teammates, the disfigured Gambit and Cyclops, until Shadowcat saves her. Luckily, the two men manage to throw off Masque’s control and join the two girls against the Morlocks. Finally, Sabretooth explains to Daisy how a clone of his helped the Marauders slaughter Morlocks and now Masque believes it was him. Daisy manages to interrupts the fight and she and Mora insert some reason into the discussion. If the Morlocks want help with Burnout, they have to play by the rules. Still, fighting almost breaks out again when Daisy tells Masque to help Sabretooth with his lost hand and the Morlock refuses. The argument is cut short when SHIELD agents discover them and shoot tranqs at Masque. The other Morlocks tell the X-Men to leave. They will handle this. Actually, they are handled and captured by the SHIELD agents, but in turn they are soon freed by another group of Morlocks led by Callisto who is in league with a mysterious person called the Ghost Panther. Back at the Mansion, Jean tries to telepathically question Mystique, but Mystique instead turns the tables on her, taunting her with the faces of dead and lost loved ones. Without the others noticing, Jean threatens her as Phoenix, then notices she is losing control and runs away. Nightcrawler is next, however he refuses to absorb his mother’s memories, preferring faith. Rogue angrily berates him for that and demands answers until Mystique finally admits she lost everyone she loved and doesn’t want to make the same mistakes with her children. When the other group returns from the Morlock tunnels, Moira wants to examine Mystique as she has immunity to Burnout. Mystique first tries to haggle, then agrees in order to not disappoint Kurt and Rogue. (Brief description courtesy of uncannyxmen.net)

X-Men Forever 2 #7 - Luck...Runs Out!
Importance Rating: 4.0 out of 10
poster
Penciler(s): Ron Lim
Writer(s): Chris Claremont
Release Date: September 2010
Variant Covers: None.
Trade Prints: X-Men Forever 2: Scream a Little Scream!
Fun Facts: None.
-
Comic Summary: After briefing Corsair, the X-Men teleport to Summers Cove, where the Starjammers and Havok and Polaris are battling the Marauders. Hepzibah is stunned and equipped with the Malice choker, though the X-Men don’t realize this. “Hepzibah” joins ‘Ro in looking after Deborah Summers and Sikorsky, while the other X-Men join the battle. Cyclops gives Gambit the job to find his son, who is currently about to be abducted with a plane by Sinister’s secret agent, Robyn Hanover. Sabretooth takes off and faces his clone self. He has a hard time until Kitty takes the clone out. Moments later, Kitty is in for a nasty surprise when she is potentially lethally injured – by Wolverine. In Japan, Mariko Yashida swears vengeance against Jean Grey for taking Wolverine away from her. In Wakanda, Queen Ororo announces plans to annex Genosha.
(Brief description courtesy of uncannyxmen.net)

X-Men Forever 2 #8 - You're Supposed to Be Dead!
Importance Rating: 6.0 out of 10
poster
Penciler(s): Ron Lim
Writer(s): Chris Claremont
Release Date: September 2010
Variant Covers: None.
Trade Prints: X-Men Forever 2: Scream a Little Scream!
Fun Facts: None.
-
Comic Summary: At Summers Cove, the battle rages on. The possessed Hepzibah tries to kill Havok but is taken out and Malice is cast out. Mystique secretly stashes the choker. Kitty has been badly hurt by a clone Wolverine, who only has boneclaws and wants her adamantium claw. Sabretooth and Gambit save her and seemingly kill the fake Wolverine. Gambit then proceeds to save Robyn and Nate who are threatened by Scalphunter. Corsair finally uses the Starjmmer to kill all Marauders on the battlefield while Jean protects the X-Men telekinetically. She senses the Marauders being “switched off” before they are killed, meaning a new batch of clones will return eventually. Robyn manages to ingratiate herself with Nate and the X-Men, much to Sinister’s pleasure. While the X-Men are called back to Westchester, some of them remain behind with Kitty, who needs to recover.
(Brief description courtesy of uncannyxmen.net)

X-Men Forever 2 #9 - Blood Debt!
Importance Rating: 3.0 out of 10
poster
Penciler(s): Mike Grell
Writer(s): Chris Claremont
Release Date: October 2010
Variant Covers: None.
Trade Prints: X-Men Forever 2: Scream a Little Scream!
Fun Facts: None.
-
Comic Summary: Kitty has a nightmare about the evil clone Wolverine killing all her friends. She kills him in turn but then has a vision of a more feral version of herself she fears she is going to become. She wakes up and is comforted by Gambit. Later, she discusses her problems with Robyn Hanover, who explains to her she needs closure. Kitty tries to find clone Wolverine’s body but it’s gone. She comes on to Gambit, who gently shoves her away. She uses the Starjammer’s systems to track Wolverine to Tokyo. Figuring he is after Mariko Yashida, she decides to go there without telling the others. She has no idea that ‘Ro is a stowaway on the Skimmer, until they have arrived. In Japan, at the stronghold of Clan Yashida, they don’t find Mariko but instead witness how Mariko’s half-brother, the Silver Samurai, is cementing an alliance with another enemy of the X-Men: Matsu’o Tsuarabaya, Oyabun of the Hand. Back in Westchester, Nightcrawler wants answers from Mystique and Cyclops suddenly recalls that he knows Robyn Hanover from his childhood at the orphanage.
(Brief description courtesy of uncannyxmen.net)

X-Men Forever 2 #10 - Friends -- No More!
Importance Rating: 5.0 out of 10
poster
Penciler(s): Mike Grell
Writer(s): Chris Claremont
Release Date: October 2010
Variant Covers: None.
Trade Prints: X-Men Forever 2: Scream a Little Scream!
Fun Facts: None.
-
Comic Summary: Shadowcat and ’Ro witness the Silver Samurai and Matsu’o Tsurabaya making a deal, just before they are attacked by the Wolverine clone. However, the clone loses interest in them when he smells Kitty’s presence. Kitty decides not to fight and get ’Ro and herself out to a train station, where they take a bullet train to Tokyo. Aboard the train, “Wolverine” attacks again but the girls manage to get rid of him. Upon arrival in Tokyo, they are arrested. Mariko Yashida comes to get them out, not as good a thing, as it turns out she is the secret leader of the Consortium and wants revenge on Jean Grey and her friends for Wolverine’s betrayal of her. Worse, Sigrid Trask and SHIELD forces are her back-up. At that moment, Jean and Gambit join the girls and a fight breaks out. Despite Trask’s power neutralizer, the X-Men win, but Mariko has managed to abduct ‘Ro and offers her to Wakanda’s queen “perfect” Storm. In Genosha, the Ghost Panther is preparing.
(Brief description courtesy of uncannyxmen.net)

X-Men Forever 2 #11 - The Gathering Storm
Importance Rating: 2.0 out of 10
poster
Penciler(s): Rodney Buchemi
Writer(s): Chris Claremont
Release Date: November 2010
Variant Covers: None.
Trade Prints: X-Men Forever 2: Perfect World
Fun Facts: None.
-
Comic Summary: A Wakandan plane is en route to Wakanda to deliver the prisoner ‘l’il ‘Ro to the queen. The plane is boarded by the mysterious Ghost Panther, who seems to control the weather and abducts the unconscious ‘Ro. In Summers Cove, the X-Men discuss what to do. Havok and Polaris inform them they found a trace of Storm’s presence in Genosha, although there is a weird echo. Kitty informs the others of the clone Wolverine. Nightcrawler believes he can be saved and Jean vows vengeance on Sinister. In Genosha, Lockheed finds ‘Ro in a prison cell. They try to sneak out and run into Callisto who takes ‘Ro to the Ghost Panther. In Wakanda, Queen Storm has an angry holovid argument with Mariko about losing her prisoner. Later, she learns of the Ghost Panther and calls her warriors to the hunt.
(Brief description courtesy of uncannyxmen.net)

X-Men Forever 2 #12 - Fire -- From the Sky!
Importance Rating: 4.5 out of 10
poster
Penciler(s): Rodney Buchemi
Writer(s): Chris Claremont
Release Date: January 2011
Variant Covers: None.
Trade Prints: X-Men Forever 2: Perfect World
Fun Facts: None.
-
Comic Summary: While the world worries over the crisis between Wakanda and Genosha, the Ghost Panther saves a young Genoshan mutate from angry humans and preaches cooperation to both sides. She, ‘Ro and Callisto are attacked by Queen “Perfect” Storm and her troops. Luckily, the X-Men arrive to help. Queen Storm almost manages to abduct ‘Ro but the Ghost Panther saves the child and reveals that they both are Storm, for she is another version of Storm made of energy.
(Brief description courtesy of uncannyxmen.net)

X-Men Forever 2 #13 - I of the Storm
Importance Rating: 2.0 out of 10
poster
Penciler(s): Robert Atkins
Writer(s): Chris Claremont
Release Date: December 2010
Variant Covers: None.
Trade Prints: X-Men Forever 2: Perfect World
Fun Facts: None.
-
Comic Summary: The Ghost Panther – the adult Storm consisting only of energy – shares her memories with ‘Ro. When young Ororo, along with several New Mutants, had been kidnapped by the Genoshans, Storm was to undergo the Mutate transmode process on Cameron Hoge’s order. However, while Hodge was busy with other X-Men prisoners, the Genegineer told Storm of his plans to fake the process and replace her with a specially-grown clone that would be able to return their powers to her captured friends. Ororo went along the plan and was stored as energy in Pipeline’s transfax console. Unfortunately, both Pipeline and the Genegineer died in the conflict, while the cloned Storm replaced her with the X-Men. Eventually, the transfax console landed in the hands of the Consortium. When its scientists examined the device, a chain reaction started, creating young ‘Ro and the energy Storm. A solution for energy Storm and her unstable powers came from Iron Man, who gave her an armor to contain her powers, as well as the Ghost Panther identity. In the meantime, clone Storm went bad, due to her partial ability to store and return powers making her vulnerable to the Shadow King’s corruption. In the present, said Clone – now Queen Storm of Wakanda – decides to call the Avengers to help against the X-Men.
(Brief description courtesy of uncannyxmen.net)

X-Men Forever 2 #14 - Strange Days
Importance Rating: 4.0 out of 10
poster
Penciler(s): Andy Smith
Writer(s): Chris Claremont
Release Date: February 2011
Variant Covers: None.
Trade Prints: X-Men Forever 2: Perfect World
Fun Facts: None.
-
Comic Summary: The X-Men infiltrate Wakanda. Mystique sneaks into the royal palace, assuming the role of Queen Storm and giving her teammates the necessary coordinates. She is aided by her kids, Rogue and Nightcrawler, who help her against W’kabi. Elsewhere, Gambit, Sabretooth and Kitty find a huge arsenal of weaponry, while Cyclops, Jean, Polaris and Havok unfortunately learn that Queen Storm has called help – the Avengers. In the United Nations, Everett Ross, Magistrate Anderson and Sigrid Trask discuss Wakanda’s incursion into Genosha. Ziggy’s superior, Mariko, is also displeased at Ziggy’s performance as head of SHIELD. Elsewhere, the Ghost Panther and ’Ro visit Dr. Strange, who plans to help them.
(Brief description courtesy of uncannyxmen.net)

X-Men Forever 2 #15 - The Price of Life -- is Death!
Importance Rating: 4.5 out of 10
poster
Penciler(s): Andy Smith
Writer(s): Chris Claremont
Release Date: January 2011
Variant Covers: None.
Trade Prints: X-Men Forever 2: Perfect World
Fun Facts: None.
-
Comic Summary: The X-Men now face both the Avengers and the sociopathic Queen Storm. Though they receive help from the other half of the team, things look bad until Nightcrawler absorbs Thor’s power and, overwhelmed by it, uses it to briefly knock everyone out. Cyclops uses the opportunity to try and talk sense into Captain America. Perfect Storm sneaks up on Cyclops to kill him but Havok throws himself into the blast’s way, sacrificing himself for his brother. Polaris angrily attacks Queen Storm and is helped by the real Storm, who has been healed by Dr. Strange. Together, they bring the fake Storm down.
(Brief description courtesy of uncannyxmen.net)

X-Men Forever 2 #16 - Shall We Rise Again?
Importance Rating: 4.0 out of 10
poster
Penciler(s): Ramon Rosanas
Writer(s): Chris Claremont
Release Date: January 26, 2011
Variant Covers: None.
Trade Prints: X-Men Forever 2: Perfect World
Fun Facts: This is the series finale.
-
Comic Summary: Nick Fury informs the Avengers of the reasons for the X-Men’s ruse, though it is not well received. Afterward, the team attempts to continue with life. While Cyclops and Polaris grieve for the dead Havok, the real Storm and Kitty have a personal reunion. To help the comatose Nightcrawler, Dr. MacTaggert plans to call Dani Moonstar, as they will need a Valkyrie to help him. With Masque’s help, Storm takes the place of her clone to lead both Wakanda and Genosha to peace. Gambit and Kitty agree to stay and help her, while the unrepentant Storm clone is sent to Genosha in the hopes of helping her as well. Before leaving, Storm makes her peace with Sigrid Trask. Elsewhere, Sinister’s agent Robyn Hanover strikes and kidnaps Corsair and Nate Summers.
(Brief description courtesy of uncannyxmen.net)

X-Men Gold, Vol. 2 #1 - Back to Basics, Part One
Importance Rating: 1.5 out of 10
poster
Penciler(s): Marc Guggenheim
Writer(s): Ardian Syaf
Release Date: June 2017
Variant Covers: A. Andre Leroy Hip-Hop Variant
B. Jim Lee Remastered Variant
C. Bill Martin Variant
D. Bob McLeod Variant
E. Leonard Kirk Variant
F. Skottie Yound Baby Variant
G. Ron Lim Party Variant
H. Ron Lim Retailer Summit Variant
I. Ron Lim Party Sketch Variant
J. Ardian Syaf Premium Variant
K. J Scott Campbell Cover A
L. J Scott Campbell Cover B
M. Fried Pie Variant
N. Mike McKone Connecting Variant
O. J Scott Campbell Cover C
P. Fried Pie Con Vol 2 Exclusive
Q. Second Printing Variant
Trade Prints: X-Men Gold Vol. 1: Back to the Basics
Fun Facts: Gambit only appears on a portrait in the comic's background. He also appears on one the variant covers.
-
Comic Summary: The X-Men, now under Kitty’s leadership, protect New York from Terrax. After their victory, Kitty talks to the onlookers and promises they’ll rebuild the trust the X-Men lost during their conflict with the Inhumans. Later, while she discusses matters with Logan, she learns that the city expects a very steep lease payment and property taxes. Nightcrawler and Storm follow an interview with Lydia Nance, director of the Heritage Foundation, who manages to express hatred toward mutants more eloquently than usual. During a Danger Room session, Rachel explains to Armor and Rockslide why she changed her name to Prestige. Colossus invites Kitty to dinner and is cut down as she wants them to move on. That moment, they learn about an attack on the UN. She gathers the team to confront a new iteration of the Brotherhood of Evil Mutants.

X-Men Gold, Vol. 2 #4 - Techno Superior, Part One
Importance Rating: 8.5 out of 10
poster
Penciler(s): R.B. Silva
Writer(s): Marc Guggenheim
Release Date: July 2017
Variant Covers: None.
Trade Prints: X-Men Gold Vol. 1: Back to the Basics
Fun Facts:
-
Comic Summary: Gambit steals a vial of nanites at the behest of Olivia Trask. When he tries to prevent her from using them, they merge with her computer, creating a new form of Sentinel. Some X-Men easily take out members of the Serpent Society during a heist. At the X-Mansion, Cecilia Reyes informs Kitty that their prisoner isn’t a mutant but an alien. Detective Mahoney informs Storm and Logan about a series of mutant killings. Gambit calls Rachel for help and she informs the rest of the team who travel to Manhattan to join him.

X-Men Gold, Vol. 2 #5 - Techno Superior, Part Two
Importance Rating: 6.0 out of 10
poster
Penciler(s): R.B. Silva
Writer(s): Marc Guggenheim
Release Date: July 2017
Variant Covers: A. Anthony Piper Mary Jane Variant
B. Second Printing
Trade Prints: X-Men Gold Vol. 1: Back to the Basics
Fun Facts: None.
-
Comic Summary: Kitty, Prestige and Storm save Gambit and evacuate Olivia Trask as well, while Old Man Logan is helping with the evacuation in the building. Kitty phases through the new Sentinel, which strangely causes Prestige to black out. The swarm disperses but reforms elsewhere and targets a baldness clinic, among other places. Trask explains the Sentinel swarm attacks all kinds of mutations… which means everyone.

X-Men Gold, Vol. 2 #6 - Techno Superior, Part Three
Importance Rating: 7.5 out of 10
poster
Penciler(s): R.B. Silva
Writer(s): Marc Guggenheim
Release Date: August 2017
Variant Covers: None.
Trade Prints: X-Men Gold Vol. 1: Back to the Basics
Fun Facts: None.
-
Comic Summary: The X-Men and other heroes are battling the Sentinel / nano swarm, which is targeting anyone with the tiniest mutation, meaning essentially everyone. Despite small victories, the Sentinels swarm keeps on adapting and the situation becomes harder for the heroes, to the point where Colossus in injured badly. Rachel, in the meantime, is confronted with her fears in her dreams, fears of becoming like either of her parents or like her past Hound self. However, she soon realizes it is that level of power she has to embrace. She does, wakes up and manages to take out he nanoswarm mentally. However, she isn’t sure what price she will have to pay for that. Also, the X-Men are unaware that a small part of the swarm has survived underground and that they are being stalked by a man with vengeance on his mind.

X-Men Gold, Vol. 2 #7 - Secret Empire, Part One
Importance Rating: 3.0 out of 10
poster
Penciler(s): Ken Lashley
Writer(s): Marc Guggenheim
Release Date: September 2017
Variant Covers: A. Jim Lee Trading Card Variant
Trade Prints: X-Men Gold Vol. 2: Evil Empires
Fun Facts: None.
-
Comic Summary: The X-Men and their students are enjoying a nice baseball game. Kitty and Colossus discuss his current inability to access his powers, while Rachel and Nightcrawler discuss her new power level and their mutual attraction. Suddenly, the sky turns dark. They learn from Dr. Strange that New York is trapped in the Darkforce dimension. Kitty sends some X-Men to help the New Yorkers, however a little later they find first one, then two, students dead. A killer is moving around in the mansion and the telepaths cannot pick him up. The X-cutioner releases the alien Brotherhood member, then attacks and injures Eye-Boy. Before he can kill him, the X-Men find the culprit. However, his armor and weapons make him a match for them and finally he fires his gun at the powerless Colossus. Meanwhile, Rockslide and Dust have found several explosives, all set to go off soon.

X-Men Gold, Vol. 2 #26 - 'Til Death Do Us Part, Part One
Importance Rating: 4.0 out of 10
poster
Penciler(s): David Marquez, Michele Bandini
Writer(s): Marc Guggenheim
Release Date: March 2018
Variant Covers: None.
Trade Prints: X-Men Gold Vol. 6: Til Death Do Us Part
Fun Facts: None.
-
Comic Summary: Years ago, Kitty Pryde first met the X-Men and in particular Colossus. Now, in the republic of San Marco, while the X-Men are hunting Mesmero, Kitty and Peter discuss why they have been stalling their wedding plans. They capture Mesmero, but not before he once again psychically attacks Prestige. Afterwards, Kitty discusses the new Pyro with Iceman and decides to keep him on the team on a provisional basis. Later, Kitty visits her mother and asks her to give her away at the wedding. Nightcrawler prepares a bachelor party in Las Vegas for Peter, which he doesn’t enjoy at all and from which he gets abducted by the nano-Sentinel Alpha, who has plans against mutantkind with Lydia Nance.

X-Men Gold, Vol. 2 #27 - 'Til Death Do Us Part, Part Two
Importance Rating: 4.0 out of 10
poster
Penciler(s): David Marquez, Michele Bandini
Writer(s): Marc Guggenheim
Release Date: April 2018
Variant Covers: None.
Trade Prints: X-Men Gold Vol. 6: Til Death Do Us Part
Fun Facts: None.
-
Comic Summary: Years ago on a Christmas Eve, Kitty Pryde kissed Colossus for the first time (albeit jokingly) under a mistletoe. Today Storm is worried as she cannot get rid of the enchanted mallet Stormcaster and about Rachel’s growing powers. They are called to Las Vegas where Colossus was kidnapped. With her growing power, Rachel discerns the abductor was the nano-Sentinel they recently fought, who now calls himself Alpha. They manage to follow Alpha’s trace to the Savage Land and to the fortress in there. Inside, Lydia Nance and Alpha tell Colossus they are going to use the traces of the Legacy virus and Hope Cure in his blood to create a virus that will kill anyone with an X-gene. The X-Men split up and are attacked by Alpha clones, which along with Lydia Nance buy the prime Alpha time to flee on a rocket with Colossus.

X-Men Gold, Vol. 2 #28 - 'Til Death Do Us Part, Part Three
Importance Rating: 4.0 out of 10
poster
Penciler(s): David Marquez, Michele Bandini
Writer(s): Marc Guggenheim
Release Date: May 2018
Variant Covers: None.
Trade Prints: X-Men Gold Vol. 6: Til Death Do Us Part
Fun Facts: None.
-
Comic Summary: Some time ago, Colossus was believed dead while he was a prisoner being experimented upon. When he was finally freed by Kitty Pryde, he thought he was in Heaven. In the present, Alpha escapes with Colossus aboard a rocket into the sky. The X-Men learn from Lydia Nance that Alpha will use Colossus’ blood to create a virus to kill all mutants and disperse it on Earth via nanites. They also learn that he has taken Colossus to the defunct Roxxon space station. Kitty orders Pyro and Iceman to stay behind. The rest are teleported from the Triskelion to the Alpha Flight Station. Alpha Flight lend them a ship and they fly to the Roxxon Station. When missiles attack and damage the ship, Kitty phases their ship right into the station. They are attacked by more Alpha clones. The others fight them, while Kitty goes search for Colossus.

X-Men Gold, Vol. 2 #29 - 'Til Death Do Us Part, Part Four
Importance Rating: 4.0 out of 10
poster
Penciler(s): David Marquez, Michele Bandini
Writer(s): Marc Guggenheim
Release Date: June 2018
Variant Covers: None.
Trade Prints: X-Men Gold Vol. 6: Til Death Do Us Part
Fun Facts: None.
-
Comic Summary: Years ago, while at college in Chicago, Kitty Pryde was informed by Professor X that Colossus had died. In the present, a team of X-Men are fighting Alpha’s Sentinel clones on the Roxxon space platform while Kitty Pryde races to save Colossus from the original Alpha. She reaches them but is too late to stop Alpha’s nanoweapon from launching and Alpha starting the station’s self-destruction sequence. Storm with her new Asgardian capabilities destroys a large part of the nano weapon as do Alpha Flight. On Earth, Pyro destroys the few missiles that reach the atmosphere, while Iceman guards the captive Lydia Nance at the Triskelion. When Alpha tries to rescue her, Iceman freezes and destroys him, unware that Alpha sent only part of himself. On the Roxxon station, Alpha Flight sends a ship to save the X-Men but Sasquatch is hit and the ship is stuck under debris. Despite his bad state, Colossus manages to free the ship and the X-Men flee the station at the last second. On Earth, after Colossus has been given a clean bill of health, Kitty doubles down on her proposal.

X-Men Gold, Vol. 2 #30 - 'Til Death Do Us Part, Conclusion
Importance Rating: 10.0 out of 10
poster
Penciler(s): David Marquez, Michele Bandini
Writer(s): Marc Guggenheim
Release Date: June 2018
Variant Covers: A. Colossus Kirkham 1/50 Variant
B. Kitty Kirkham 1/50 Variant
C. J Scott Campbell Variant
D. Putri 1/50 Variant
E. Unknown Comic Variant
F. Unknown Comic Variant
G. Unknown Comic Variant
H. Unknown Comic Variant
I. Unknown Comic & KRS Variant
J. Unknown Comic & KRS Variant
K. Unknown Comic & KRS Variant
L. Unknown Comic & KRS Variant
M. Unknown Comic & KRS Wraparound Con Variant
N. J Scott Campbell Classified Variant (Polybagged)
O. J Scott Campbell Classified Variant (Opened)
Trade Prints: X-Men Gold Vol. 6: Til Death Do Us Part
Fun Facts: This is the issue featuring the marriage of Gambit's to Rogue.
-
Comic Summary: Years ago, Colossus broke up with Kitty Pryde after he fell out of love with her. Now they are standing at the same place on the eve of their wedding. They join their friends and fellow X-Men at the wedding rehearsal. During the party, Kitty slips away to the roof with Illyana Rasputin and they share a drink. Kitty notices Illyana’s pensive mood and wants her friend to reveal what’s on her mind. She insists and Illyana finally admits doubting whether the marriage is a good idea. She immediately apologizes and Kitty promises to forget it. The next day, they are all taken to the former site of Xavier’s school where the wedding is to take place and both Kitty and Peter share some moments with their friends. The ceremony starts without a hitch but, when Peter tries to put the ring on her finger, Kitty reflexively phases, then bursts out she can’t go through with this and phases away. Later, when Peter asks her what’s going on, she admits that, while she loves him, the rabbi’s sermon made it clear to her that she cannot face this responsibility at the moment. In the meantime, the others discuss what happened. Inspired by Storm’s words, Gambit proposes to Rogue and she says ‘yes’. Kitty and Peter give them their blessing to marry right there and now, so the occasion doesn’t go to waste… and a little later both say ‘I do’.

X-Men: The Manga #1 - Untitled
Importance Rating: 6.5 out of 10
poster
Penciler(s): Hiroshi Higuchi
Writer(s): Hiroshi Higuchi
Release Date: March 1998
Variant Covers: None.
Trade Prints: None.
Fun Facts: This is a translated reprint from the Japanese Manga Volume #1.
-
Comic Summary: The X-Men connect a mutant registration program, with ties to the government and to a group of mutant-capturing robots called Sentinels. They rescue a teenage mutant girl named Jubilee from the program while visiting a mall. They decide to bring her back to the mansion where she finds they are not just normal mutants, they are the X-Men.

X-Men: The Manga #2 - Untitled
Importance Rating: 5.5 out of 10
poster
Penciler(s): Hiroshi Higuchi
Writer(s): Hiroshi Higuchi
Release Date: April 1998
Variant Covers: None.
Trade Prints: None.
Fun Facts: This is a translated reprint from the Japanese Manga Volume #1.
-
Comic Summary: The X-Men connect a mutant registration program, with ties to the government and to a group of mutant-capturing robots called Sentinels. They rescue a teenage mutant girl named Jubilee from the program while visiting a mall. They decide to bring her back to the mansion where she finds they are not just normal mutants, they are the X-men.

X-Men: The Manga #3 - Operation Rescue Part I
Importance Rating: 5.5 out of 10
poster
Penciler(s): Koji Yasue
Writer(s): Koji Yasue
Release Date: April 1998
Variant Covers: None.
Trade Prints: None.
Fun Facts: This is a translated reprint from the Japanese Manga Volume #1.
-
Comic Summary: The X-Men break into the Mutant Registration Office and destroy the files, but Beast is apprehended while trying to escape. Gyrich and Trask, the renegades responsible for the Sentinels, kidnap Jubilee, hoping she can lead them to the X-Men.

X-Men: The Manga #4 - Operation Rescue Part II
Importance Rating: 2.5 out of 10
poster
Penciler(s): Koji Yasue
Writer(s): Koji Yasue
Release Date: May 1998
Variant Covers: None.
Trade Prints: None.
Fun Facts: This is a translated reprint from the Japanese Manga Volume #1.
-
Comic Summary: The X-Men break into the Mutant Registration Office and destroy the files, but Beast is apprehended while trying to escape. Gyrich and Trask, the renegades responsible for the Sentinels, kidnap Jubilee, hoping she can lead them to the X-Men.

X-Men: The Manga #5 - Enter: Magneto
Importance Rating: 3.0 out of 10
poster
Penciler(s): Koji Yasue
Writer(s): Koji Yasue
Release Date: May 1998
Variant Covers: None.
Trade Prints: None.
Fun Facts: This is a translated reprint from the Japanese Manga Volume #2.
-
Comic Summary: After Beast's trial, Sabretooth demands that Beast be set free, prompting the guards to shoot and injure Sabretooth. Cyclops aids Sabretooth and brings him to the Mansions' infirmary. Later, Magneto attacks a military missile facility. As the X-men arrive, Magneto is preparing to launch nuclear missiles in order to ensure a war between mutants and humans. Cyclops, Storm, and Wolverine face off with Magneto, but are unable to stop him. Later Storm uses her control over wind and lightning to cause the missiles to short-circuit, deactivating them and drop them into the water. Having prevented a nuclear war, the X-men return home to the mansion having learned the full power of Magneto.

X-Men: The Manga #9 - Menace of the Morlocks Part I
Importance Rating: 4.0 out of 10
poster
Penciler(s): Reiji Hagihara
Writer(s): Reiji Hagihara
Release Date: July 1998
Variant Covers: None.
Trade Prints: None.
Fun Facts: This is a translated reprint from the Japanese Manga Volume #3.
-
Comic Summary: Wolverine must overcome his feelings for Jean, and Storm must overcome her crippling claustrophobia, when the team journeys into the sewer to rescue Jean Grey & Cyclops from a race of hideously deformed mutants known as Morlocks, and their leader Callisto, who wants to make Scott her king.

X-Men: The Manga #10 - Menace of the Morlocks Part II
Importance Rating: 6.0 out of 10
poster
Penciler(s): Reiji Hagihara
Writer(s): Reiji Hagihara
Release Date: August 1998
Variant Covers: None.
Trade Prints: None.
Fun Facts: This is a translated reprint from the Japanese Manga Volume #3.
-
Comic Summary: Wolverine must overcome his feelings for Jean, and Storm must overcome her crippling claustrophobia, when the team journeys into the sewer to rescue Jean Grey & Cyclops from a race of hideously deformed mutants known as Morlocks, and their leader Callisto, who wants to make Scott her king.

X-Men: The Manga #11 - Stalked By Sabretooth
Importance Rating: 5.0 out of 10
poster
Penciler(s): Rei Nakahara
Writer(s): Rei Nakahara
Release Date: August 1998
Variant Covers: None.
Trade Prints: None.
Fun Facts: This is a translated reprint from the Japanese Manga Volume #3.
-
Comic Summary: Having left the X-Men to seek peace in the arctic, Wolverine instead finds himself battling Sabretooth for the safety of an Inuit tribe. Storm, Gambit, and Jubilee investigate an island resort which welcomes mutants, and might be too good to be true.

X-Men: The Manga #12 - Untitled
Importance Rating: 5.0 out of 10
poster
Penciler(s): Rei Nakahara
Writer(s): Rei Nakahara
Release Date: September 1998
Variant Covers: None.
Trade Prints: None.
Fun Facts: This is a translated reprint from the Japanese Manga Volume #3.
-
Comic Summary: Having left the X-Men to seek peace in the arctic, Wolverine instead finds himself battling Sabretooth for the safety of an Inuit tribe. Storm, Gambit, and Jubilee investigate an island resort which welcomes mutants, and might be too good to be true.

X-Men: The Manga #13 - Mutant Island
Importance Rating: 7.0 out of 10
poster
Penciler(s): Rei Nakahara
Writer(s): Rei Nakahara
Release Date: September 1998
Variant Covers: None.
Trade Prints: None.
Fun Facts: This is a translated reprint from the Japanese Manga Volume #3 and 4.
-
Comic Summary: Gambit, Storm, and Jubilee become slave labor on the island resort of Genosha, along with other mutants, forced to help build the new power source for a Sentinel factory. They're given aide in escaping by a mysterious mercenary named Cable.

X-Men: The Manga #14 - Mutant Island Part II
Importance Rating: 7.0 out of 10
poster
Penciler(s): Hirofumi Ichikawa
Writer(s): Hirofumi Ichikawa
Release Date: October 1998
Variant Covers: None.
Trade Prints: None.
Fun Facts: This is a translated reprint from the Japanese Manga Volume #4.
-
Comic Summary: Gambit, Storm, and Jubilee become slave labor on the island resort of Genosha, along with other mutants, forced to help build the new power source for a Sentinel factory. They're given aide in escaping by a mysterious mercenary named Cable.

X-Men: The Manga #15 - Mutant Island Part III
Importance Rating: 5.0 out of 10
poster
Penciler(s): Hirofumi Ichikawa and Uoriya Ohashi
Writer(s): Hirofumi Ichikawa and Uoriya Ohashi
Release Date: October 1998
Variant Covers: None.
Trade Prints: None.
Fun Facts: This is a translated reprint from the Japanese Manga Volume #4.
-
Comic Summary: Gambit, Storm, and Jubilee become slave labor on the island resort of Genosha, along with other mutants, forced to help build the new power source for a Sentinel factory. They're given aide in escaping by a mysterious mercenary named Cable.

X-Men: The Manga #16 - Colossus
Importance Rating: 4.0 out of 10
poster
Penciler(s): Uoriya Ohashi
Writer(s): Uoriya Ohashi
Release Date: November 1998
Variant Covers: None.
Trade Prints: None.
Fun Facts: This is a translated reprint from the Japanese Manga Volume #4.
-
Comic Summary: Colossus, with the help of the X-Men, fights the Juggernaut after the Juggernaut charges through his contrustion site. That is after he destroys the X-Mansion.

X-Men: The Manga #17 - Untitled
Importance Rating: 5.0 out of 10
poster
Penciler(s): Hirofumi Ichikawa
Writer(s): Hirofumi Ichikawa
Release Date: December 1998
Variant Covers: None.
Trade Prints: None.
Fun Facts: This is a translated reprint from the Japanese Manga Volume #5.
-
Comic Summary: A Doctor at the Muir Island Mutant Research Center claims to have found a cure for the mutant gene. Rogue flies to the island seeking the 'cure', which turns out to be a plot by the villainous Apocalypse to turn mutants into his evil servants.

X-Men: The Manga #19 - Untitled
Importance Rating: 5.0 out of 10
poster
Penciler(s): Hirofumi Ichikawa
Writer(s): Hirofumi Ichikawa
Release Date: January 1999
Variant Covers: None.
Trade Prints: None.
Fun Facts: This is a translated reprint from the Japanese Manga Volume #5.
-
Comic Summary: The immortal mutant Apocalypse terrorizes the world with his Horsemen--mutants who journeyed to Muir Island seeking the fictitious cure, but instead became the living embodiments of Famine, Pestilence, War, andDeath. Can the X-Men stop them from carrying out Apocalypse's plan to annihilate all humankind?

X-Men: The Manga #20 - Untitled
Importance Rating: 4.0 out of 10
poster
Penciler(s): Hirofumi Ichikawa
Writer(s): Hirofumi Ichikawa
Release Date: January 1999
Variant Covers: None.
Trade Prints: None.
Fun Facts: This is a translated reprint from the Japanese Manga Volume #5.
-
Comic Summary: The immortal mutant Apocalypse terrorizes the world with his Horsemen--mutants who journeyed to Muir Island seeking the fictitious cure, but instead became the living embodiments of Famine, Pestilence, War, andDeath. Can the X-Men stop them from carrying out Apocalypse's plan to annihilate all humankind?

X-Men: The Manga #21 - Untitled
Importance Rating: 4.0 out of 10
poster
Penciler(s): Hirofumi Ichikawa
Writer(s): Hirofumi Ichikawa
Release Date: February 1999
Variant Covers: None.
Trade Prints: None.
Fun Facts: This is a translated reprint from the Japanese Manga Volume #6.
-
Comic Summary: A mutant from more than half a century into the future, named Bishop, arrives in the present, attempting to change history for the better, by stopping an X-Man from committing an assassination. But between being chased by a future breed of Sentinel, and the details of his mission being fuzzy, he's got his work cut out for him.

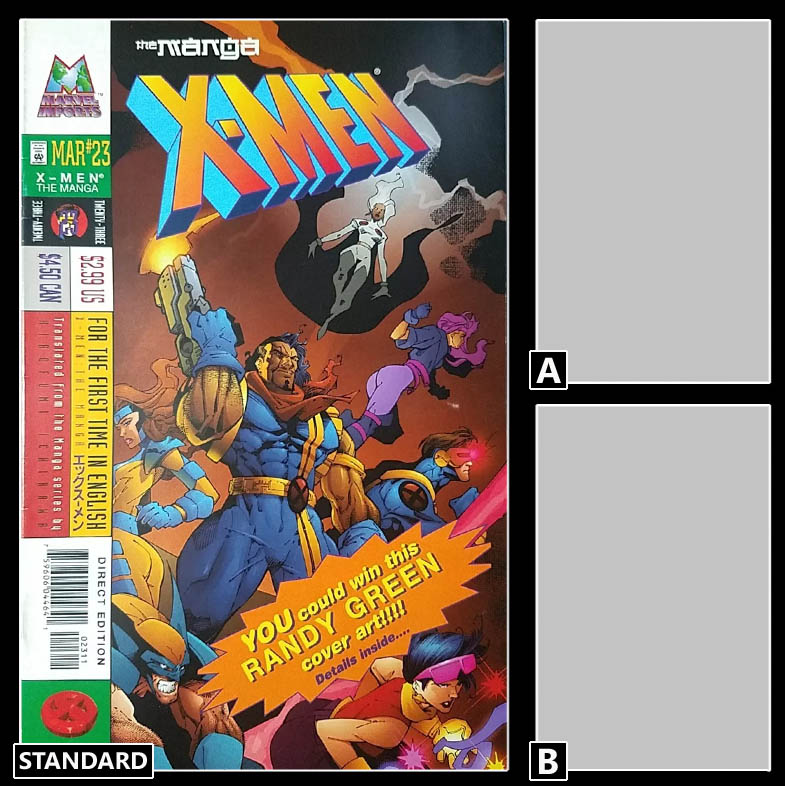
X-Men: The Manga #23 - Untitled
Importance Rating: 8.0 out of 10
poster
Penciler(s): Hirofumi Ichikawa
Writer(s): Hirofumi Ichikawa
Release Date: March 1999
Variant Covers: None.
Trade Prints: None.
Fun Facts: The cover was original art by Randy Green and Tim Townsand. The original art for the cover was part of a contest celebrating the end of the Manga comic run.

This is a translated reprint from the Japanese Manga Volume #6.
-
Comic Summary: A mutant from more than half a century into the future, named Bishop, arrives in the present, attempting to change history for the better, by stopping an X-Man from committing an assassination. But between being chased by a future breed of Sentinel, and the details of his mission being fuzzy, he's got his work cut out for him.

X-Men: The Manga #24 - Untitled
Importance Rating: 6.0 out of 10
poster
Penciler(s): Hirofumi Ichikawa
Writer(s): Hirofumi Ichikawa
Release Date: March 1999
Variant Covers: None.
Trade Prints: None.
Fun Facts: The cover was original art by Randy Green and Tim Townsand. The original art for the cover was part of a contest celebrating the end of the Manga comic run.

This is a translated reprint from the Japanese Manga Volume #6.

-
Comic Summary: Aware of an impending assassination which will create a catastrophic future, the X-Men must deal with threats both outside and within their team. Bishop identifies the traitor -- the mysterious Cajun Gambit! Can the X-Men stop Bishop from destroying Gambit before the assassination can take place? Should they?

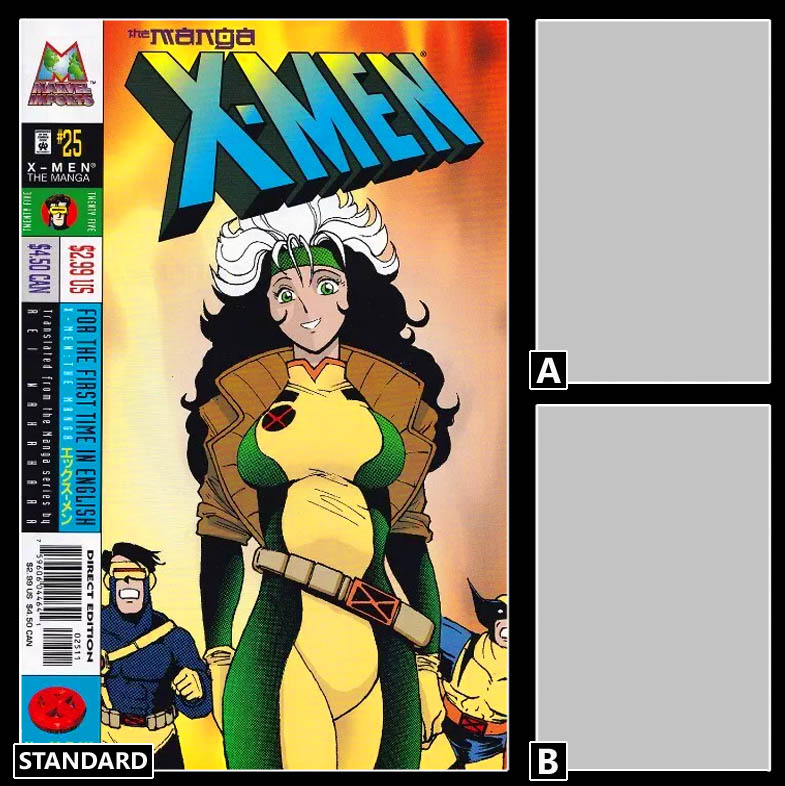
X-Men: The Manga #25 - Untitled
Importance Rating: 7.0 out of 10
poster
Penciler(s): Hirofumi Ichikawa
Writer(s): Hirofumi Ichikawa
Release Date: April 1999
Variant Covers: None.
Trade Prints: None.
Fun Facts: This is a translated reprint from the Japanese Manga Volume #6.
-
Comic Summary: Aware of an impending assassination which will create a catastrophic future, the X-Men must deal with threats both outside and within their team. Bishop identifies the traitor -- the mysterious Cajun Gambit! Can the X-Men stop Bishop from destroying Gambit before the assassination can take place? Should they?

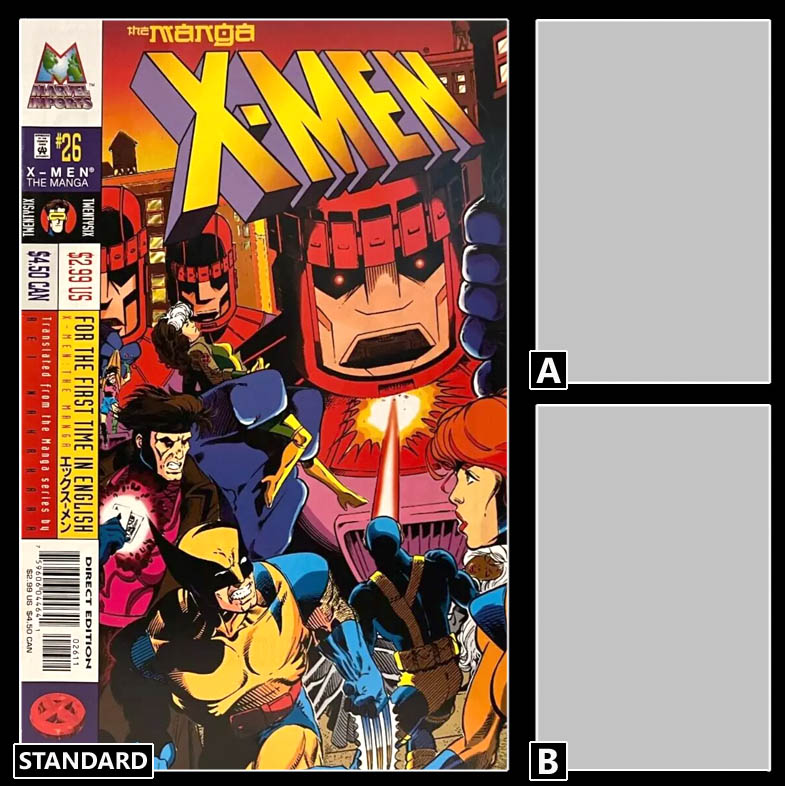
X-Men: The Manga #26 - Untitled
Importance Rating: 4.0 out of 10
poster
Penciler(s): Hirofumi Ichikawa
Writer(s): Hirofumi Ichikawa
Release Date: April 1999
Variant Covers: None.
Trade Prints: None.
Fun Facts: This is the last issue released in the US even though there was two whole Japanese manga books left untranslated which could have been made into 8-9 comics. The US ending was very abrupted, ending in the middle of a story.

This is a translated reprint from the Japanese Manga Volume #7.
-
Comic Summary: Recovering from their initial battle with the X-Men, Gyrich and Trask have resumed Project Wideawake by creating the ultimate Sentinel: the Master Mold, a walking factory capable of creating Sentinel robots at an assembly-line pace. The X-Men must join with their oldest nemesis, Magneto, to destroy the Master Mold and prevent the extermination of all mutantkind.

X-Men Red, Vol. 1 #3 - The Hate Machine, Part Three: Rising Storm
Importance Rating: 6.0 out of 10
poster
Penciler(s): Mahmud Asar
Writer(s): Tom Taylor
Release Date: April 2018
Variant Covers: A. Incentive Travis Charest Headshot Variant Cover
B. Javier Garron Young Guns Variant
C. In-Hyuk Venom 30th Anniversary Variant
D. Gabriele Dell'Otto Variant
E. Second Print Variant
Trade Prints: X-Men Red Vol. 1: The Hate Machine
Fun Facts: None.
-
Comic Summary: In Delhi, Jean Grey’s team battles both a Sentinel and an anti-mutant mob, some of whom are strangely resistant to Jean’s telepathy. When Trinary witnesses Honey Badger being killed, she is angry enough to take over the Sentinel with her power. Luckily, thanks to her healing factor, the injury proves to be no big deal for Honey Badger. Trinary and Jean realize that the human attackers are running under a similar more complex version of the program the Sentinel has. In order to get out without hurting anyone, Trinary has the Sentinel fly them away, towards Wakanda. However, in the meantime, Cassandra Nova has snuck into the X-mansion, killed a sensitive boy named Kyle who noticed her and infected Storm with the programming. Storm then faces Jean’s team over Wakanda, ready to kill them. In a town in Louisiana, Gambit interferes when an anti-mutant rally tries to kill a winged mutant girl named Kara, who faces them. Unfortunately, Cara is shot and killed by one of the mob members.

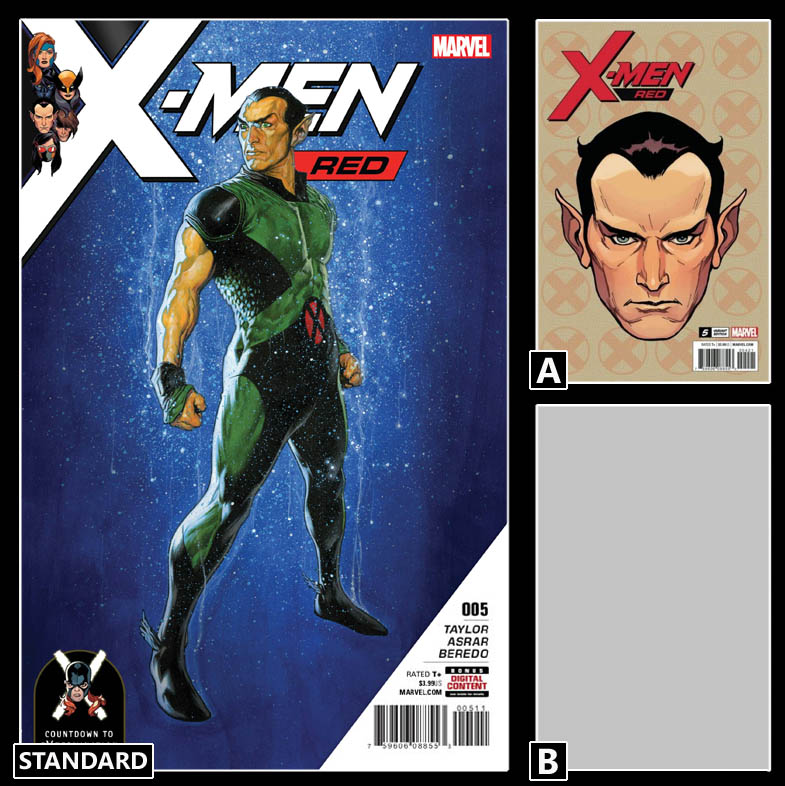
X-Men Red, Vol. 1 #5 - The Hate Machine, Part Five: The Truth
Importance Rating: 4.0 out of 10
poster
Penciler(s): Mahmud Asar
Writer(s): Tom Taylor
Release Date: June 2018
Variant Covers: A. Incentive Travis Charest Headshot Variant
Trade Prints: X-Men Red Vol. 1: The Hate Machine
Fun Facts: None.
-
Comic Summary: MUTANT HATE IS AT AN ALL-TIME HIGH... • ...and Jean Grey is caught right in the middle! • CASSANDRA NOVA's plan is finally revealed....but to devastating consequences. • And just because JEAN GREY's team finally knows what's going on, doesn't mean they can actually stop it. • Someone close to Jean is about to become Nova's latest pawn...but who? And why?

X-Men Red, Vol. 1 #6 - The Hate Machine, Part Six: Learn to Hate
Importance Rating: 4.0 out of 10
poster
Penciler(s): Mahmud Asar
Writer(s): Tom Taylor
Release Date: July 2018
Variant Covers: A. Incentive Travis Charest Headshot Variant
Trade Prints: X-Men Red Vol. 2: Waging Peace
Fun Facts: None.
-
Comic Summary: From deep beneath the ocean, Jean Grey's X-Men watch as waves of anti-mutant hatred wash over the world! • Can the X-Men quell the tide? Or will they be swept away in its wake?

X-Men Red, Vol. 1 #7 - The Hate Machine, Part Seven: Atlantis Smashed
Importance Rating: 4.0 out of 10
poster
Penciler(s): Mahmud Asar
Writer(s): Tom Taylor
Release Date: August 2018
Variant Covers: A. Incentive Travis Charest Headshot Variant
Trade Prints: X-Men Red Vol. 2: Waging Peace
Fun Facts: None.
-
Comic Summary: Attack on Atlantis! One of the X-Men’s greatest foes comes calling on the undersea kingdom, determined to bring about their end!

X-Men Red, Vol. 1 #8 - The Hate Machine, Part Eight: Global Hatred
Importance Rating: 5.0 out of 10
poster
Penciler(s): Mahmud Asar
Writer(s): Tom Taylor
Release Date: September 2018
Variant Covers: A. Incentive Travis Charest Headshot Variant
B. Jamal Campbell Cosmic Ghost Rider Variant
Trade Prints: X-Men Red Vol. 2: Waging Peace
Fun Facts: None.
-
Comic Summary: In the wake of an unprecedented assault on Atlantis, the X-Men must react and recover...while at the mercy of a world that grows more hostile to mutants every day, and a foe who is determined to keep it that way!

X-Men Red, Vol. 1 #9 - The Hate Machine, Part Nine: Grey Vs. Grey
Importance Rating: 5.0 out of 10
poster
Penciler(s): Roge Antonia
Writer(s): Tom Taylor
Release Date: October 2018
Variant Covers: A. Incentive Travis Charest Headshot Variant
B. Jamal Campbell Cosmic Ghost Rider Variant
Trade Prints: X-Men Red Vol. 2: Waging Peace
Fun Facts: None.
-
Comic Summary: Following the shocking events of X-MEN RED #8, it's time for Jean to finally confront her demon head-on. • Jean Grey and Cassandra Nova... The showdown begins here!

X-Men Red, Vol. 1 #10 - The Hate Machine, Part Ten: Mutant Nation War
Importance Rating: 5.0 out of 10
poster
Penciler(s): Roge Antonia
Writer(s): Tom Taylor
Release Date: October 2018
Variant Covers: A. Maxx Lim Battle Lines Variant
Trade Prints: X-Men Red Vol. 2: Waging Peace
Fun Facts: None.
-
Comic Summary: In the aftermath of a showdown between Jean Grey and Cassandra Nova, the rules have changed - and the battle is nowhere near over! It's all hands on deck as the building wave of hatred against mutants crashes down on the X-Men!

X-Men Red, Vol. 1 #11 - The Hate Machine, Part Eleven: Waging Peace
Importance Rating: 5.0 out of 10
poster
Penciler(s): Roge Antonia
Writer(s): Tom Taylor
Release Date: December 2018
Variant Covers: None.
Trade Prints: X-Men Red Vol. 2: Waging Peace
Fun Facts: None.
-
Comic Summary: The X-Men have battled valiantly against their powerful psychic foe, Cassandra Nova, since the moment she framed Jean Grey for murder on the world stage. They have been hunted. They have been hated. And now...they can fight no more.

X-Men Red, Vol. 1 Annual #1 - Untitled
Importance Rating: 6.0 out of 10
poster
Penciler(s): Mahmud Asrar
Writer(s): Tom Taylor
Release Date: July 2018
Variant Covers: None.
Trade Prints: None.
Fun Facts: Gambit only appears on the main cover of the comic. Not in the storyline. Only the main cover is shown.
-
Comic Summary: The X-Men welcome back the resurrected Jean Grey and both verbally and telepathically catch her up on everything she’s missed. She introduces herself to Old Man Logan. Afterwards, Nightcrawler takes her to the mansion at Central Park, as everything gets to be too much for her, and they have a confrontation with a racist youth. Afterwards, Jean looks up her daughter Rachel and the two take flight together exchanging thoughts. On Jean’s insistence, they visit Laura Kinney. Laura is stoic about Jean’s visit, while her clone sister Gabby fangirls Jean. Jean asks Rachel and Laura to accompany her to New Attilan, where she confronts Black Bolt over his role in Cyclops’ death. As she contacts him telepathically, Black Bolt is able to apologize. Later, Jean stands at Cyclops’ grave and vows she will change the world. She is unaware that the evil Cassandra Nova secretly takes over Rachel’s mind…

X-Terminators, Volume 2 #4 - This Is Your Favorite Book Now, Isn't It? Be Honest.
Importance Rating: 2.0 out of 10
poster
Penciler(s): Carlos Gomez-Moreno
Writer(s): Leah Williams
Release Date: Feburuary 2023
Variant Covers: A. Rickie Yagawa Variant
Trade Prints: X-Terminators
Fun Facts: None.
-
Comic Summary: SEXY COSPLAY OF DEATH! It's not the clothes that make the badass, it's the asses they kick! Dazzler, Boom-Boom, Jubilee and Wolverine might not be dressed for a beatdown, but that's not gonna stop them from handing them out! Make a joke about them - they dare you! Parental Advisory

X-Treme X-Men, Vol. 1 #4 - Dreamtime Serenade
Importance Rating: 8.0 out of 10
poster
Penciler(s): Salvador Larroca
Writer(s): Chris Claremont
Release Date: October 2001
Variant Covers: None.
Trade Prints: X-Treme X-Men Vol. 1: Destiny
Fun Facts: This is the first appearance of Gambit in the X-Treme X-Men series.
-
Comic Summary: From one of Gateway’s dreamtime visions, the X-Treme X-Men learn that Bishop is a descendant of Gateway. Also they see a vision of the future involving a „needle“, a special elevator that transports cargo from earth’s surface into the orbit. They look at a diary page, which pictures Gambit crucified with six pieces of jewelry and something growing out of his chest. Later the X-Men break into Destiny’s house only to find a crate with goodies prepared for them. One box looks like holding a diary, but it has been stolen by Vargas. At the same time Gambit breaks into Vargas‘ castle, but is captured and defeated. Yet he charms his way out of the situation and is allowed to leave, on the way out he steals a big diamond, which Vargas notices, but pretends not to. Later Gambit checks on the X-Treme team and finding them to be alright, leaves before being spotted.
(Brief description courtesy of uncannyxmen.net)

X-Treme X-Men, Vol. 1 #5 - Deadline
Importance Rating: 6.5 out of 10
poster
Penciler(s): Salvador Larroca
Writer(s): Chris Claremont
Release Date: November 2001
Variant Covers: None.
Trade Prints: X-Treme X-Men Vol. 1: Destiny
Fun Facts: None.
-
Comic Summary: The X-Men have a team pow-wow to decipher one of Destiny’s diaries. Through one of Sage’s fantastic inventions they learn what little they can about the book’s contents, including predictions of current catastrophic events. The X-Men also discover that Gambit’s wanted for the murder of crime lord called Viceroy. Bishop does some undercover work and the team investigates the scene of the crime. They find clues to the murder and learn that Viceroy has two children, heirs to his criminal empire. Storm decides to locate them. Even though most of the evidence points to Gambit’s guilt, Rogue believes in his innocence. Since her teammates believe that Gambit could indeed be guilty, Rogue leaves them in anger to find clues on her own. She heads to Chinatown, where men are planning to kill Viceroy’s children and eliminate heirs to the criminal throne. Rogue finds Gambit in a restaurant. Julius Gow, the restaurant’s owner, has his thugs attack the two of them and their powers are negated during the fight, so they seek shelter. When someone kills Gow and frames Gambit, Gow’s grandson the Red Lotus mistakes Rogue and Gambit for murderers. He defeats them both, leaving them in dire straits.
(Brief description courtesy of uncannyxmen.net)

X-Treme X-Men, Vol. 1 #6 - Paradise Lost
Importance Rating: 6.0 out of 10
poster
Penciler(s): Salvador Larroca
Writer(s): Chris Claremont
Release Date: December 2001
Variant Covers: None.
Trade Prints: X-Treme X-Men Vol. 1: Destiny
Fun Facts: Title Logic: Paradise Lost is an epic poem in blank verse by the 17th-century English poet John Milton. It was originally published in 1667 in ten books, with a total of over ten thousand individual lines of verse.
-
Comic Summary: While Sage monitors their activities, the X-Treme team continues their investigation into the death of Miles Warbeck, otherwise known as Viceroy. Bishop delves into the nature of his killing, Rogue tries to clear the prime suspect, and Storm and Thunderbird protect the children of the deceased. Bishop hits a dead end when autopsy reports reveal nothing about the real killer. When he learns about the shooting death of another mob boss, Bishops heads toward the scene of the new crime. Rogue and Gambit are captured and tortured by the Examiner while Red Lotus watches. Despite their pleas of innocence, the Examiner believes they were responsible for the death of even another crime boss, one of the Examiner’s associates. Rogue and Gambit manage to free themselves, but the Examiner escapes punishment. Red Lotus starts to believe that they had nothing to do with any murders, but he still treats the X-Men harshly, forcing Rogue to knock him out. Rogue and Gambit leave to inform their teammates about their adventure, taking the unconscious Red Lotus with them. Storm and Thunderbird locate Viceroy’s children, the Cameron siblings, but evil forces are close behind. Criminal gangs want to seek and destroy the Camerons and eliminate any heirs to Viceroy’s empire. Sage becomes a target as well when her old allies from the Hellfire Club reenter her life with a vengeance.
(Brief description courtesy of uncannyxmen.net)

X-Treme X-Men, Vol. 1 #7 - Getting Even!
Importance Rating: 5.0 out of 10
poster
Penciler(s): Salvador Larroca
Writer(s): Chris Claremont
Release Date: January 2002
Variant Covers: None.
Trade Prints: X-Treme X-Men Vol. 1: Destiny
Fun Facts: None.
-
Comic Summary: Storm and Thunderbird save the Camerons’ lives by defeating assassins and Heather Cameron reveals herself as Lifeguard, a mutant with mysterious power. The Camerons learn the truth about Viceroy and their blood ties to the local criminal underworld. They decide to help the X-Men put an end to the death and destruction. While investigating another murder, Bishop meets an inspector and the two of them join forces to get to the bottom of this mess. Sebastian Shaw and Lady Mastermind imprison Sage within an impressive illusion, intending to brainwash her back into the Hellfire Club. Rogue, Gambit, and Red Lotus return from their adventure, but Shaw and Lady Mastermind surprise them. The villains capture Rogue and force Gambit and Red Lotus to flee. Along with Sage, Shaw plans to brainwash Rogue into helping him become the leader of Australian crime. Once they’ve reached safety, Gambit and Red Lotus vow to save their friends and stop Shaw.
(Brief description courtesy of uncannyxmen.net)

X-Treme X-Men, Vol. 1 #8 - Boomerang
Importance Rating: 8.0 out of 10
poster
Penciler(s): Salvador Lorroca
Writer(s): Chris Claremont
Release Date: February 2002
Variant Covers: None.
Trade Prints: X-Treme X-Men Vol. 1: Destiny
Fun Facts: The issue is part of Marvel’s ‘Nuff Said silent month, meaning no one says ANYTHING in the entire comic.
-
Comic Summary: Various plot threads start tying together as the X-Treme X-Men unravel Sebastian Shaw’s plan to become king of the Australian underworld. Gambit searches for Rogue, but he still manages to make time for other damsels in distress on his way. Bishop and Teri Baltimore round up a large band of criminals. Rogue continues to serve as a manipulated weapon of destruction while Lady Mastermind uses her to savagely attack the rest of the X-Men. After nearly killing Storm, Rogue tries to destroy the rest of her teammates believing them to be the team’s enemy Vargas. Once Thunderbird defeats Lady Mastermind, her illusion weakens and Rogue regains her sense of reality just in time to stop herself from killing the people she cares about. Red Lotus fights Sebastian Shaw to a standstill in a valiant effort to rescue Sage, but it may take a miracle to save Sage’s mind, as she trapped in Lady Mastermind’s illusionary world.
(Brief description courtesy of uncannyxmen.net)

X-Treme X-Men, Vol. 1 #9 - Face the Music
Importance Rating: 4.5 out of 10
poster
Penciler(s): Salvador Lorroca
Writer(s): Chris Claremont
Release Date: March 2002
Variant Covers: None.
Trade Prints: X-Treme X-Men Vol. 1: Destiny
Fun Facts: None.
-
Comic Summary: Gambit and Red Lotus invade a meeting of the Triad’s ruling council. They present evidence that proves Gambit’s innocence as actually the Examiner is responsible for the murder of the Viceroy and he and Shaw had wanted to take over all of australia’s crime syndicates. In the X-Men’s appartment, Storm is visitied by an astral image of Jean Grey. From half a world away, Jean establishes contact and though their conversation would fill hours in the real world, it takes only seconds on the astral plane. Jean warns Storm of Cassandra Nova and that she might have infected the teams at the school with some strange illness, so they should consider the mansion quarantained. Also the diaries given to Xavier by Mystique are missing. Before departing Jean telekinetically braids Ororo’s hair. In the next room the catatonic Sage is still trapped in Lady Mastermind’s illusion. The others wonder what to do, as Sage suddenly reaches out to Heather, whose Lifeguard powers activate as she is pulled into the illusion as well. She experiences the scenarios that Tessa has to witness until being discovered by the illusionist. Lifeguard manifests new abilities for every new threat that Mastermind throws at her, but her power is limited to only reacting and she can’t hope to defeat her foe. Meanwhile Tessa is manipulated into pointing a weapon towards a version of herself, representing her allliance to the X-Men. Once she shoots it, she will be loyal to Shaw once more. Mastermind believes Lifeguard defeated after draining her body of water in a desert-scenario, yet her skin cracks to reveal Tesa underneath. Trained by Xavier himself, Sage managed to switch places in the illusion scenario, right under Mastermind’s nose. Still the bullet is fired against Heather who finds herself in the victim position, but Tessa, within Lifeguard’s armor, leaps in between and the bullet bounces off. Sage and Heather return to the real world, where Tessa apologizes for taking over Heather’s body and risking her life. Lady Mastermind took the bullet’s impact herself and is wheeled catatonic into a hospital. Bishop and policewoman Terri Baltimore try to arrest Sebastian Shaw, but can’t come up with enough evidence to support it.
(Brief description courtesy of uncannyxmen.net)

X-Treme X-Men, Vol. 1 #10 - Keys of the Kingdom
Importance Rating: 9.0 out of 10
poster
Penciler(s): Salvador Lorroca
Writer(s): Chris Claremont
Release Date: April 2002
Variant Covers: None.
Trade Prints: X-Treme X-Men Vol. 2: Invasion!
Fun Facts: The Madripoor gems, Storm’s ruby, a diamond Gambit stole from Vargas in X-Treme X-Men #4, another stone he got from the Viceroy’s appartment, and three more that Shaitan had already aquired, were added to Remy's mutant ability to amplify the power enough to create a portal. This event was fortold in Destiny's diary.
-
Comic Summary: While the X-Men and their new-found friends are resting in their civilian clothes, Gambit asks Storm for possession of the ruby she wears in her costume's choker. Sage surprises Gambit by identifying Storm's family heirloom as part of a collection of ancient gemstones called the Madripoor Set. As Storm tries to explain that she cannot give up her mother's present the X-Men are attacked by a hulking creature called Shaitan. Gambit and Lifeguard, under Storm's orders, attempt to escape with the ruby but are attacked by Shaitan who teleports them all away. Desperate to follow and rescue their abducted friends, the X-Men allow Sage to use her abilities to unlock the latent powers of Davis Cameron. He manifests the ability to access a Warp Wave teleportation power, and Davis takes the team to Madripoor, where they are greeted on Madripoor by its current ruling princess, Viper. She leads the X-Men to a temple where Shaitan has Gambit tied to an altar surrounded by the gems of the Madripoor Collection. The X-Men attack Shaitan, but not before he successfully activates the gems and, using Gambit's energy powers, opens a portal from which emerges an immense red energy-laced tower. Also emerging from the portal are alien combat troops. The X-Men rescue Lifegurad and capture the troop leader before, at the behest of the still captive Gambit, they withdraw. After the X-Men have left, a new portal opens and more troops emerge. The new troop leader informs his men that the reports are correct and that their leader has been captured. After their instruments locate their leader they will rescue him and if any harm has become their Lord, then this new world will pay the price.
(Brief description courtesy of uncannyxmen.net)

X-Treme X-Men, Vol. 1 #11 - Beachhead
Importance Rating: 4.5 out of 10
poster
Penciler(s): Salvador Lorroca
Writer(s): Chris Claremont
Release Date: May 2002
Variant Covers: None.
Trade Prints: X-Treme X-Men Vol. 2: Invasion!
Fun Facts: None.
.
-
Comic Summary: Shaitan wants to find Khan, his missing leader, and asks Gambit, who is used to empower the strange tower to tell him about the X-Men. Yet Gambit refuses to talk. Meanwhile in the U.S. the President’s National Staff and the Avengers analyze the tower and the forcefield. It goes up 22,600 miles into the atmosphere and can be used as an elevator to transports cargo and men. Within the next fifty hours it will become fully solid. Madripoor‘s Air Force is being attacked by the invaders aircraft’s and the X-men try to help them best as they can with Rogue, Thunderbird and Bishop shooting aircrafts out of the sky, and Lifeguard catching both human soldiers and alien invaders as prisoners alike, though minutes later, the Viper executes the Alien Invaders that the X-Men had just captured, except for Khan, who Storm jumps on to protect him from the bullets. Rogue disarms the Viper and the X-Men escape when an alien aircraft is spotted trying to find their missing soldiers. Storm convinces Khan that not all of them think like the Viper and that she has the power to force him along, but wouldn’t want to use it. Shaitan and the alien troops find their executed men and they angrily kill many of Madripoor’s army in revenge. Meanwhile the X-men have made it to one of Viper’s hideouts where they analyze their situation. Shaitan finds the X-Men just as Khan thanks Storm for saving him. Recognizing that he is only after Khan, Storm decides that it’s better to split up. She places Bishop in charge and wants to take Khan elsewhere, but Viper attacks Storm from behind while the rest of the X-Men escape. Viper wants to finish her earlier execution and attacks Khan, but is defeated by him. Khan orders Shaitan to call a medivac for Storm because he wants to save her to become his Queen.
(Brief description courtesy of uncannyxmen.net)

X-Treme X-Men, Vol. 1 #13 - Strikeback
Importance Rating: 4.0 out of 10
poster
Penciler(s): Salvador Lorroca
Writer(s): Chris Claremont
Release Date: July 2002
Variant Covers: None.
Trade Prints: X-Treme X-Men Vol. 2: Invasion!
Fun Facts: None.
-
Comic Summary: Before the X-Men leave to go to the transport, Sage and Rogue discuss their future plans. After Sage jump-starts Rogue's mutant powers, Rogue and Slipstream use them to destroy much of Khan's army on Earth. In an apartment building, Vargas, with his statue of Psylocke, watches Rogue fight the army and talks to himself about their need to kill Rogue. Elsewhere, the other four X-Men sneak past Gambit and his guards and onto Khan's space station. There, Lifeguard goes through a metamorphosis and transforms into more of an alien being. Using her own powers, Sage is able to hack into Khan's computers and find out where Storm is being held prisoner. Sage also finds information on what occurs when Khan actually conquers each dimension. In Khan's fortress, Storm is in her prison quarters being pampered by her attendants and talking to Khan about the X-Men. Khan leaves and later talks to Shaitan about their plans on capturing the X-Men and Khan's weakness for Storm.
(Brief description courtesy of uncannyxmen.net)

X-Treme X-Men, Vol. 1 #15 - Final Gambit
Importance Rating: 6.5 out of 10
poster
Penciler(s): Salvador Larroca
Writer(s): Chris Claremont
Release Date: September 2002
Variant Covers: None.
Trade Prints: X-Treme X-Men Vol. 2: Invasion!
Fun Facts: None.
-
Comic Summary: In the damage Control Headquarters a few of Khan’s scientists discuss an anomaly they have detected on the station. Khan walks in and hears their discussion only to be distracted by his own thoughts of Storm. He thinks the anomalies are Storm’s doing, but his Harem tells him that her injuries prevent her from fully using her powers. Once that the transmission is over, the harem girls attack Storm, as they don’t want her to become queen. Despite her injuries, Storm takes out the entire Harem with hand-to-hand combat and creative use of her diminished powers. Sage makes her way to a control room and she causes security breaches all over the tower, making it look as if there were hundreds of X-Men attacking it. She then goes to aid Storm and escorts her through the air vent tunnels to safety. Storm however has other plans, she has discovered the buildings weakness – a large supply of water at the top of the tower, used as coolant for the machinery. At the same time, Lifeguard, Bishop, and Thunderbird, posing as Royal Shi’Ar and consorts gain access to the Damage Control central. Once in they reveal themselves and force Khan’s staff to leave the room, while they continue to upload Sage’s scrambling data files. While all this goes on in space, on Earth Rogue faces off against Vargas, and his servants Thaiis and Thais. Finally Vargas reveals his motives as he shows Rogue a page of Destiny’s diary that has Rogue stabbing Vargas with his own sword. Rogue distracts him with Cyclops’s optic blast, and Slipstream teleports in, plucks Vargas from the area and takes him above the temple that Gambit is trapped in. Yet Slipstream’s inexperience costs him as Vargas manages to slice across his back with his sword, almost killing him. Vargas crashes into the temple where quickly disperses the entire troop of Khan’s army, and plans to take on Gambit, who finally releases a charged piece of rock he had been hiding in his fist. Outside Rogue saves Slipstream from drowning in the swamps as suddenly the temple collapses, apparently killing Gambit, though saving the universe from Khan’s invasion.
(Brief description courtesy of uncannyxmen.net)

X-Treme X-Men, Vol. 1 #16 - While I Live, You Don't Die
Importance Rating: 9.0 out of 10
poster
Penciler(s): Salvador Larroca
Writer(s): Chris Claremont
Release Date: September 2002
Variant Covers: None.
Trade Prints: X-Treme X-Men Vol. 2: Invasion!
Fun Facts: None.
-
Comic Summary: Rogue flies into the collapsing temple, looking for her lover Gambit. Despite him still being trapped by the tight red beam and it’s forcefield, he caused the building‘s destruction, hoping that his death would close the portal and save the world. Rogue tries to free him, but ends up trapped by the forcefield as well, as she has absorbed Gambit’s powers in the past, which allows the beam to use her as a conduit as well. Still disguised as Storm, Shaitan investigates reports of a single swordsman killing many if the alien invaders – it is Vargas. Thinking Shaitan to be the X-Men’s leader, he battles and easily defeats “her“. Vargas then approaches the defenseless couple, and rams his sword straight through both Rogue and Gambit. Up above in the destabilizing tower, Storm and Sage are trying to sabotage the water supply system, when suddenly Khan shows up. He easily defeats Sage but him and Storm are too much of an even match. While they are busy battling each other Bishop finishes the job the two X-Men started and blasts the pipes of the water supply. Both Storm and Khan get caught in the floodwave and are washed away. As they fall Storm grabs a hold of a ledge saving herself and Khan from a long and probably fatal fall. Khan tries to talk her into reconsidering his offer but she denies him leaving her and Bishop to fall the rest of the way down through the tower. Lifeguard though saves the two would be heroes and she flies them to the portal back to earth, where they meet with Sage and Thunderbird. Khan has different plans though, he separates his Warship from the towers head, planning to navigate it through the portal, intending to conquer the X-Men’s world even without his tower. Yet, the five X-Men, now on the other side of the portal back on Earth, quickly fire all their powers toward the ship to keep the ship from fully making the trip. It is still stuck in the portal as it implodes, apparently killing Khan and his troops. Sadly the X-Men have no time for celebration as they find the injured Slipstream, and the lifeless forms of Rogue and Gambit.
(Brief description courtesy of uncannyxmen.net)

X-Treme X-Men, Vol. 1 #17 - La Suerte De Matar!
Importance Rating: 7.5 out of 10
poster
Penciler(s): Salvador Larroca
Writer(s): Chris Claremont
Release Date: Main Storyline Series
Variant Covers: None.
Trade Prints: X-Treme X-Men Vol. 2: Invasion!
Fun Facts: Title Logic: “La Suerte de Matar!“ is a bullfighting term that means preparing the bull for its death and of killing it by the use of the sword.
-
Comic Summary: In the temple in Madripoor, the X-Men mourn the apparent loss of Rogue and Gambit who lie in front of them, with Vargas‘ sword skewering both of their bodies. Yet they are not dead as Rogue speaks up, requesting their help. Bishop removes the sword and him and the X-Men tend to their friends injuries as best as they can. Bishop tries to calm Rogue down but her powers go out of control knocking him back with Cyclops’ optic blast. She transforms next into Colossus, then the Beast, the Hulk, and finally into Wolverine. She uses his healing factor to help in her recovery. Also manifesting both Psylocke and Destiny, she decides to go after Vargas, something which she claims to have to do alone, despite the other X-Men’s protests. As she leaves so does Lifeguard to go get medical help for the other wounded X-Men. Sage is shocked that the solution to their diary quest was right before them, as Rogue’s imprint of Destiny should have all the knowledge they need. Elsewhere in the city, Vargas carries his price, Storm’s body (actually Shaitan). He finds his two servants and they return to base, where Rogue, posing as the Psylocke statue is waiting for them. She attacks and knocks Vargas out of the building, but suddenly looses her extra powers fade. Left with only her basic powers and her skills in hand to hand combat, she defeats both Thais and Thaiis, before Vargas returns. At first Vargas and Rogue seem evenly matched, but her wounds reopen, and the swordsman gains the upper hand. The fight is observed by Shanna Cho and her cameraman, who keeps recording. Rogue finally imprints Vargas and is now able to match him blow for blow. Suddenly she comes to the realization that the diaries are a trap, that they leave no room for spontaneity or hope. Rogue prepares to strike Vargas with his own blade, but it is unclear wether she kills him or not, as right then the camera’s battery runs out of power and the end of the fight is not recorded. Elsewhere, Lifeguard attends to her brother’s injuries and he awakes but sadly he sees her Shi’Ar appearance and refuses to believe that this alien is his sister. Madripoor’s ruling prince, the Viper, comes with the medical supplies to help the X-Men. Unluckily for her, Storm remembers that she nearly killed her and takes her vengeance by shooting her with one of Sage’s guns. Luckily Viper was wearing Kevlar which stopped the bullets fatal blow. Still, Sage threatens Viper to never harm her friends again and with a blade to her throat, Viper is forced to agree to her demands. Rogue returns from her encounter with Vargas, barely able to stand. She collapses on Gambit’s chest as the rest of the X-Men look on.
(Brief description courtesy of uncannyxmen.net)

X-Treme X-Men, Vol. 1 #18 - Day of the Dead
Importance Rating: 8.0 out of 10
poster
Penciler(s): Salvador Larroca
Writer(s): Chris Claremont
Release Date: November 2002
Variant Covers: None.
Trade Prints: X-Treme X-Men Vol. 2: Invasion!
Fun Facts: Title Logic: Day of the Dead (Spanish: Día de los Muertos) is a holiday celebrated by many in Mexico and by some Mexican Americans living in the United States and Canada. The holiday focuses on gatherings of family and friends to pray for and remember friends and family members who have died.

-
Comic Summary: Shanna Cho reports to the world that the X-Men were able to save them from an attack by an alien invasion, but sadly some of their own were hurt in the battle. Captain America, Iron Man, and the Thing are there to help the wounded X-Men though, as they carry the more critically wounded into a M.A.S.H. unit. The Doctors work frantically trying to save the wounded heroes but Storm, Rogue and Gambit seem far-gone. Rogue thinks that her healing factor should save her, but has to discover that she is completely powerless. Seeing Storm’s spirit leave her body, Rogue panics and tries to follow her, only to slip into the astral plane where she is welcomed by Jean Grey. Phoenix informs her of her plan to save Storm, while Rogue needs to help Gambit who has now ascended into his own spiritual world. Back with the living in the M.A.S.H. unit the Beast, Jean, Nightcrawler, and Wolverine have teleported in to help. The X-Men set out to help their friends. Nightcrawler tries to persuade Davis Cameron that just because Heather may look different does not make her a monster, while Wolverine and Jean calm Heather down from a near Shi’Ar berserker rage. The Beast has brought a new set of mechanical fingers to try and save Gambit, since he cannot use his now bulky fingers for such delicate surgery. Jean enters the astral plane and heads for Storm’s spirit world, where she is surprised by the beauty of Storm’s soul. Turns out that Ororo deliberately took the chance to meet her deceased parents in the afterlife, before she returns to her body, after she introduced her best friend Jean to them. At the same time, Rogue heads to Gambit‘s spirit world, where she tries to convince him not to die. Gambit thinks that it is a good day to die as he just saved the world, and he is willing to step into the light. Yet Rogue drags Gambit’s astral form back to the land of the living. Later, as the healthy check on the sick Heather finds that her brother has run away and he does not want her to follow. While Wolverine informs Rogue that Gambit may never treat her the same for taking away his chance at peace.
(Brief description courtesy of uncannyxmen.net)

X-Treme X-Men, Vol. 1 #19 - Passages
Importance Rating: 6.0 out of 10
poster
Penciler(s): Salvador Larroca
Writer(s): Chris Claremont
Release Date: December 2002
Variant Covers: None.
Trade Prints: X-Treme X-Men Vol. 3: Schism
Fun Facts: None.
-
Comic Summary: The X-Treme team, plus a few members from the other X-Men teams, is having a party in celebration of their recent victory over Khan's forces. Jean and Hank baked a cake to surprise their friends, which it does. Jean sits down at the table and before too may of them can begin eating she asks the X-Treme team if they are willing to move back to the Institute to become teachers. The team does not answer her question, but only ponders if they should or not. As they sit around the table, each one talking about different subjects, plus teasing Storm because of her recent abduction, the mood is festive. The mood does not stay festive for long though because Kitty's recent troubles over her father's death surface, causing her to leave the table. After talking for a moment, each X-Man goes in their separate ways exploring Rogue's recently acquired mansion. Beast helps Gambit in the Garden as he tests Gambit's recent injuries to see if he is getting better, which Beast finds that Gambit has greatly improved. In another room of the mansion, Bishop delivers a cake to Sage and they discuss whether they should take Jean up on her offer or not. Still in yet another room, Storm and Kitty argue over Kitty's recent behavior until Kitty eventually breaks down. The two embrace and Storm tries to comfort Kitty. Rogue approaches Gambit, who is still in the garden, and she tries to comfort him over his recent revelation that he has also lost his power along with hers. The two decide on not leaving one another, as they want to take their relationship day by day and see how it all turns out. The next morning, as Jean and Storm finish doing the dishes since they stayed up all night talking, Kitty says her good-byes and leaves to head back to college. The two friends are left alone in the kitchen when they are startled by a noise outside. As they investigate, they see a motorcycle and Gambit and Rogue inform their friends that they are planning on leaving for a while to explore their relationship further. Neal and Heather also decide to leave together to hunt down Heather's brother and to make sure he is all right. Jean watches the four of them go and is shocked to see how their day has begun. Jean decides that it is their time to leave and Logan offers to stay behind to help Storm in her recuperation and they agree. As the other members leave, the three members of the X-Treme team that are left discuss their future plans.
(Brief description courtesy of uncannyxmen.net)

X-Treme X-Men, Vol. 1 #24 - Prodigal
Importance Rating: 1.5 out of 10
poster
Penciler(s): Salvador Larroca
Writer(s): Chris Claremont
Release Date: June 2003
Variant Covers: None.
Trade Prints: X-Treme X-Men Vol. 6: Intifada
Fun Facts: Gambit is not really in the comic storyline, he just appears on Cannonball's laptop.
-
Comic Summary: Sam is carrying a woman from the wreckage in the Channel Tunnel, just outside in Paris. He was just in a battle with Weapon XII, where he lost a friend and hundreds of people lost their lives. That was yesterday, but today he’s trying to make right what another mutant made wrong. After setting down an injured woman, Xavier contacts Sam and asks him to meet up with the other X-Corp members so they can leave. Sam declines, choosing to stay till all the bodies are accounted for. During his aid work, Sam befriends a group called Sappers after saving one of their own from a cave in. Sam enjoys a few laughs with them and decides to help them till their work is finished. Later that day, they are moving debris when Sam hears a noise from a pile of rubble. After searching through the pile he finds survivors and becomes a hero to the workers in the tunnel. After their search is over, the Sappers reveal that they know about Sam’s secret powers, but they like him just the way he is. Flying off and giving the Sappers a show of his powers, Sam goes to visit the grave where they buried his teammate, Darkstar. While he’s there, Xavier gives him a note that reads the location of his one time girlfriend, Lila Cheney. Sam goes to visit her and the two decide to runaway together for a while. Months later, they reappear on Earth and Sam gets a visit from Storm. She offers him a chance to join the X-Treme team and he accepts.
(Brief description courtesy of uncannyxmen.net)

X-Treme X-Men, Vol. 1 #31 - Intifada, Part 1 - This is the Way the World Ends
Importance Rating: 1.0 out of 10
poster
Penciler(s): Igor Kordey
Writer(s): Chris Claremont
Release Date: November 2003
Variant Covers: None.
Trade Prints: X-Treme X-Men Vol. 6: Intifada
Fun Facts: Gambit is not in the storyline himself. He is on the cover and is spoke about among other characters.
-
Comic Summary: A family drives down a highway in Los Angeles when they are distracted by a group of rebel mutants passing by them. Taking his eyes off the road, the father is too late to save his family as they crash off the side of the cliff, leaving only the daughter alive. Hours later, Marie, the daughter, is rushed to the hospital, where she overhears the disturbing news that the gang of mutants will most likely go unpunished. Elsewhere, a group of Guerrilla fighters, in Africa, gun down two relief workers, only to be killed themselves by a mutant claiming to be a survivor from Genosha. While these events transpire, in Texas, dignitaries from across the globe meet to discuss the ever-growing threat of the mutant population. It just so happens that Storm and Gambit are at this same meeting, in disguise, and they are troubled by what they hear coming from people they considered allies and confidants. Back in Los Angeles, Bishop intercedes in a police fight, where a young mutant boy dies because of an overdose of the drug called Rave. Behind the scene and unknown to Bishop, the only reason the local police did not arrest him was due to the interceding of Roberto Dacosta and his power over the X-Corp Branch in Los Angeles. Bishop and Sage, who joins him towards the end of the battle, leave the crime scene and happen upon Rogue, who is now calling herself Anna and working in a local garage. The three of them later go to a concert, where they meet Sam Guthrie, who is there to hear Lila Cheney’s concert. During the concert, Rogue and Sage notice a suspicious looking individual and the two of them find that the person is carrying a bomb, intent on murdering mutants.
(Brief description courtesy of uncannyxmen.net)

X-Treme X-Men, Vol. 1 #32 - Intifada, Part 2 - W.M.D. (Weapons of Mass Destruction)
Importance Rating: 6.0 out of 10
poster
Penciler(s): Igor Kordey
Writer(s): Chris Claremont
Release Date: December 2003
Variant Covers: None.
Trade Prints: X-Treme X-Men Vol. 6: Intifada
Fun Facts: Rare ocassion to see Storm and Gambit sharing a kiss.
-
Comic Summary: Marie D’Ancanto, a disturbed young woman, rushes into the Mermaid Club but, to her anguish, Sam Guthrie and Anna’s teamwork stops the rampage she planned on causing. After a brief fight in the air, the two mutants and Marie land on the ground and the team faces a tough decision: either give Marie to the authorities or question her themselves. They decide on questioning her themselves and Anna takes Marie to her beach house. Elsewhere, in Texas, a tremendous tornado is headed straight for the Presidential Ranch but, thanks to Storm’s intervention, the dignitaries are saved a horrific night. Storm lands near the river she and Gambit are camped near and Remy helps her recover from the strain of her fight. Interrupting the two friends’ intimate moment, a group of officials approach them. Valerie Cooper and Colonel Vazhin question their two mutant allies about the questionable dispersion of the tornado. Back in Valle Soleada, Anna finishes her interrogation with Marie, with only more questions than answers.
(Brief description courtesy of uncannyxmen.net)

X-Treme X-Men, Vol. 1 #33 - Intifada, Part 3 - Manifest Destiny
Importance Rating: 3.0 out of 10
poster
Penciler(s): Igor Kordey
Writer(s): Chris Claremont
Release Date: December 2003
Variant Covers: None.
Trade Prints: X-Treme X-Men Vol. 6: Intifada
Fun Facts: None.
-
Comic Summary: A group of protesters converge on the Valle Soleada courthouse. The reason is because of the trial that is taking place inside, the Mermaid Club debacle and the person that caused it Marie D’Ancanto. Inside the beach house of Rogue’s, she is having a nightmare and, in the dream, she kills all her teammates after transforming into Mystique. After awaking, she sees that Sam and Lila have ported back to her house. Later in the morning, a man named Jarod Malloy visits her house. Sam and Anna pose as husband and wife and they listen as Jarod tries to talk Anna into selling her house. After Jarod leaves, Sage follows after him and Bishop ports away with Lila to find an ally in New York that owes the X-Treme team a favor. Rogue and Sam head off to visit the gang of mutants that forced the D’Ancanto family’s car off the cliff. After arriving on the beach, Rogue and Sam show off their strength. During their display, Sam calls Sage to get an update on her surveillance and she informs Sam that the lawyer has arrived at the X-Corp branch in Los Angeles. Unknown to Sage, a set of eyes follow her and those eyes belong to Elias Bogan.
(Brief description courtesy of uncannyxmen.net)

X-Treme X-Men, Vol. 1 #34 - Intifada, Part 4 - Crossed Swords
Importance Rating: 3.5 out of 10
poster
Penciler(s): Igor Kordey
Writer(s): Chris Claremont
Release Date: Main Storyline Series
Variant Covers: None.
Trade Prints: X-Treme X-Men Vol. 6: Intifada
Fun Facts: None.
-
Comic Summary: am awaits the arrival of a close friend of his, Amara Aquilla, at the Los Angeles International Airport. After meeting up, Sam blasts the two of them, via his mutant powers, to the X-Corp Headquarters in Los Angeles. Once there, the two friends meet up with Roberto DaCosta, an old ally of theirs. After a brief reunion, questions are asked regarding recent events with no answer given. After a friendly argument, Roberto requests the presence of Sam at a gala he is throwing later on that night. Elsewhere, Rogue and Bishop watch as the D.A. loses a case against a handful of delinquent mutants involving the D’Ancanto “accident.” Upset, the two mutants meet up with Evangeline Whedon, who agrees to help them with the Marie D’Ancanto “terrorist” trial. At Rogue’s house that night, the team is attacked by Revenant but, thanks to the earlier planning of Rogue, she saves them. After their confrontation, Rogue follows Revenant back to her home base, the X-Corp’s Headquarters. At this point, it is the evening and Roberto’s gala is going full force, but a flying motorcycle and its driver, a woman named Rogue, are bent on answers interrupt it.
(Brief description courtesy of uncannyxmen.net)

X-Treme X-Men, Vol. 1 #35 - Intifada, Part 5 - Detante
Importance Rating: 3.5 out of 10
poster
Penciler(s): Igor Kordey
Writer(s): Chris Claremont
Release Date: January 2004
Variant Covers: None.
Trade Prints: X-Treme X-Men Vol. 6: Intifada
Fun Facts: None.
-
Comic Summary: Rogue has attacked Roberto DaCosta at his very house in Los Angeles, California. Roberto doesn’t come unguarded, though, and two mutants by the name of Stringfellow and Skitz easily take care of Cannonball and Rogue. After the fight, Sunspot sends his two allies into the atmosphere and they land near a beach, unconscious and un-composed. Sage is able to pick up the fight on her tech-glasses and she takes Evangeline Whedon to safety, as Bishop prepares to save his two friends. Elsewhere in Crawford, Texas, Gambit teaches Storm a lesson in humiliation, as he defeats her in hand-to-hand combat. After their practice, Colonel Vazhin meets them and congratulates her for her team getting an official authoritative status. He tells her that, in order for him to feel better about her leading this new official team, named the X-S-E, she must infiltrate a battle arena and put a stop to it. Back in California, the delinquent mutants sit around their house silently reveling in their victory, in court. A shadowy figure approaches them and offers them the drug “kick” to defeat the X-Treme team and they accept. The mutants go after the fallen Cannonball and Rogue but, luckily for them, Bishop is there to save them. Back at the X-Corp headquarters, Bobby and Amara find the secrets behind Jarod Malloy. After their finding, Bobby announces to the public his findings and apologies. This event helps Marie to be found not guilty. Anna and Marie go to the D’Ancanto grave and she apologizes to her parents for her dishonor.
(Brief description courtesy of uncannyxmen.net)

X-Treme X-Men, Vol. 1 #36 - Storm: The Arena - Challenger
Importance Rating: 3.0 out of 10
poster
Penciler(s): Igor Kordey
Writer(s): Chris Claremont
Release Date: February 2004
Variant Covers: None.
Trade Prints: X-Treme X-Men Vol. 7: Storm - The Arena
Fun Facts: None.
-
Comic Summary: Storm arrives in California with Gambit in tow. She returns him to his lover, Rogue, who in so many ways is ecstatic to see his return. After a brief discussion on their new role as world police enforcers and their title of X-Treme Sanctions Executives, Bishop is hit hard with the similarities of the future where he came from. Trying to ease his fears, Ororo explains that, as long as they try their best, the future is never truly known. With that said, Ororo flies off into the sky in search of Tullamore Voge in Tokyo. After her arrival, she meets up with Yukio and the two head towards a club called the Arena, where Vogue is believed to be involved. After their arrival, they meet up with a mysterious woman by the name of Masato and she guides them to a special area of the club. Shockingly enough, this place is a true arena, where mutants fight one another for survival. Watching the battle, Storm takes pity on one of the combatants and enters herself in the fray. In the midst of the battle, Ororo is able to gain the upper hand and, after it is all said and done, is declared the victor and new champion. Beginning to wonder, Storm realizes that the feeling of victory is glorious.
(Brief description courtesy of uncannyxmen.net)

X-Treme X-Men, Vol. 1 #38 - Storm: The Arena - Slave
Importance Rating: 1.5 out of 10
poster
Penciler(s): Igor Kordey
Writer(s): Chris Claremont
Release Date: February 2004
Variant Covers: None.
Trade Prints: X-Treme X-Men Vol. 7: Storm - The Arena
Fun Facts: None.
-
Comic Summary: In the Tokyo Arena, Storm and Callisto face off to see who will win the rightful title as Champion. The match seems to be one-sided and Callisto easily takes care of Storm. Surprisingly, instead of Callisto gloating, another character from Storm’s past enters the Arena. Her name is Masque and, although he was a male before, it still seems she/he can still cause the same damage. She quickly transforms Storm into a devilish creature but even still Storm is able to allow the others enough time to escape and hide at Lila Cheney’s safe house. Afterwards, Masque uses her newly acquired entourage to break Storm’s spirit in preparation of using her in the Arena. It seems to work, as, days later, Storm stands in the midst of the Tokyo Arena, preparing to battle an armored clad ninja. During the battle, the ninja’s helmet falls from off of her shoulders, revealing the fact that Yukio was the combatant all along. Storm strangely does not stop and silently begins to close in for the kill. Placing two Katana’s to Yukio’s neck, Storm changes her mind at the last second and allows Yukio to live. Masque’s entourage quickly removes Yukio from the Arena and Purge pays Storm back for her disobedience.
(Brief description courtesy of uncannyxmen.net)

X-Treme X-Men, Vol. 1 #40 - Prisoner Of Fire - Ambush!
Importance Rating: 5.5 out of 10
poster
Penciler(s): Igor Kordey
Writer(s): Chris Claremont
Release Date: March 2004
Variant Covers: None.
Trade Prints: X-Treme X-Men Vol. 8: Prisoner of Fire
Fun Facts: None.
-
Comic Summary: Gambit and Rogue walk down the beach to meet Sam and Lila at a clambake they are having. Rudely, Bishop runs by them interrupting a passionate kiss, but the lovers quickly get over their anger and continue. Inside the beach house of Rogue’s, Evangeline Whedon remarks about her concerns to Marie. Her worries are that both she and Sage will never find the puppet master that was controlling Jarod Malloy’s strings. Vange decides to fly off into the night sky to clear her head and Marie talks a while to Sage about her recent murder attempt. Amidst talking to Marie, Sage finds out a startling revelation about the demise of the Xavier Institute. Sage calls Storm over their high tech glasses to discuss their next move. Later that evening, Evangeline Whedon arrives at the clambake in her dragon form, carrying two passengers, Sunspot and Magma. Sam explains that he invited them, because he wanted the X-Men to continue as a family. Missing one of their members, thoughts travel to where Bishop could be? Bishop has run into some trouble along his jog and that trouble consists of Revenant and her cronies. Bishop fights hard and eventually takes them all out. Reveling in his victory, he is unaware of Elias Bogan behind him and he/she easily defeats Bishop.
(Brief description courtesy of uncannyxmen.net)

X-Treme X-Men, Vol. 1 #41 - Prisoner Of Fire - Past Lies
Importance Rating: 5.5 out of 10
poster
Penciler(s): Igor Kordey
Writer(s): Chris Claremont
Release Date: April 2004
Variant Covers: None.
Trade Prints: X-Treme X-Men Vol. 8: Prisoner of Fire
Fun Facts: None.
-
Comic Summary: In a dungeon hidden from prying eyes, save that of Bogan and his pets, the X-Man named Lucas Bishop is hung upside down and fed a drug called Rave. The drug makes Bishop go mad and also makes him susceptible to the mind manipulations of Elias’ pet telepath. She is easily able to sedate Bishop and remove Lucas’ psi-blocks that he has placed over his mind, due to years of training. Elsewhere, Anna and Remy discover the battle marks left on the sand by Bishop and Elias’ pets and they rush back to Anna’s home to inform the others. Once there, they are met by a hostile Sage, but the situation is quickly resolved, though the inside of the house is in total disarray. Just then, Sam and Amara arrive and are informed of the situation. Sam admits that Bishop’s plan to get himself captured was bad because it was kept a secret to everyone save Sage, but it was still a great plan. He goes on to inform the others that their new plan should be to split up the team into two groups, so that one could focus on stopping Bishop’s rampage and the other can take care of Elias’ pet telepath. Shockingly, Storm’s hologram interrupts them and she demands to know what is transpiring in California. After a brief rundown of the events, Sage tells the others about her past with Bogan and how Storm saved her from his cruel clutches. Later that evening, Storm and Sage have a moment alone to discuss their past and some of Sage’s worries about her time in the Hellfire Club, especially around the time of Mastermind’s creation of the Dark Phoenix.
(Brief description courtesy of uncannyxmen.net)

X-Treme X-Men, Vol. 1 #42 - Prisoner Of Fire - Eyes Of Fire
Importance Rating: 6.5 out of 10
poster
Penciler(s): Igor Kordey
Writer(s): Chris Claremont
Release Date: April 2004
Variant Covers: None.
Trade Prints: X-Treme X-Men Vol. 8: Prisoner of Fire
Fun Facts: None.
-
Comic Summary: The X-Treme team prepare for their upcoming battle, just as help arrives in the form of Sunspot, Skids and Magma. Cannonball goes over their plan and splits the teams up with Gambit, Sunspot, Skids and himself on one team, while Rogue, Magma and Sage are on the other. After a brief goodbye, Sam’s team heads to take on Bishop and his newfound allies. The team of X-Men, once atop an old army fort, is attacked by Bludgeon, Cudgel and Rolling Thunder, who they easily take care of after a brief confrontation. Next comes what Bishop calls the main event, where he single-handedly takes out all of his old teammates, minus one. That one is Remy LeBeau, who, after a brief battle, removes Bishop from combat by using his own booby-trap against him. The fight is quickly ended, however, when Elias’ pet telepath sneaks up on Gambit and uses her powers to nock him out cold. Elsewhere, as their battle ends, the other team flies over the sands of California to a destination known only to Sage. Vange, who is flying the X-Men to L.A., lands on a deserted stretch of highway, where they meet up with an ally from their past, Shadowcat.
(Brief description courtesy of uncannyxmen.net)

X-Treme X-Men, Vol. 1 #43 - Prisoner Of Fire - Shadow Of The Soul
Importance Rating: 6.0 out of 10
poster
Penciler(s): Igor Kordey
Writer(s): Chris Claremont
Release Date: May 2004
Variant Covers: None.
Trade Prints: X-Treme X-Men Vol. 8: Prisoner of Fire
Fun Facts: None.
-
Comic Summary: On the coastline of Valle Soleada, Sage and Magma figure out the best plan of attack against Bogan. A few feet away, Shadowcat and Rogue discuss their philosophy surrounding Xavier’s dream. Nearing the time of their attack, Sage calls them together and the quartet of women risk their lives in a desperate attempt to travel through the Earth’s mantle to reach Bogan’s lair. Finally arriving, the team is split from one another. Sage goes off in search of Bogan and Magma disappears, per Sage’s instructions, to an undisclosed place to be used as a last resort in stopping Bogan. Shadowcat and Rogue fight off Revenant and Manacle, only to be stopped in their tracks by the sudden appearance of a handful of their comrades under Bogan's control and fighting alongside the mysterious telepath and Bogan’s minions. Gambit only was conning Bogan, thankfully, and he uses his staff to trip most of the attackers up. Angered, the telepath vows vengeance upon them but, coming out of hiding himself, Bishop takes out the telepath. Elsewhere in the caverns, Sage nears her goal, only to be stopped by Magma, who is controlled by Bogan and intent on burning Sage to death.
(Brief description courtesy of uncannyxmen.net)

X-Treme X-Men, Vol. 1 #44 - Prisoner Of Fire - Liberation
Importance Rating: 4.0 out of 10
poster
Penciler(s): Igor Kordey
Writer(s): Chris Claremont
Release Date: May 2004
Variant Covers: None.
Trade Prints: X-Treme X-Men Vol. 8: Prisoner of Fire
Fun Facts: None.
-
Comic Summary: The mutant known as Sage travels through her memories, remembering her first encounter with her mentor, Charles Xavier. Elsewhere, though, her teammates fight off the mysterious telepath, but to no avail, each one of them passing out with her psychic attack. Awaking, they find themselves along side Sage. They see her murdering guerilla insurgents and realize why she keeps so many secrets. Bogan is with Sage, trying every step she takes to make her his pet. Thanks to the words of her friends, Sage is able to break free and they all awake in the catacombs of Bogan’s lair. Mysteriously, though, the telepath is gone. After rescuing Sage, Shadowcat and Rogue travel through a jewel to take on Bogan face-to-face. While in his dimension, they find the telepath and are able to break her free from Bogan’s control. Traveling back to the catacombs, the team realizes that the telepath was Rachel Summers, their former teammate and friend.
(Brief description courtesy of uncannyxmen.net)

X-Treme X-Men, Vol. 1 #45 - Prisoner of Fire, Conclusion - Hunting Bogan!
Importance Rating: 6.0 out of 10
poster
Penciler(s): Igor Kordey
Writer(s): Chris Claremont
Release Date: June 2004
Variant Covers: None.
Trade Prints: X-Treme X-Men Vol. 8: Prisoner of Fire
Fun Facts: None.
-
Comic Summary: Rogue’s Beach House is surprised by two new houseguests, Storm and Callisto. They arrive via Lila Cheney’s sentient house and startle both Vange and Marie. Shadowcat is there and greets the two women, debriefing them on the X-Men’s last couple of days with Bogan. Elsewhere, in the catacombs of Elias’ hideout, the other members of the X-Treme team search to no avail for Elias or his allies. Suddenly and without warning, Elias attacks. His attack is even felt in Valle Soleada, as Rachel Summers swiftly saves her friends at the Beach House by barricading them in Lila’s house. The others are not so lucky, as they are taken on a journey through their own thoughts, where each one has two face-off against one of their most evil desires. Each one, in their own way, defeats their inner demons. Amara, though, is the most unlucky, as she does not face off against Elias, but Selene, her archenemy, instead. Causing great mental stress, Selene is able to affect Amara’s physical world. Amara uses her powers, subconsciously, to send a lava flow through the catacombs, but, thanks to Cannonball and Bishop’s quick thinking, the team is saved. Above ground, Amara finally awakens to a shocking scene. A volcano now stands where the X-Corp building once did and now they have a lot of explaining to do.
(Brief description courtesy of uncannyxmen.net)

X-Treme X-Men, Vol. 1 #46 - One For My Lady… One More For The Road
Importance Rating: 6.5 out of 10
poster
Penciler(s): Igor Kordey
Writer(s): Chris Claremont
Release Date: June 2004
Variant Covers: None.
Trade Prints: X-Treme X-Men Vol. 8: Prisoner of Fire
Fun Facts: Gambit regains his powers after a kiss and a jumpstart from Sage.

This is the last issue of the X-Treme X-Men series. The comic returns back to the Uncanny X-men format.

Title Logic: The title is a play on...or just quoted wrong from...the song "One for My Baby (And One More for the Road)" originally done by Fred Astaire, but more famously know as a song by Frank Sinatra.
-
Comic Summary: A day spent in relaxation is cut short by nightfall. The X-Treme team gathers around Rogue’s television, as they are shocked to hear the reports of the wholesale slaughter that happened in New York at the hands of Magneto. Also shocking, they see the death of their friend, Jean Grey-Summers, at the hands of the butcher. Storm receives a phone call from Val Cooper, stating that their badges may be taken away from them. Ororo tells them that it is time they return to the Institute to help their friends. Before they leave, an entourage of Valle Soleada residents offers its assistance to the battered New York. Lila Cheney uses her powers to teleport them and their supplies there. After helping out, the team returns to the mansion. Ororo meets Archangel and the two of them make up, after their recent arguments over the death of Psylocke. Floating to the ground, Storm frightens her friend, Rahne Sinclair, who rushes into Harry’s Hideaway to get away from her. Shocked, Storm realizes that she may not be the same woman she once was, thanks to the time she spent in Tokyo. After a few brief get-together’s of their own, the entire team meets up in the kitchen of Xavier’s. Storm makes a speech about how they must fight through persecution to save humanity from warring against mutants but, thanks to Magneto’s recent actions, it will be much harder on them than times past. Holding up her X.S.E badge, she asks, who will join her?
(Brief description courtesy of uncannyxmen.net)

X-Treme X-Men, Vol. 1 Annual 2001 - Queen Of Shadows
Importance Rating: 5.0 out of 10
poster
Penciler(s): Salvador Larroca
Writer(s): Chris Claremont
Release Date: 2001
Variant Covers: None.
Trade Prints: X-Treme X-Men Vol. 8: Prisoner of Fire
Fun Facts: None.
-
Comic Summary: When Bishop, Rogue, and Sage visit Gateway in Dreamtime, the Shadow King attacks and kidnaps Gateway. During the adventure, Rogue learns about one of Destiny’s diaries, but she’s reluctant to tell the X-Men everything about what she’s found. Later, while Rogue sleeps, the Shadow King visits her dreams and makes her doubt everything she knows about her life. As he menaces Rogue, the Shadow King orders the Reavers to take her and kill the X-Men. While the X-Men defend themselves against the Reavers, Gambit and Rogue discover that Rogue may possess the key to defeating the Shadow King. Rogue leaves to rescue Gateway alone and finish the fight while the rest of the X-Men defeat the Reavers. Rogue locates the Reavers’ base where the Shadow King invades her mind and transforms her into the Shadow Queen. The Shadow King reveals his plot to use Rogue and Gateway’s powers to control space and time. Rogue uses her strength of will, and perhaps the borrowed power of other minds, to stop the Shadow King and imprison him, like Psylocke did. Rogue rescues Gateway and the X-Men hand the defeated Reavers over to the police. Thanks to Gateway, the X-Men acquire another one of Destiny’s diaries. In light of her recent victory, Rogue inspires the X-Men by reaffirming their team mission and purpose. Together, Rogue and Gateway enjoy an evening of peaceful bonding.
(Brief description courtesy of uncannyxmen.net)

X-Treme X-Men, Vol. 1: Savage Land #1 - Savage Genesis
Importance Rating: 1.5 out of 10
poster
Penciler(s): Kevin Sharpe
Writer(s): Chris Claremont
Release Date: November 2001
Variant Covers: None.
Trade Prints: X-Treme X-Men Savage Land
Fun Facts: None.


-
Comic Summary: Rogue has been tormented by hallucinations. The X-Treme X-Men ask former member Beast for help, and soon they depart to South America, as the dreams seem to be linked to that area. They find a tribe of Saurids hunted by the local military and decide to help them. The Saurids have been living hidden in the south west desert of the USA for a long time, but having learned of the Savage Land, they wanted to resettle. They were spotted along the way and hunted as monsters. They are too many to fly all of them in the Blackbird, and so the X-Men take them to the secret cavern below the Drake Passage. Rogue carries the craft through the cavern with Storm and Thunderbird scouting ahead, and Beast and Bishop clearing the area of things that might get in the way. Brainchild spies on them from the Savage Land and wants to settle an old score with Storm. From afar he causes an explosion and all of a sudden the cavern is flooded with ocean water.
(Brief description courtesy of uncannyxmen.net)

X-Treme X-Men, Vol. 1: X-Pose #1 - Chasing Smoke
Importance Rating: 1.0 out of 10
poster
Penciler(s): Arthur Ranson
Writer(s): Chris Claremont
Release Date: January 2003
Variant Covers: None.
Trade Prints: X-Treme X-Men Vol. 3: Schism
Fun Facts: Gambit does not really appear in the storyline, just on a tv screen.
-
Comic Summary: At the “Spotlight” headquarters a man named Paul show his journalists video clips of the X-Men. He plans on using the X-Men as his next story piece for television. After the meeting Paul has a short conversation with two of his journalists, Neal and Manoli. He tells them that their old-school style of journalism is out of date and that they should let the other four, who have fresh ideas, create the story. However Neal and Manoli don’t trust Paul and decide to make a better story then the four “newbie” reporters can, making Paul eat his words. Craig Damaski, one of the new reporters tries his luck in Paris at X-Corporation. He asks for a meeting with Charles Xavier, but as he has no appointment, receptionist Holly lets him wait for over nine hours. Getting upset, he storms out in disgust. Later he and his colleagues try to gain access to the Xavier Institute, but Emma Frost and one of her students teach them a similar lesson, and the four reporters end up in the pond. Meanwhile, Neal and Manoli spend two weeks chasing leads about the whereabouts of the X-Men. Finally, they receive a tip about the X-Treme team’s location in New Orleans. There they find Logan putting Storm through rigorous exercises in order to help her legs heal faster. Storm gives them an interview and explains that hers and Xavier’s methods differ from one another, and that is the reason the X-Treme team does not currently live at the mansion. Next, Neal and Manoli head towards California and continue their meetings, now with Bishop and Sage. The four sit down in front of a café. During the meeting, they are disturbed by a group of mutants who begin to terrorize the beach. A woman named Paint approaches Neal and the others, she apologizes for the other mutants‘ actions. She explains to them her powers and also demonstrates them so Manoli can get more footage for her story. Two police officers approach the thug group of mutants, but are attacked by them. Bishop and Sage intervene in the fight, saving the officers and restraining the group of mutant thugs. However one of the officers tells the X-Men to let the mutants go, as they fear acts of revenge on either them or their families. Reluctantly Bishop and Sage comply to the officer’s request. Sage, upset over the officer’s reactions, tells Neal and Manoli of how they all, mutant and human, need to work together, or else humanity won’t survive. Hours later, Neal sends the tape of the meeting with the X-Men to the headquarters of “Spotlight”. Paul congratulates Neal on his good work, but then edits the video, making it more negative against mutants.
(Brief description courtesy of uncannyxmen.net)

X-Treme X-Men, Vol. 1: X-Pose #2 - Watershed
Importance Rating: 7.5 out of 10
poster
Penciler(s): Arthur Ranson
Writer(s): Chris Claremont
Release Date: February 2003
Variant Covers: None.
Trade Prints: X-Treme X-Men Vol. 3: Schism
Fun Facts: None.

-
Comic Summary: Paul and his film editor, Gary, watch the footage shot from Madripoor, to see if they can use any of it in their documentary. After watching Rogue face off against Vargas, they move to the footage shot from their two reporters in front of the Xavier’s Institute. While in California, Officer Mendes drives Manoli and Neal to a bar to meet up with a mutant that would like to tell his side of the story. The two reporters enter the bar where they meet a biker/mutant who introduces himself as the person that called them. Unknown at the time to Neal and Manoli, the X-Men Gambit and Rogue are there as well. The two X-Men decide to leave, but are confronted by Cutter and his gang. After the gang attacks Rogue, leaving her lying on the ground, they destroy her bike as they leave. Going back inside the bar, they tell the other patrons, including Paint and Jack, what Cutter had done. Neal walks up to Rogue and, instead of outing her, helps hide her appearance from Paint, who has recognized Rogue from the news. Rogue ponders for a few moments if she should stop hiding from humans. She decides the answer and walks out of the bathroom she was in to give Neal his footage. Sadly, Neal and Manoli find out about Paul’s plan and no longer want to put their friends in danger. A week later, Storm finds out from Paul D’Antoni that he was canceled along with his show, and he will get his revenge on them later. Doing a little detective work Storm finds out that it was Warren Worthington III who canceled the show and she meets with him to ask why!
(Brief description courtesy of uncannyxmen.net)

X-Treme X-Men, Vol. 2 #13 - X-Termination - Part 4
Importance Rating: 3.0 out of 10
poster
Penciler(s): Guillermo Mogorron, Raul Valdes
Writer(s): Greg Pak
Release Date: June 2013
Variant Covers: A. Variant Edition
Trade Prints: X-Termination
Fun Facts: None.
-
Comic Summary: As Howlett mourns the death of Hercules, the monster in 616 becomes stronger, due to the Celestial it just destroyed. Northstar creates a vortex around it to stop it being empowered by more energy, whilst Prophet tries to figure out how to kill it. He finds out that billions more monsters are headed to where this one is and, if they don’t destroy this one, the whole world is doomed. In New Apocalypse on the other side of the portal, Jean is being chased by another monster. Dazzler and her team slow it down and Kurt teleports Prophet and Howlett through the portal. They see Dark Beast trying to take the power of the Apocalypse seed for himself. Nightcrawler and Jean try to take the seed off him but he fights back. Another monster enters and grabs the seed but is hurt by its touch. Dark Beast grabs the seed again and runs off with Jean and Nightcrawler chasing him. Prophet realizes that the monster was hurt by the seed. Kurt tells Dazzler her world is in danger too and Prophet says they have to close the portal and sacrifice one world. Dazzler refuses to do that and comes up with a plan. Whilst the others chase down Jean and the seed, Dazzler and Cyclops head to the portal. They use their powers to try and draw the monster through but it doesn’t go for it. Kurt finds them and decides he can do it. He teleports to the monster and then teleports it through the portal. The strain of doing it was too much for him, though, and he dies in Dazzler’s arms. Nightcrawler, Prophet, Howlett and Dark Beast teleport in. Dark Beast won’t let go of the seed, so Dazzler confronts him, beats him up and takes the seed. She then hands it over to Jean Grey, so they can have her use it on the three monsters at the same time.

X-Treme X-Men, Vol. 3 #1 - The Ghost That Just Won't Die!
Importance Rating: 6.0 out of 10
poster
Penciler(s): Salvador Larroca
Writer(s): Chris Claremont
Release Date: January 2023
Variant Covers: A. Phil Noto Variant
B. Chrissie Zullo Variant
C. Carlos Gomez Variant
D. Salvador Larroca Hidden Gem Variant
E. Salvador Larroca Classic Variant
F. Scott Williams Unknown Comics Exclusive Variant
G. Scott Williams Unknown Comics Exclusive Virgin Variant
H. Salvador Larroca Virgin Variant
Trade Prints: X-Treme X-Men by Claremont & Larroca: A New Beginning
Fun Facts: None.
-
Comic Summary: THE X-TREME TEAM IS BACK! Legendary X-scribe Chris Claremont reunites with artistic dynamo Salvador Larroca for an all-new story set just after the groundoriginal run of X-TREME X-MEN! A powerful psychic attack on KITTY PRYDE from her old enemy OGUN brings the X-Treme team back together for a high-stakes mission...but what secret is Ogun hiding, and will even the combined might of BISHOP, SAGE, GAMBIT, ROGUE, RACHEL SUMMERS, STORM and WOLVERINE be enough to stop his insidious plan? The X-citement starts here, with the kickoff to the arc that will have wide-reaching implications for some of your favorite X-characters!

X-Treme X-Men, Vol. 3 #2 - Things Get Bad!
Importance Rating: 6.0 out of 10
poster
Penciler(s): Salvador Larroca
Writer(s): Chris Claremont
Release Date: February 2023
Variant Covers: A. Peach Momoko Variant
B. Salvador Larroca Design Variant
C. David Nakayama Demonized Variant
D. Jim Rugg Homage Variant
Trade Prints: X-Treme X-Men by Claremont & Larroca: A New Beginning
Fun Facts: None.
-
Comic Summary: LOGAN LEADS THE HUNT FOR OGUN! The X-Treme X-Men have reunited to aid their comrade KITTY PRYDE, but as WOLVERINE leads the hunt for their mutual enemy OGUN, RACHEL uncovers a dark secret! And what does PURITY hope to gain in the chaos of the mutants' battle? Chris Claremont and Salvador Larroca take X-TREME to the next level in this issue!

X-Treme X-Men, Vol. 3 #3 - Things Get Worse!
Importance Rating: 6.0 out of 10
poster
Penciler(s): Salvador Larroca
Writer(s): Chris Claremont
Release Date: March 2023
Variant Covers: A. Salvador Larroca Design Variant
B. Gerardo Sandoval Variant
C. Giant Size X-Men Homage Variant
Trade Prints: X-Treme X-Men by Claremont & Larroca: A New Beginning
Fun Facts: None.
-
Comic Summary: THE Galérer ATTACK! OGUN's psychic attack has led the X-TREME X-MEN into conflict with a mysterious cabal called the Galérer! But what sinister aim is this group after, and how does it play into Ogun's plan? It won't matter if the team falls before the vanguard attack of BEASTYBRUTE!

X-Treme X-Men, Vol. 3 #4 - Search and Destroy!
Importance Rating: 6.0 out of 10
poster
Penciler(s): Salvador Larroca
Writer(s): Chris Claremont
Release Date: April 2023
Variant Covers: A. Salvador Larroca Design Variant
B. Dan Panosian Homage Variant
Trade Prints: X-Treme X-Men by Claremont & Larroca: A New Beginning
Fun Facts: None.
-
Comic Summary: RAGING STORM! The X-TREME X-MEN have suffered a major loss, and nothing will contain STORM's unbridled rage! But when an anti-mutant scheme leaves the team without powers, can they survive the onslaught of PURITY and the GALÉRER, or will they be done in by the agents of hate and fear?

X-Treme X-Men, Vol. 3 #5 - Hold the Line!
Importance Rating: 6.0 out of 10
poster
Penciler(s): Salvador Larroca
Writer(s): Chris Claremont
Release Date: May 2023
Variant Covers: A. Salvador Larroca Design Variant
B. Jung-Geun Yoon Variant
Trade Prints: X-Treme X-Men by Claremont & Larroca: A New Beginning
Fun Facts: None.
-
Comic Summary: X-TREME MEASURES! As the battle between the wounded X-MEN and mighty GALÉRER reaches a deadly climax, the anti-mutant PURITY demonstration boils over into unbridled chaos! Can the mutants save the innocent civilians and stop the villains at the same time? And at what cost - to themselves and the city of Chicago? The epic conclusion to Chris Claremont and Salvador Larroca's latest chapter of X-TREME X-MEN!

-